How to make a greenhouse from polypropylene pipes?
Nowadays, many gardeners carry out greenhouses and greenhouses of various kinds on their homestead or summer cottages in order to have access to fresh vegetables throughout the year. The article will discuss one of the categories of greenhouse solutions, which has gained great popularity - a greenhouse made of polypropylene pipes.
Features: advantages and disadvantages
It must be said that PVC pipes are considered to be quite a convenient material for work, from which it is easy to build a small greenhouse for growing greens and anything else in just a couple of hours. Particularly relevant greenhouse of propylene pipes will be in the northern regions, where climatic conditions are not as good for growing plants as in the south.
If we talk about the benefits of pipes PP, then you can call the following:
- high degree of resistance to moisture;
- practicality;
- long service life - about ten years;
- environmental friendliness;
- resistance to fire;
- flexibility;
- affordable cost;
- resistance to wear - the tubes are not damaged during their use;
- resistance to temperature extremes;
- strength;
- non susceptibility to corrosion and decay.
But, as with any material, there are some drawbacks to the flow tube:
- complexity in the matter of transportation;
- susceptibility to sunlight;
- under the serious influence of the physical nature of the pipe PND can not stand and break.
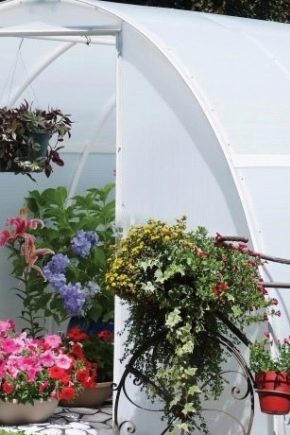
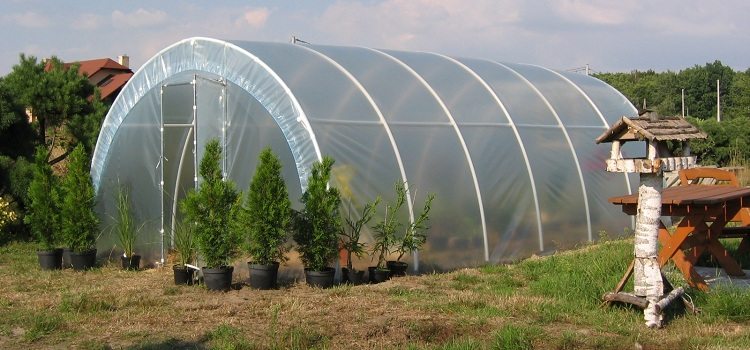
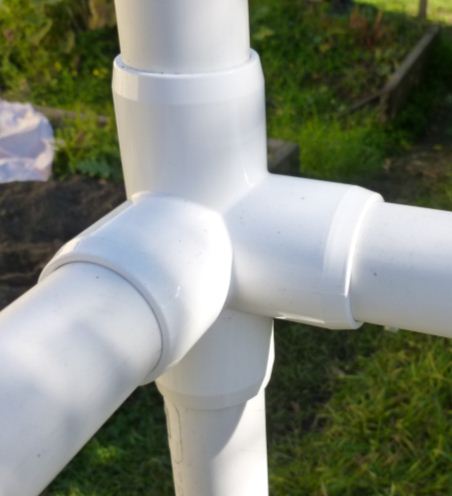
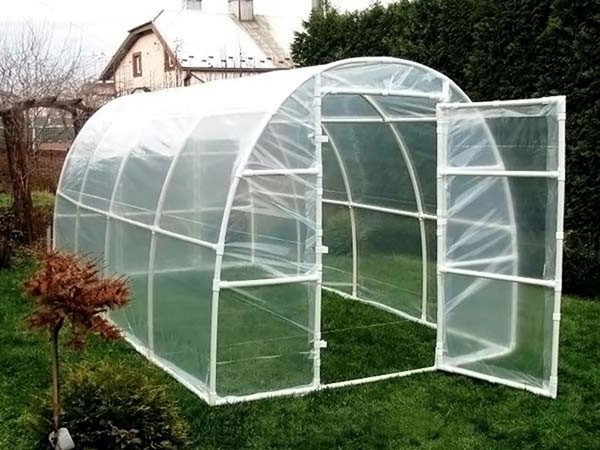
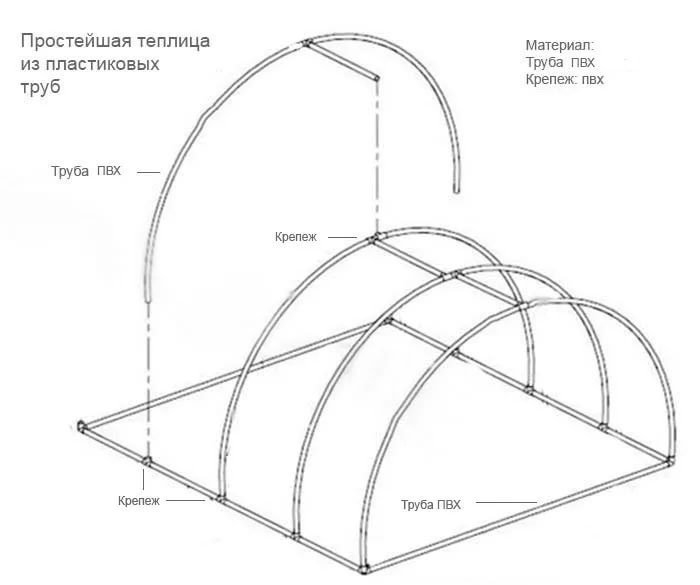
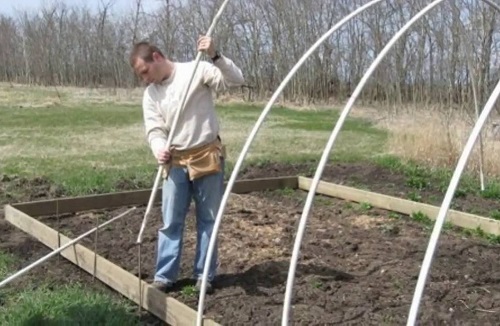
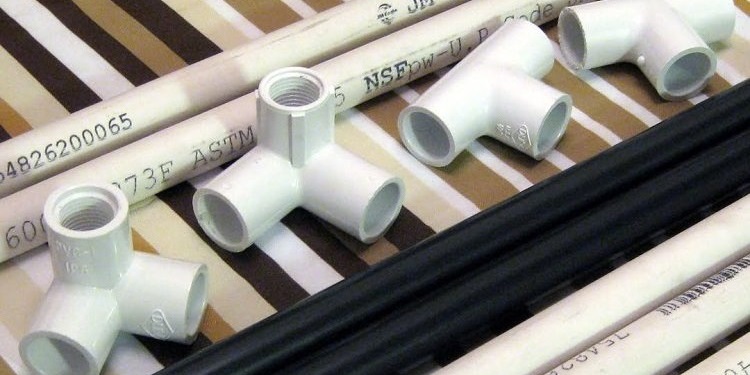
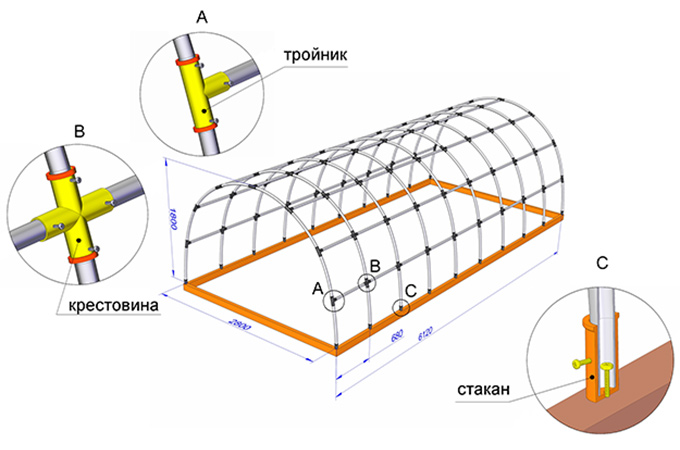
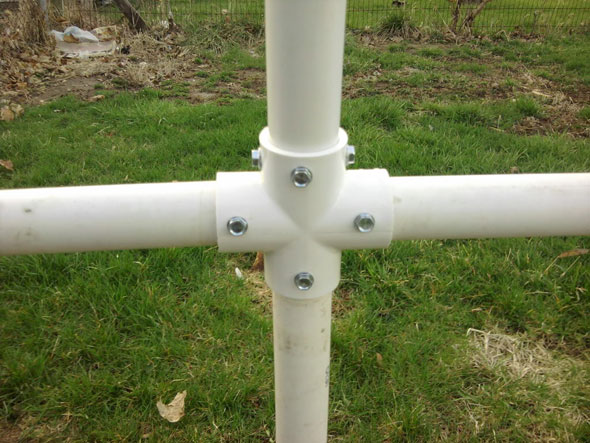
Flexible solutions made of polypropylene are well suited for the formation of a greenhouse having the shape of an arch, as opposed to rigid analogues. All solutions from polypropylene are made with special fittings. That is, we are talking about special tees, cross-type splitters, swivel connectors, adapters of different diameters. This significantly speeds up the process of creating a greenhouse from polypropylene.
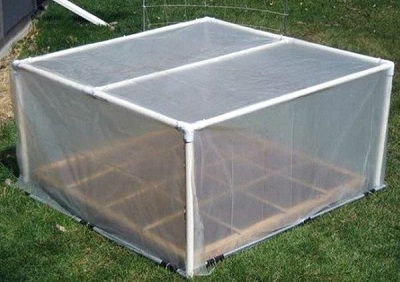
Pipes made of the material in question make it possible to produce convenient collapsible mobile greenhouse structures that can be easily disassembled at the right time and hidden.
Types of construction
Before you begin to talk about the installation of the construction in question, you should decide what its type will be.
There are the following categories of greenhouses from this material:
- box;
- butterfly;
- bread box;
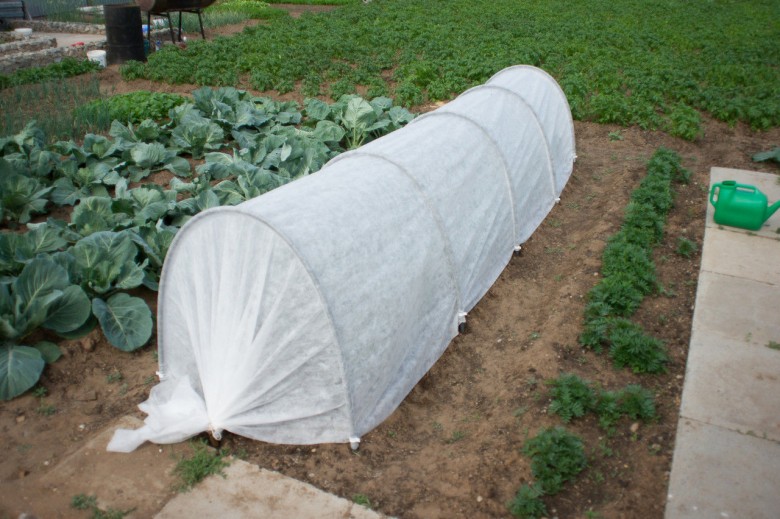
- soil with a film.
Now we will tell about each category in more detail.
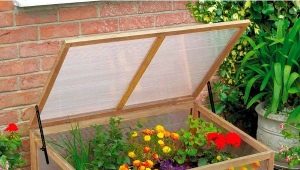
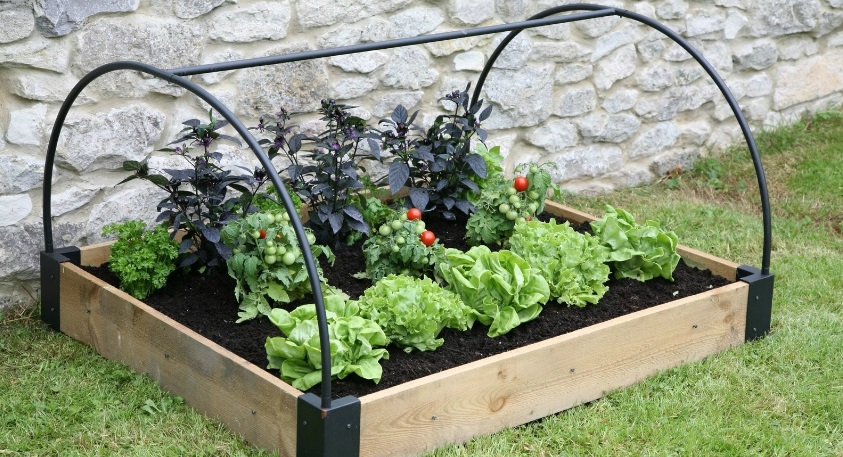
The greenhouse-box is usually used for sprouting seedlings. This type of greenhouse can be only ground or bulk, as it completely depletes the earth somewhere in one to three months. Another disadvantage of this design will be the lack of normal illumination. At the same time, in one square meter you can grow seedlings, which in the future can be planted on twenty acres of land.
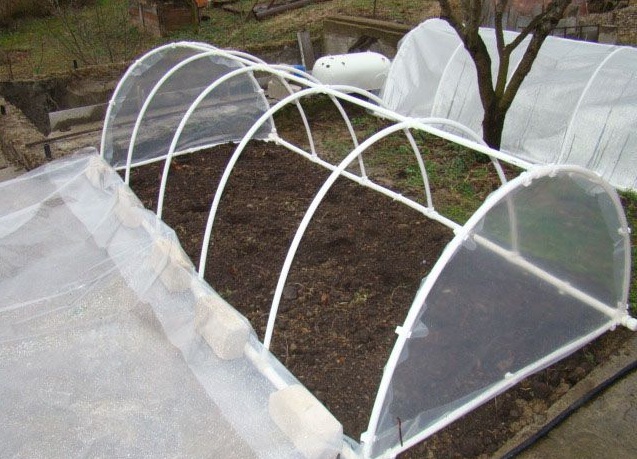
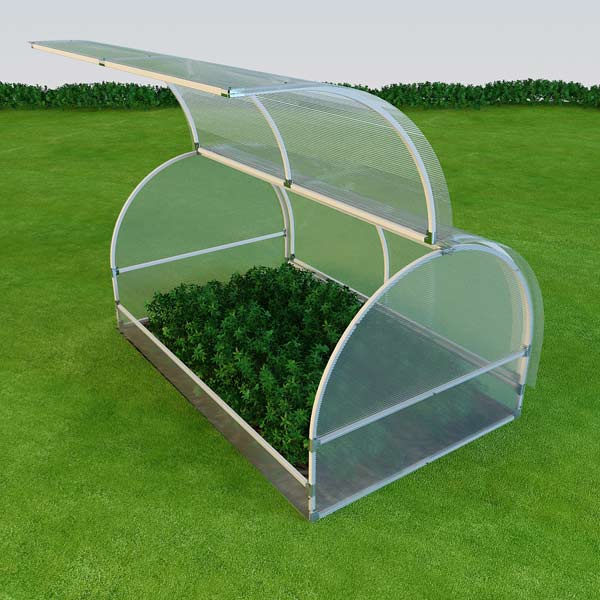
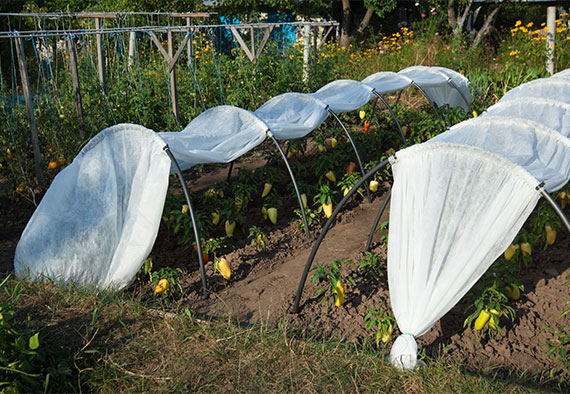
A greenhouse of the butterfly type is made of polypropylene pipes by means of adjustable plants or for plants that constantly need to breathe. These are pepper, eggplant or tomato. It is also suitable for cucumbers.
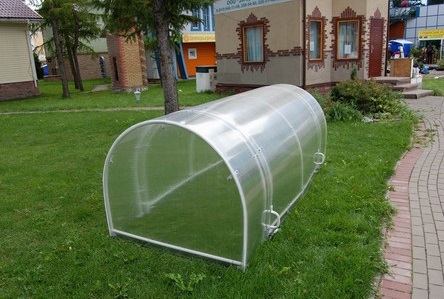
Types of the greenhouse bread box should be chosen by farmers who have little experience.
Its main advantages are:
- low cost and simplicity;
- installation work is as simple as possible.

This option will keep the house for the night period the necessary amount of air for all cultures.It is because of the large amount of air that the greenhouse effect is formed here. This makes it possible to build even cold greenhouses using this technology, which can work as soon as the snow melted. It is also easy to grow large crops. And such a collapsible version, if desired, can be moved somewhere. Soil film version of PVC pipes is considered the most simple. This solution is built for low-growth seedlings - lettuce, onions, and so on. In this case, the bed will have a width of thirty centimeters, and its height will be forty centimeters.
The main advantage of this type of plastic greenhouses will be cheap and simple. But if we talk about the shortcomings, then we should mention the difficulty of caring for such a building, as well as poor-quality use of light.
Sizes and location
Many gardeners love to equip the greenhouse with a fairly large size, which will make it possible to penetrate inside and grow there a large number of crops of various categories and types.
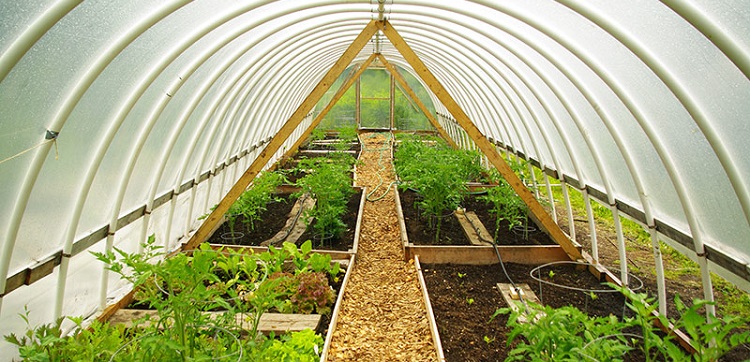
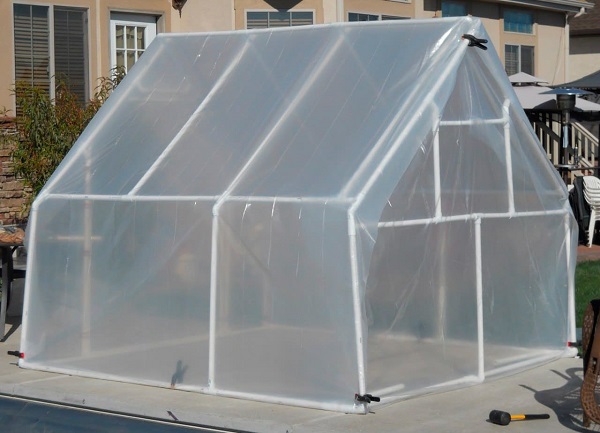
But you can make some homemade mini-greenhouse, because everything will depend on what will be grown.But if the structure is longer than four millimeters, it will be necessary to take into account the load of the roof and its strength.
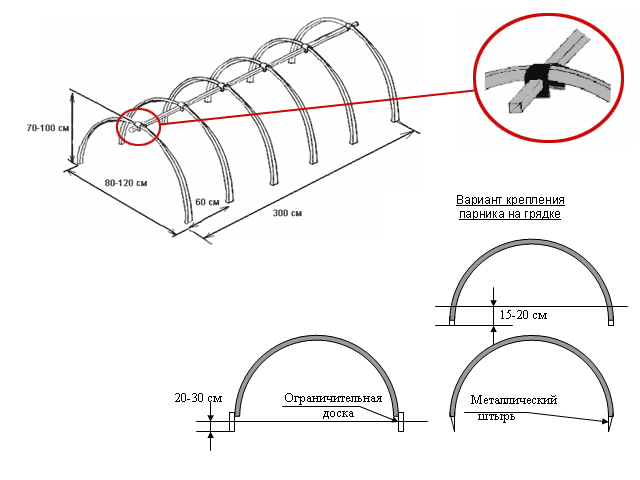
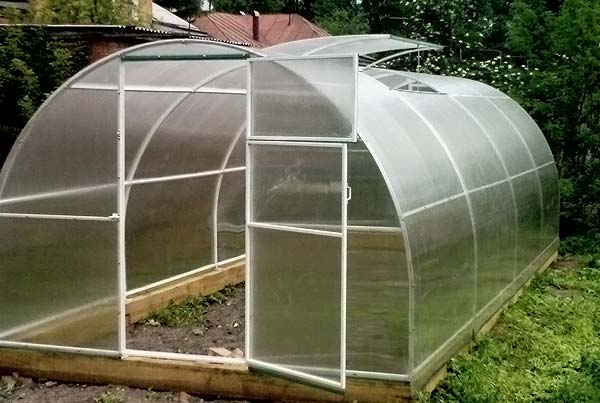
Experienced gardeners believe that a greenhouse project with parameters of a height of about two meters, a length of no more than four meters, and a width of about two and a half meters will be ideal. Such parameters will be an excellent solution not only for the summer resident caring for crops, but also for plants growing in the greenhouse.

If we talk about the location of greenhouses, then when choosing a place for this, the following aspects should be taken into account:
- The greenhouse should not be located under the shade of buildings or trees;
- it is necessary to ensure a good approach to the design in order to take care of the plants comfortably;
- you need to take into account the direction of the winds, which prevails in the area, then the heat loss will decrease significantly.

Schemes and drawings
It is necessary to think in advance what construction will have a roof, as well as where there will be windows and doors. When creating a scheme for a future greenhouse, it should be accurately taken into account that the nodes of the connections and parts of the bearing nature should be evenly spaced. Only then can sustainability be achieved.And also when developing a blueprint for a future design, consider what the external coating will be. And special attention will need to be paid to the mass of the material. If the agro-canvas or film is relatively light, then sheets of a material such as polycarbonate are quite heavy and can damage the building. Choosing a material with a considerable mass, you should consider additional supports and place them in the middle of the greenhouse roof.
Before creating a building made of polypropylene, it is necessary to have the clearest and most accurate drawing, where all parts and components, categories of fastenings, dimensions and other physical parameters will be marked. The advantage of polypropylene pipes that should be considered in the development of drawing documentation will be that they are suitable for creating any type of greenhouse.
Step by step production
Consider how to build a greenhouse of polypropylene pipes with their own hands. This process will be analyzed step by step.
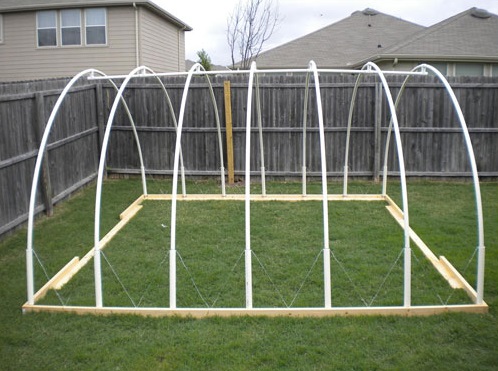
Foundation
Before starting the construction of a greenhouse, it is required to level the place where it will be conducted. To do this, markup on the ground is the place of the future greenhouse with the use of pegs and rope.After that, the plot is checked by level. If there is a slope of more than one degree, re-alignment is performed. Under the foundation should make a pillow of sand, the thickness of which will be five to ten centimeters.
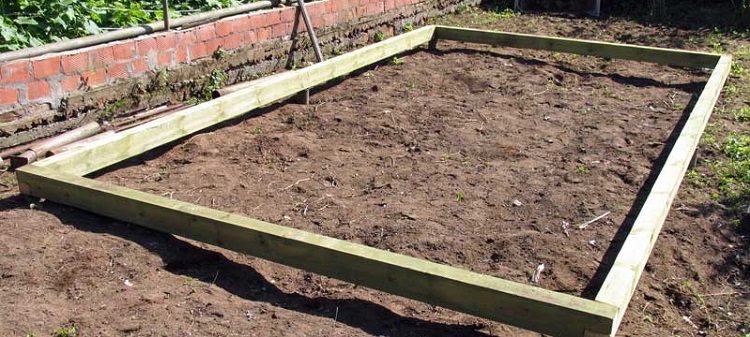
Usually a wooden beam with a cross section of 10 to 10 centimeters is used as a foundation for such premises. It distributes the load evenly and can last for about ten to fifteen years. Its cost is low, and installation can be carried out relatively quickly.

If we talk about creating the foundation, then the algorithm of actions will include a series of sequential actions.
- The timber is sawn to the size of the future building, it is impregnated with antiseptic agents in the area of the lower rims, and then dried. By the way, it is better to process wood with an antiseptic with a sprayer.
- The assembly of the foundation begins directly at the site. The beam is laid on a sand pillow or brick auxiliary posts. Sizes are checked.
- We lay timber. It is interconnected with the use of screws and metal angles. If the length is not enough, the timber fastened with staples.If you need high-quality grip, you can use special lugs. All fasteners must be protected against corrosion.
- Sand is poured along the base perimeter with its final consolidation. You can also immediately make tracks and fence beds.
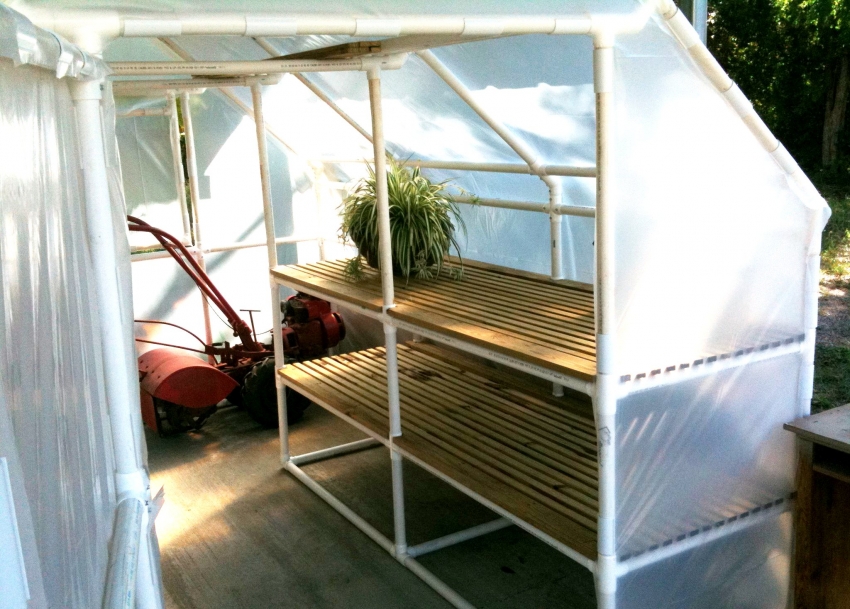
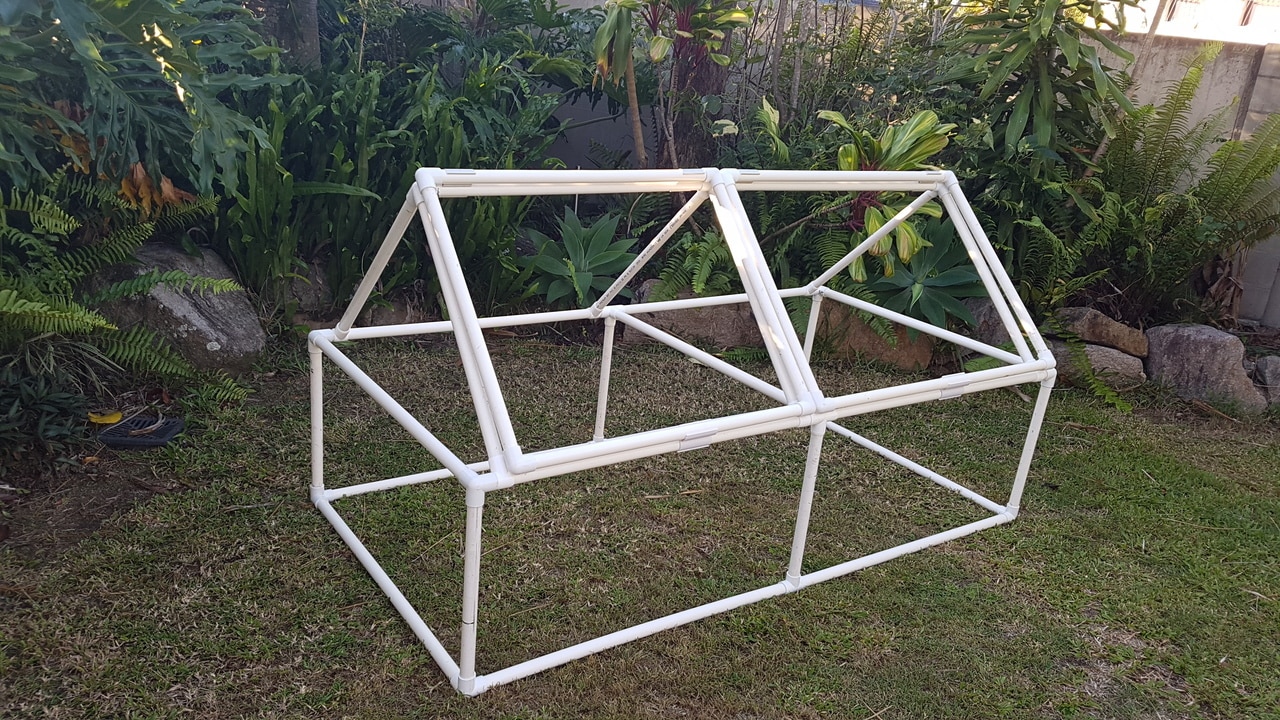
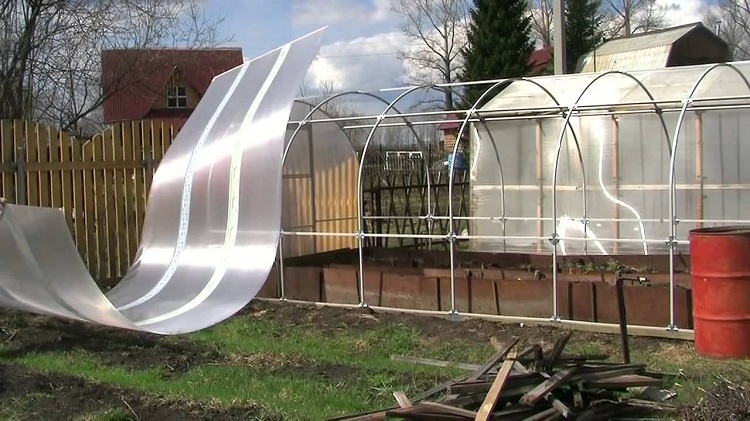
Frame
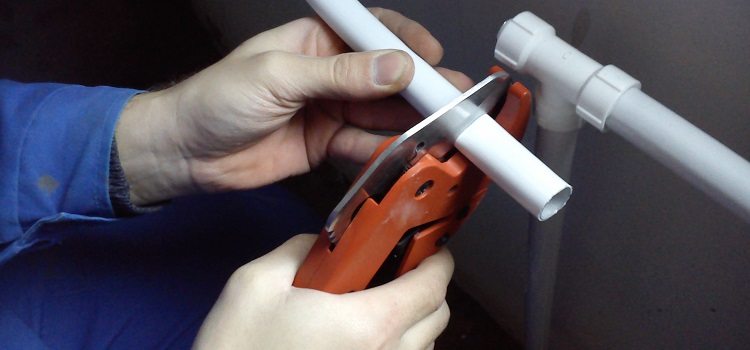
The assembly of the greenhouse frame starts with the pipe is prepared in the appropriate size. After the segments of the desired size are completed, it is better to mark them with a felt-tip pen, so as not to confuse them. Depending on the characteristics of the greenhouse, pipe segments of the appropriate sizes will also be needed. Other elements such as the frame of window leaves, end-type screeds and doors will be cut out already during installation.
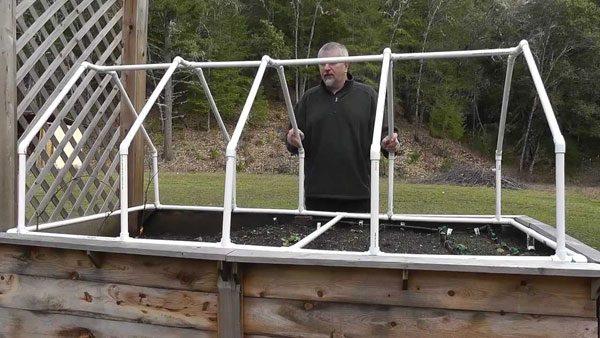
We consider the creation of the frame on the example of the assembly of the greenhouse with the parameters:
- width - 240 centimeters;
- height - 200 centimeters;
- length - 400 centimeters.
So, to create a greenhouse frame of pipes, it is necessary to produce a certain algorithm of actions.
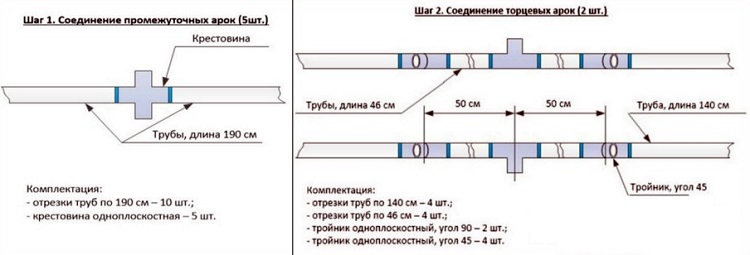
- Pipes with a length of 1.9 meters, which are intended to form five arches of the intermediate type, are connected in pairs with the use of crosses.
- The end arches are connected by three tees from four pipe lengths. Two of them with a length of 1.4 meters will form arcs on the sides, attached to the tees with a forty-five-degree angle so that when it was necessary to bend the arch into an arc, the tee nozzles were directed downwards. It is to them later will attach the door opening rack. Now the 46-centimeter pipe lengths are joined with a 90-degree tee and combined into one system. By the way, the socket on the side of the mentioned tee is directed perpendicular to the tee-axis with a 45 degree angle.
- Two lower screeds are assembled on the sides of six 65-centimeter elements of the pipe and five tees of single-plane type for each screed.
The tee outlets are guided exclusively in one direction, as arcs will be attached.
- Two end braces are assembled from pipe lengths of 76 centimeters and two single-plane tees on the screed.
- We carry out assembly of doorways. To do this, we fix the pipe sections with a length of 180 centimeters to the lower tees, after which we join them with the same tees and a 76-cm lintel.Now we stick to the tees 10-centimeter pipe pieces, which will be a rack-mount continuation. Then they will need to be cut to size when joining with the arch will be carried out.
- We make the formation of end-type walls. An end connection is carried out using racks and tees and two-plane solutions at the bottom. At the top of the pipe is cut to the desired size.
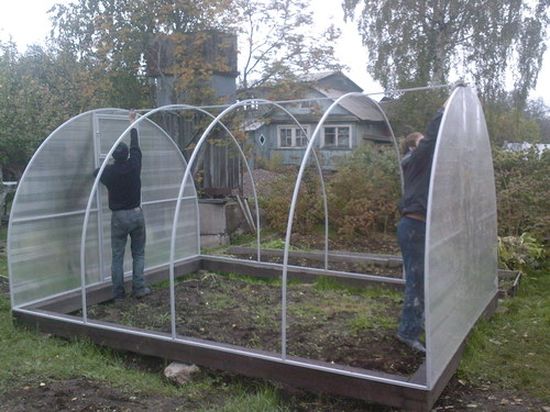
- Now begins the frame assembly on the foundation. To do this yourself, one end-type arch is assembled and connected to the bottom with ties. The installation of the first arch of the intermediate plan is carried out in the tees on the bottom underlays and the subsequent connection to the end arch using a 65-cm jumper. Then arches of the intermediate type are fixed. We carry out installation of the second wall of the end type, joining it with the upper and lower ties, located on the sides.
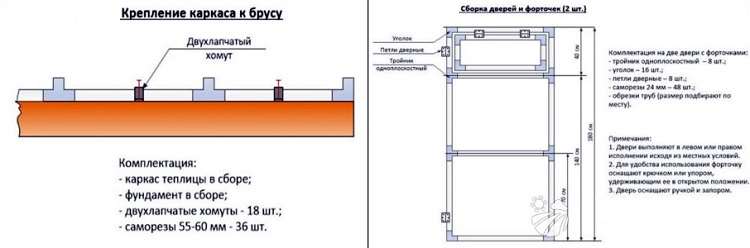
- We check the diagonals of the frame and, if there is a need, we align it. Now we fix on the timber using metal clamps and self-tapping screws.
- Mounting side screeds.They are attached to special bolts of furniture type at a height of 140-160 centimeters on both sides of the inside of the greenhouse. For good stiffness, you can attach an additional longitudinal tie strap.
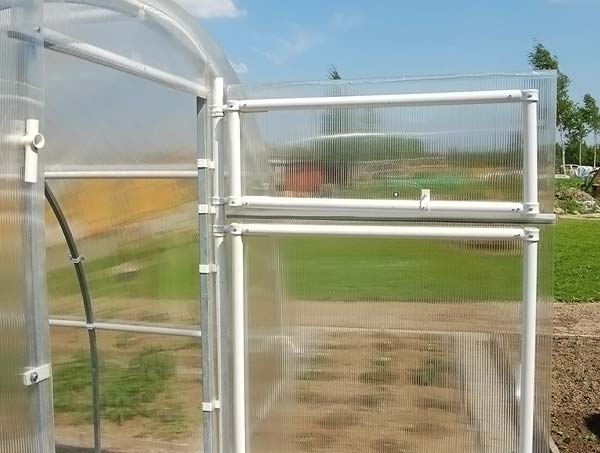
- The collection of vents and doors is carried out according to drawings from the corners, pipe trimmings and tees. Fastening windows to the frame on the loop is made using screws.
- Now follows the fastening of doors using hinges in the openings. We make the installation of end pipe screeds according to the drawings, attaching to furniture-type screws.
This completes the frame assembly.
Sheathing
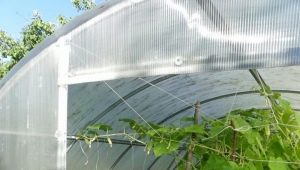
Now let's talk about the greenhouse trim. Most often they take for covering such material as polycarbonate.
He has many advantages:
- two-layer structure of the cellular type, which perfectly retains heat;
- good mechanical strength;
- resistance to ultraviolet rays;
- quick installation;
- quite long term of use - not less than five years.
But the material has disadvantages:
- it too reflects the rays of the sun;
- poorly tolerates physical effects;
- if improperly installed, moisture accumulates inside the material,for which reason the material becomes duller.
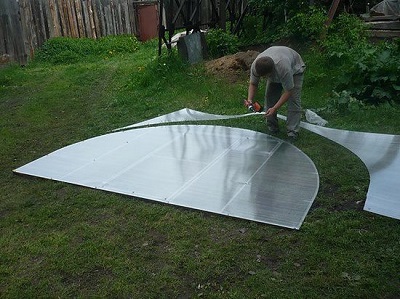
So, for covering the greenhouse polycarbonate should take several consecutive steps.
- Remove the film and mark the upper part with a felt-tip pen (the film is usually colored with a company logo). It is better to make a couple of notes on all sheets.
- Cut out polycarbonate for end-type walls. It is necessary to take a regular sheet and cut it into three pieces of 2 by 2 meters. One part should be attached to the greenhouse butt so that the cavities are directed vertically. We dub the left side along the corresponding edge and with a felt-tip pen draw arc contours to the left pillar and down from it. With the right edge, repeat the action. As a result, we need to get two semi-arc contours. Using an electric jigsaw or a knife of an assembly type, cut them out with a small allowance of three to five centimeters. The same is done with the second end.
- The cutting elements are fastened using self-tapping screws with a thermal washer using a screwdriver. The distance between the fixings should be 0.3-0.5 meters. It is better not to pinch the material. If there are surpluses, they are trimmed with a knife.
- The third cut is used for sheathing vents and doors. The sheet is fitted to the door with the observance of verticality. The doors are circled with a margin, after which blanks are cut out and fastened to the doors and window leaves. An arch over the door is cut out of the remaining parts of the material.
- Now the greenhouse top is closed by placing the sheet on top of the two and leveling along one of the lower edges, and the second one is trimmed along the way. They are fixed in the corners.
- In the butt place overlaps the second sheet at the first. Now the corners are attached with screws from the bottom and to the arcs with a distance of 0.4-0.6 meters.
Recommendations
Now we give literally a few recommendations which will make the process of creating a greenhouse better:
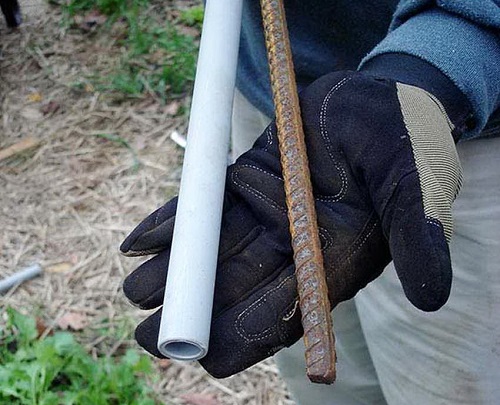
- The best solution to create a greenhouse will be PVC pipes, which are quite flexible and durable;
- it is better to prepare components at once, in order not to waste time on their purchase;
- the foundation of the greenhouse is better to make of good boards;
- if the steel rods are not at hand, then they can be replaced with fittings.
How to make a greenhouse from polypropylene pipes with your own hands, see the following video.