Methods for the manufacture of greenhouses from metal profiles
The advantage of growing vegetables and crops in greenhouses is not only their protection from frost, poor climatic conditions, adverse weather, but also the provision of the necessary humidity and temperature conditions inside the room. All this contributes to the normal growth and development of plants. Every lover of work on the plot or a farmer who has the desire and ability can create a greenhouse with his own hands. The result of the effort will be a big and healthy harvest that will pay for all the wasted effort and money.
Special features
The greenhouse of the metal profile, which was built by own hands, is a durable, economical, reliable and demanded type of structure, the purpose of which is to grow various crops in greenhouses. If you take care of this design correctly, then it will be able to serve for many years without requiring large investments.
For a long and safe operation of the greenhouse, as well as to avoid its destruction under load, the design and construction process should be carried out correctly.
Important points that need to be considered for the self-made construction of a greenhouse from metal profiles.
- The future territorial location of the greenhouse. Snow load is an aspect that plays a significant role in the construction, it will depend on it the features of the frame.
- Type of crops that will be grown. This information will be the basis for calculating the dimensions of the structure of the greenhouse.
- Mobility. Depending on the preferences of the farmer, the greenhouse can be either stationary or assembled if necessary. In the case of a stationary version, it is worth considering the need for airing, heating, watering and lighting.
- Material opportunities. Based on the budget, which is allocated for the construction of the structure, materials for coatings and carcass will be selected.
- Own skill and skills.
Advantages and disadvantages
The greenhouse from a metalprofile has a lot of positive characteristics. A self-assembled design is a mass of advantages.
- A choice. A gardener, who has decided to build a greenhouse on his own, can choose its shape, size, material for the manufacture of the frame and coatings.
- Efficiency. A metal profile has a low cost, and a small amount of finance will be required for plating using polycarbonate or film. In addition, the home craftsman does not have to overpay for work and mark-up from suppliers. A greenhouse that was created with your own hands will cost almost two times less than a ready-made purchased one.
- Long service life. Galvanized profile is a durable metal base for a greenhouse, which is not afraid of corrosion. Such a construction does not become damp, it is not afraid of constant moisture, rust. Proper construction and proper maintenance are the factors that make the greenhouse serve its owner for many years.
- Mobility. Greenhouses that have a frame made of metal, weigh very little, their weight increases slightly when the skin is covered with foil or polycarbonate. That is why it is possible to move such constructions even indiscriminately into separate parts. These greenhouses are easily disassembled and assembled back.This procedure does not take much time and effort.
- Simplicity in construction. To build a greenhouse yourself, you do not need to have special knowledge or skills. Ability to use conventional tools will be quite enough. And for people who have experience in construction, it will be even easier.
The greenhouse of the metal profile, in addition to the advantages, has one significant disadvantage.
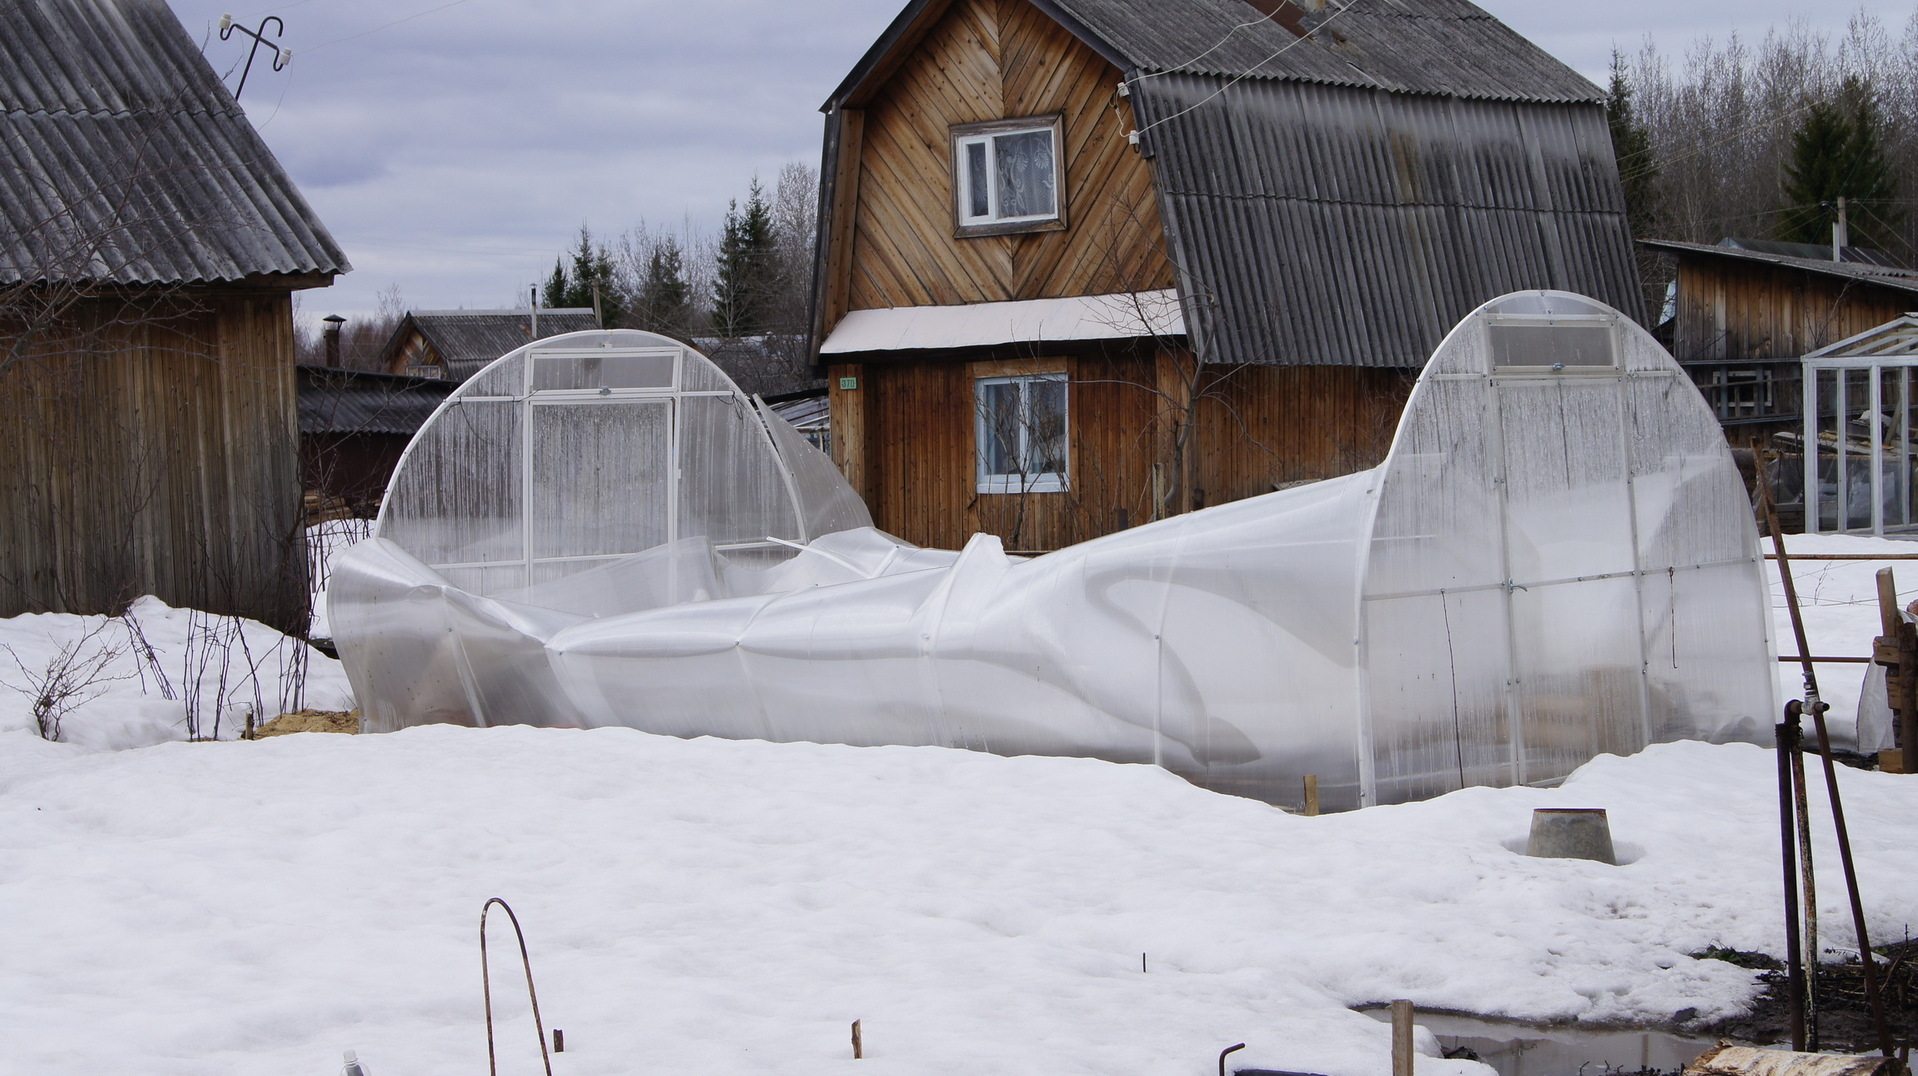
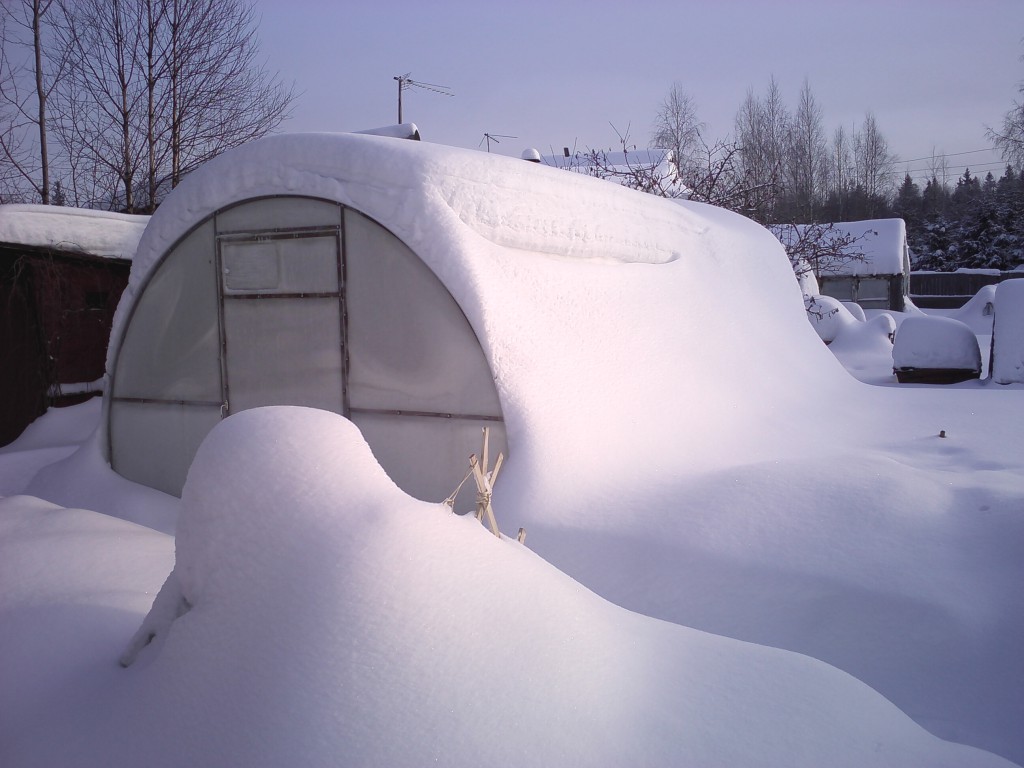
In the winter season due to the influence of snow mass, the frame and fasteners of the greenhouse can simply not withstand, which would entail the folding or destruction of the structure. In order that this problem does not arise, it is necessary to reinforce the frame. This is done by reducing the distance between the arches, the introduction of additional braces and racks that are designed to support the roof.
Despite some additional material costs, the user will be confident in the reliability of the structure and safety of the plantings. Also, do not forget about the timely cleaning of the greenhouse surface from precipitation. The second way to solve this situation will be the equipment of a removable roof. But this option is suitable only for those greenhouses that are used in the summer season; when it ends, the roof can be removed. In the spring, after cleaning and fixing the roof, you can still use the greenhouse.
Profile selection
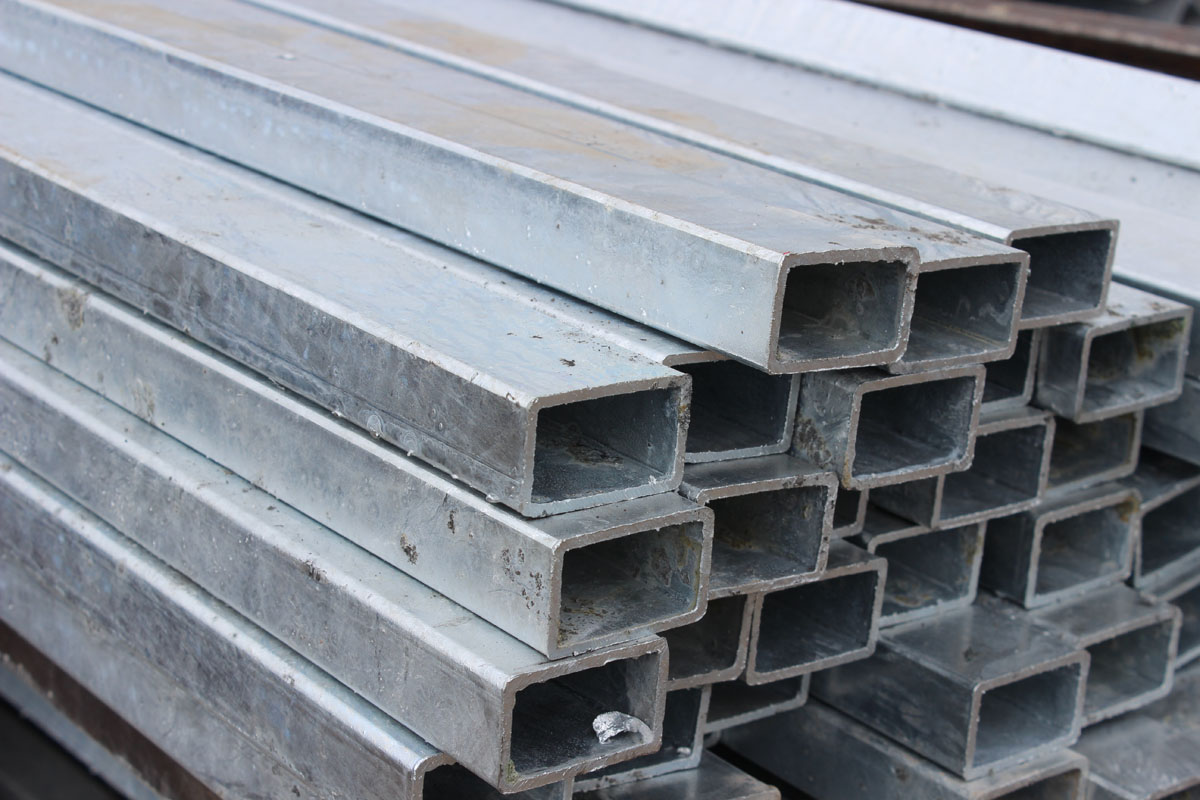
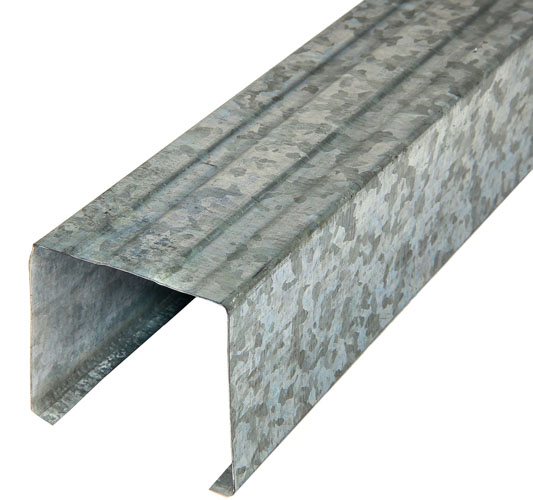
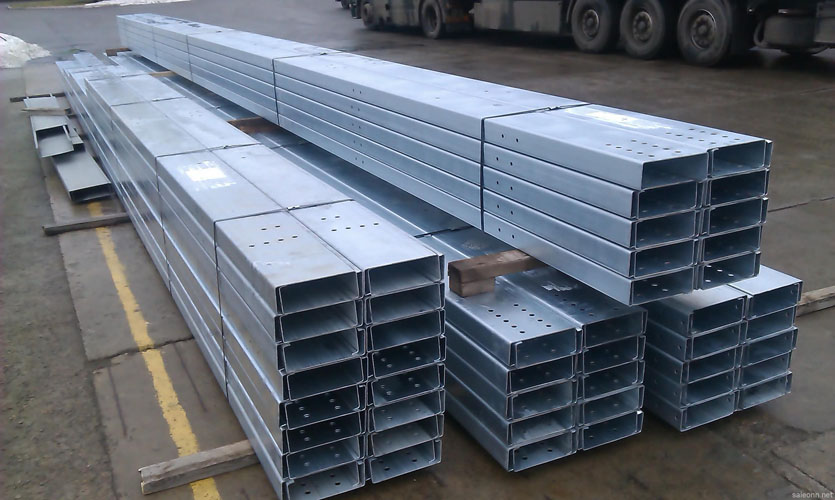
The metal profile, which is used for the production of greenhouse structures, provides them with rigidity and stability, reliability, durability and tightness. Thanks to this material, the master can create a structure that has any length, width and height.
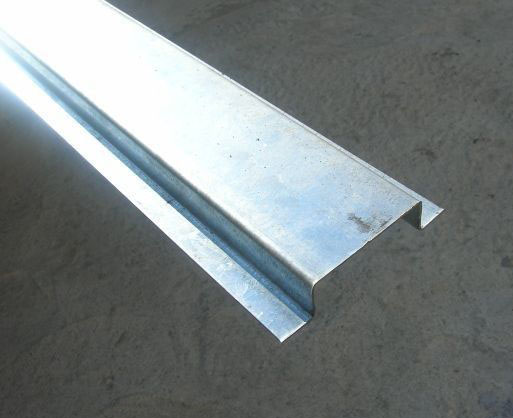
Galvanized drywall profile has the following types.
- U-shaped section. It is quite simple to install, and also contributes to the configuration of the greenhouse with additional power parts. Due to the use of this profile, the structures have high stability and reliability, as well as the ability to withstand 150 kilograms of load per square meter.
- V-shaped section has good rigidity and at the same time reasonable price. At installation of the greenhouse it is worth avoiding any distortions, even insignificant. The fact is that such materials do not withstand high loads, for example, copious amounts of snow in winter. The maximum load is 110 kilograms per square meter.
- W-shaped section practically have no drawbacks, are characterized by durability and are not twisted. Withstand the load that should be a maximum of 230 kilograms.
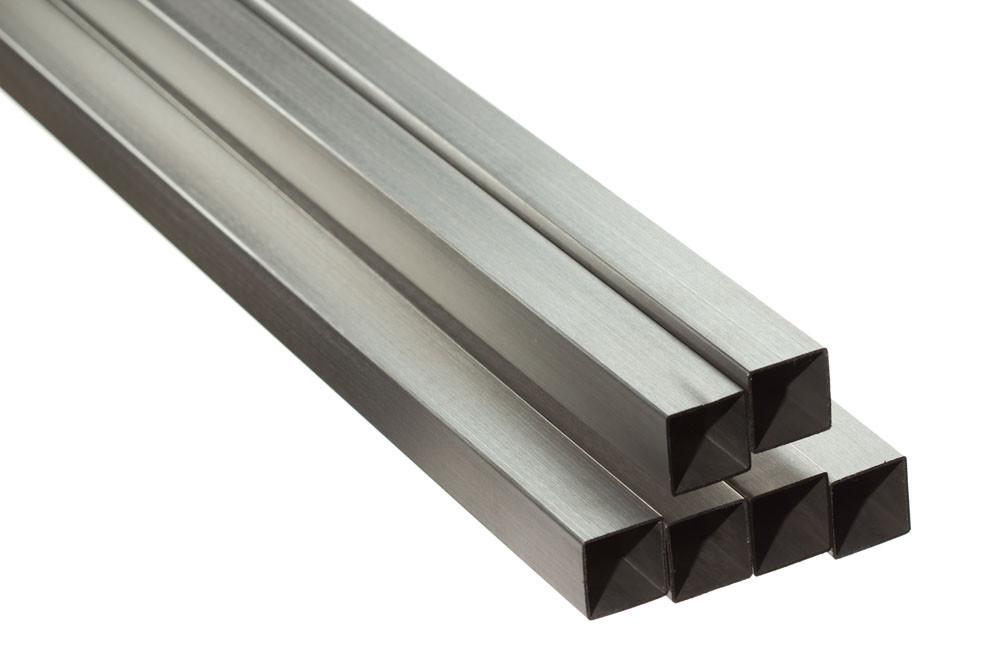
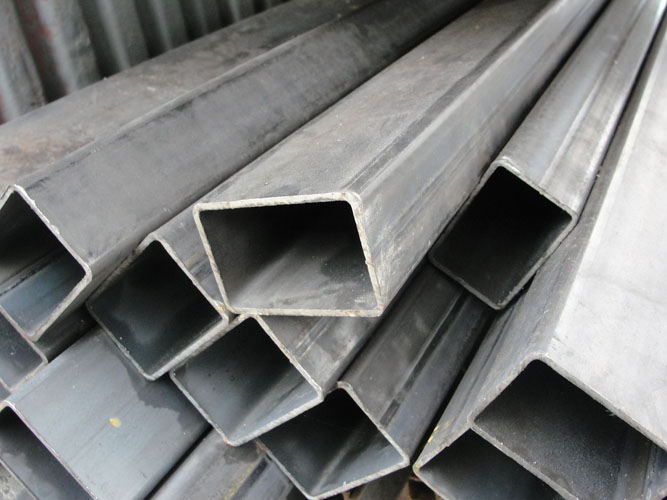
- With square and rectangular section. Its edge has dimensions of 20 by 20, 20 by 40 and 20 by 60 millimeters. Provided that the pipe wall is 0.01 cm thick, the resistance of the high load will be significant.
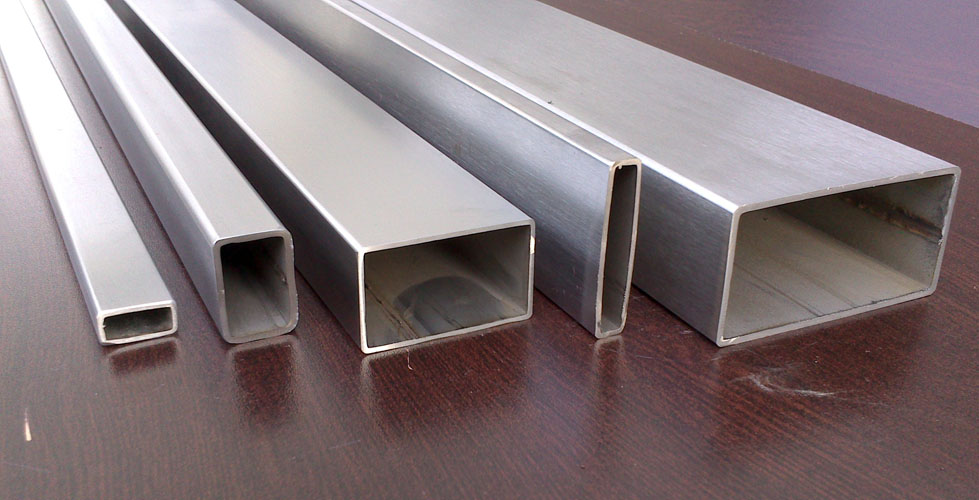
Galvanized profile pipe for a greenhouse can also be divided into two types.
- Arched. It has found its use in the creation of structures of complex arch type. Usually used in the decoration of the ceiling and walls.
- Wall. Often used for mounting the partition walls between rooms. These pipes have high rigidity.
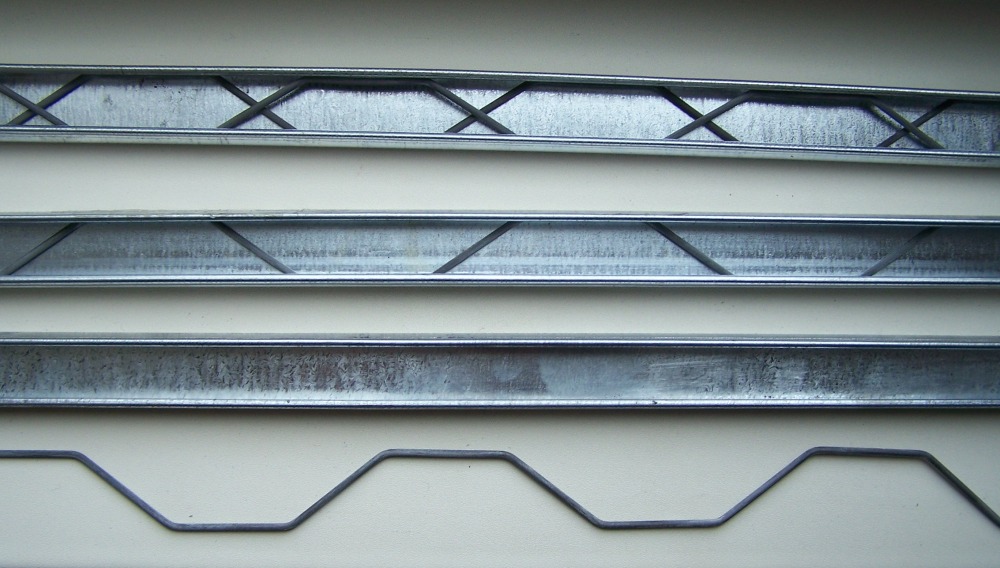
A planar CD profile is used for ceilings and walls; it is a carrier because it assumes the burden of the entire load.
From it create frames. The length of the material is 30 or 40 cm, the height is 0.6 cm, and the width is 0.27 cm. The UD-profile guide is designed to create the framework for the batten, a profile of the previous type is laid in it. The material has a width of 0.28 cm and a height of 0.27 cm, often produced with a length of three or four meters and a wall thickness of up to 0.06 cm.
A metal profile with a thickness of 0.06 cm should be used if it is necessary to form a suspended ceiling system.A material with a thickness of 0.04 cm is often used for wall cladding.
Partition profiles are represented by two types.
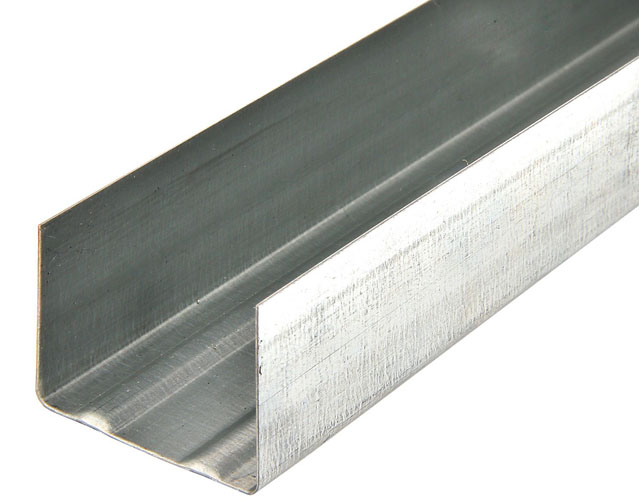
- UW-guides. This is the profile that is used in the installation of the carrier profile, they form the pier in the installation plane. This profile is installed on the floors, walls, ceilings.
- CW-rack and carrier profile, with its help, the frame is formed.
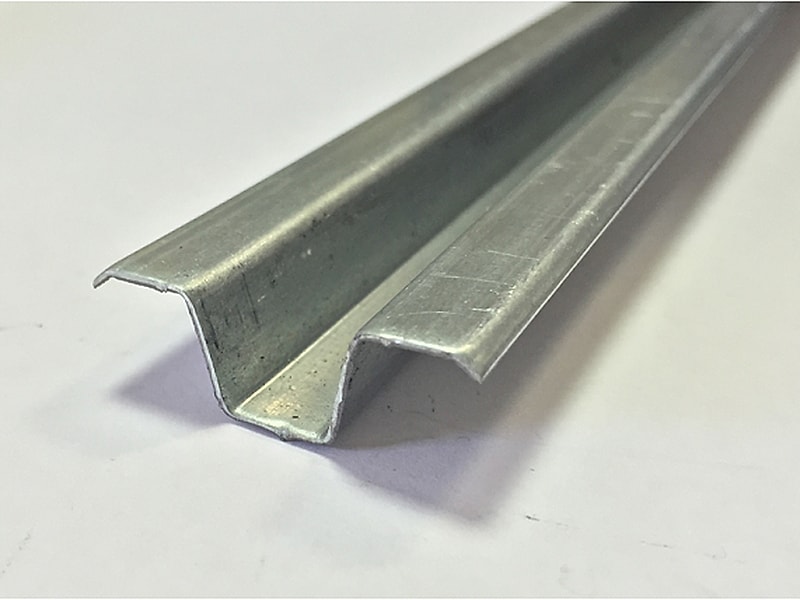
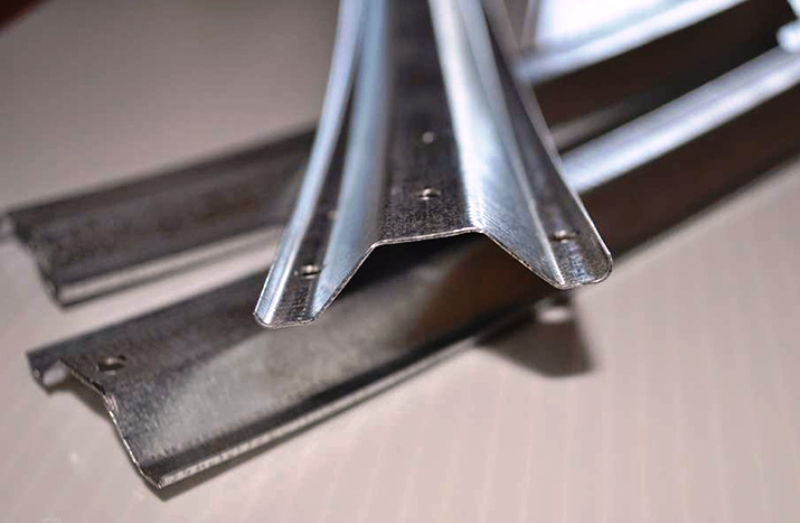
The difference of the partition profile from the planar is the shape of the section. In addition, the partition wall has a pair of longitudinal ribs, so that the wall becomes stiffer. There is also a special type of profile - zigzag, the purpose of which is to firmly fix the film.
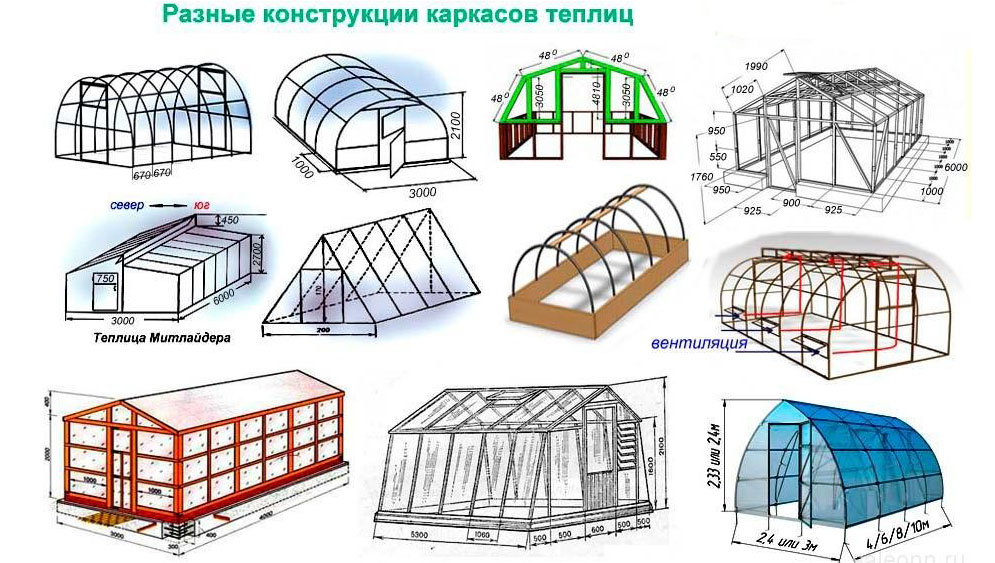
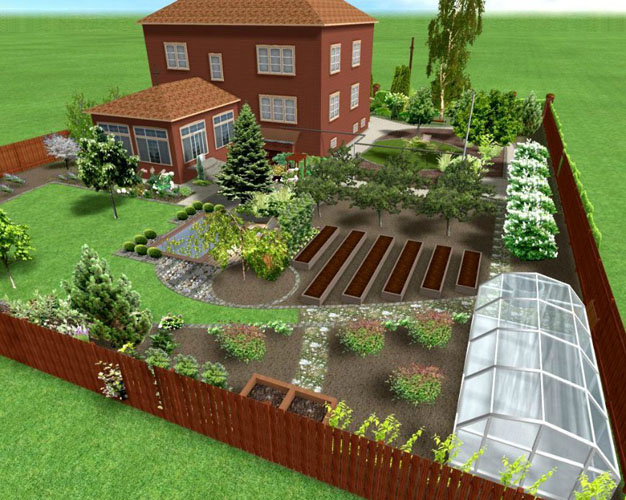
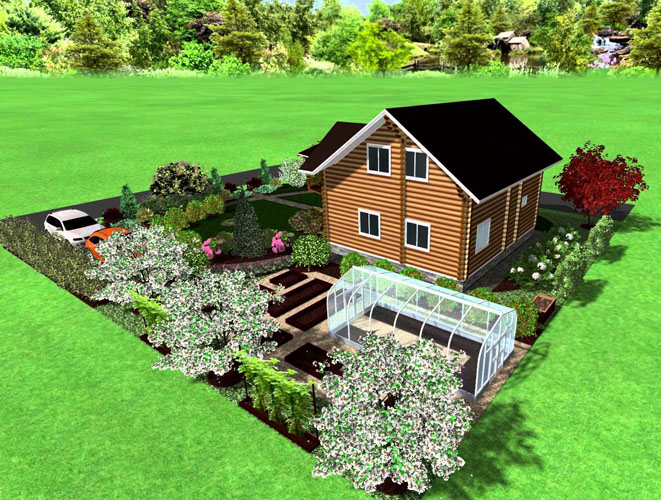
Forms and designs
Before the master has to proceed to the drawings and preparation for the construction of the greenhouse from the metal profile, it is worth deciding what its shape and construction will be.
Most often construct such options for greenhouses.
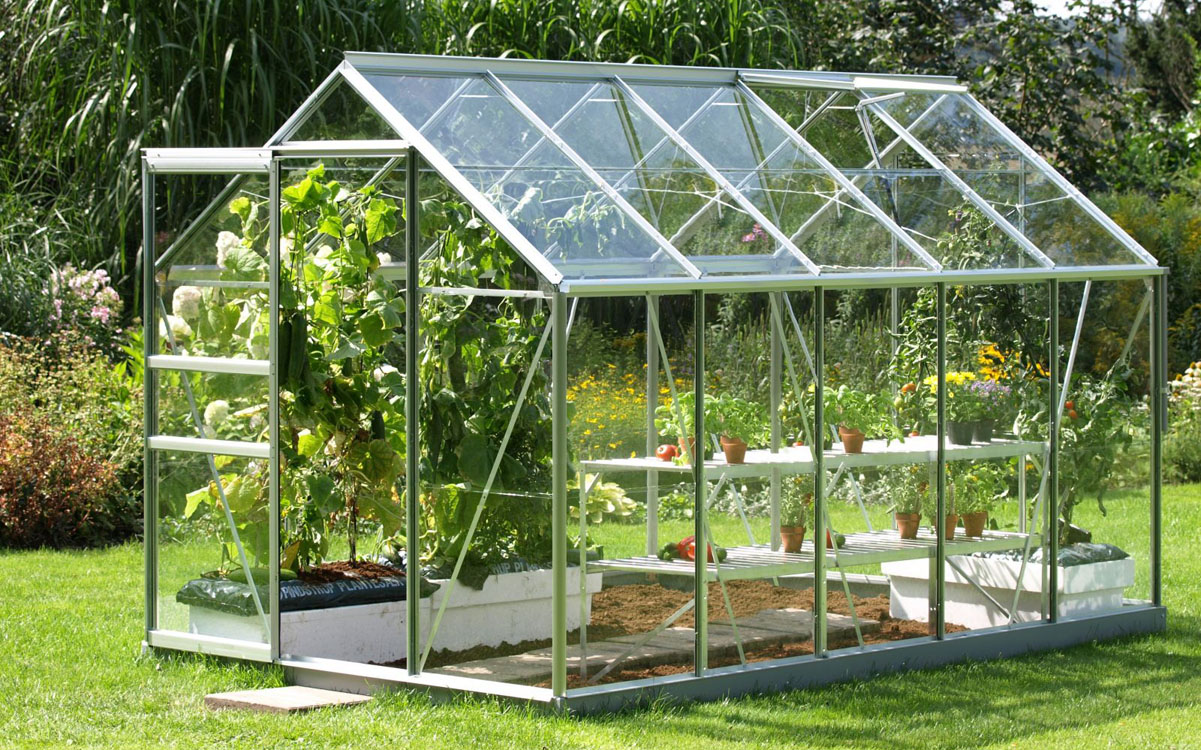
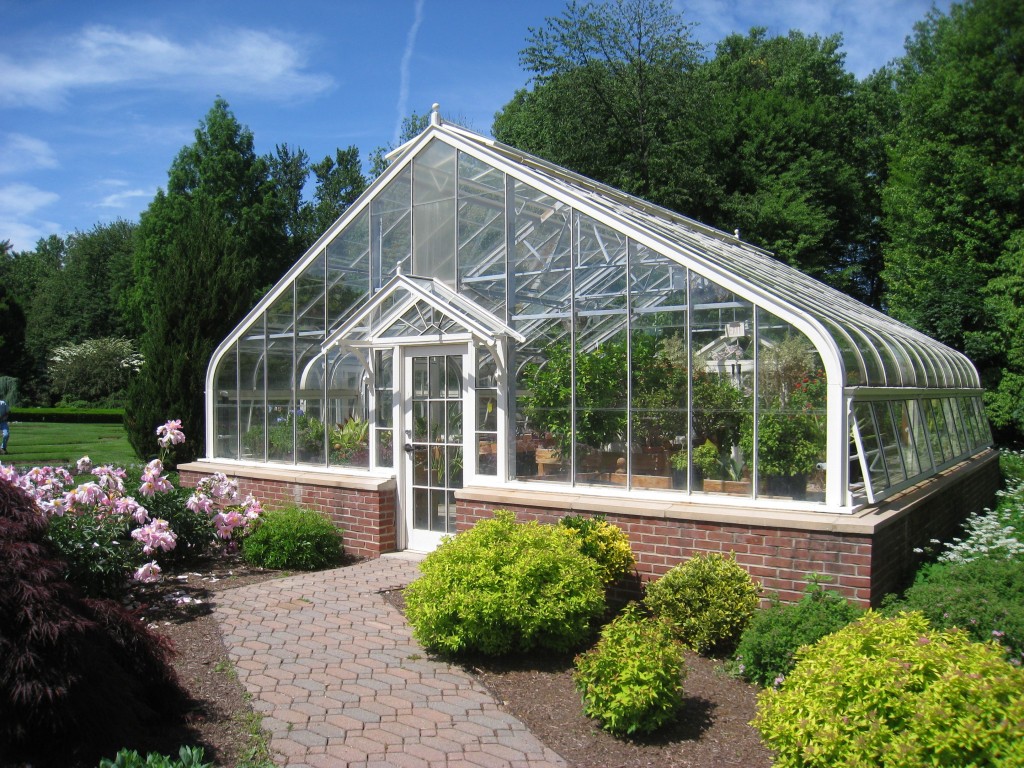
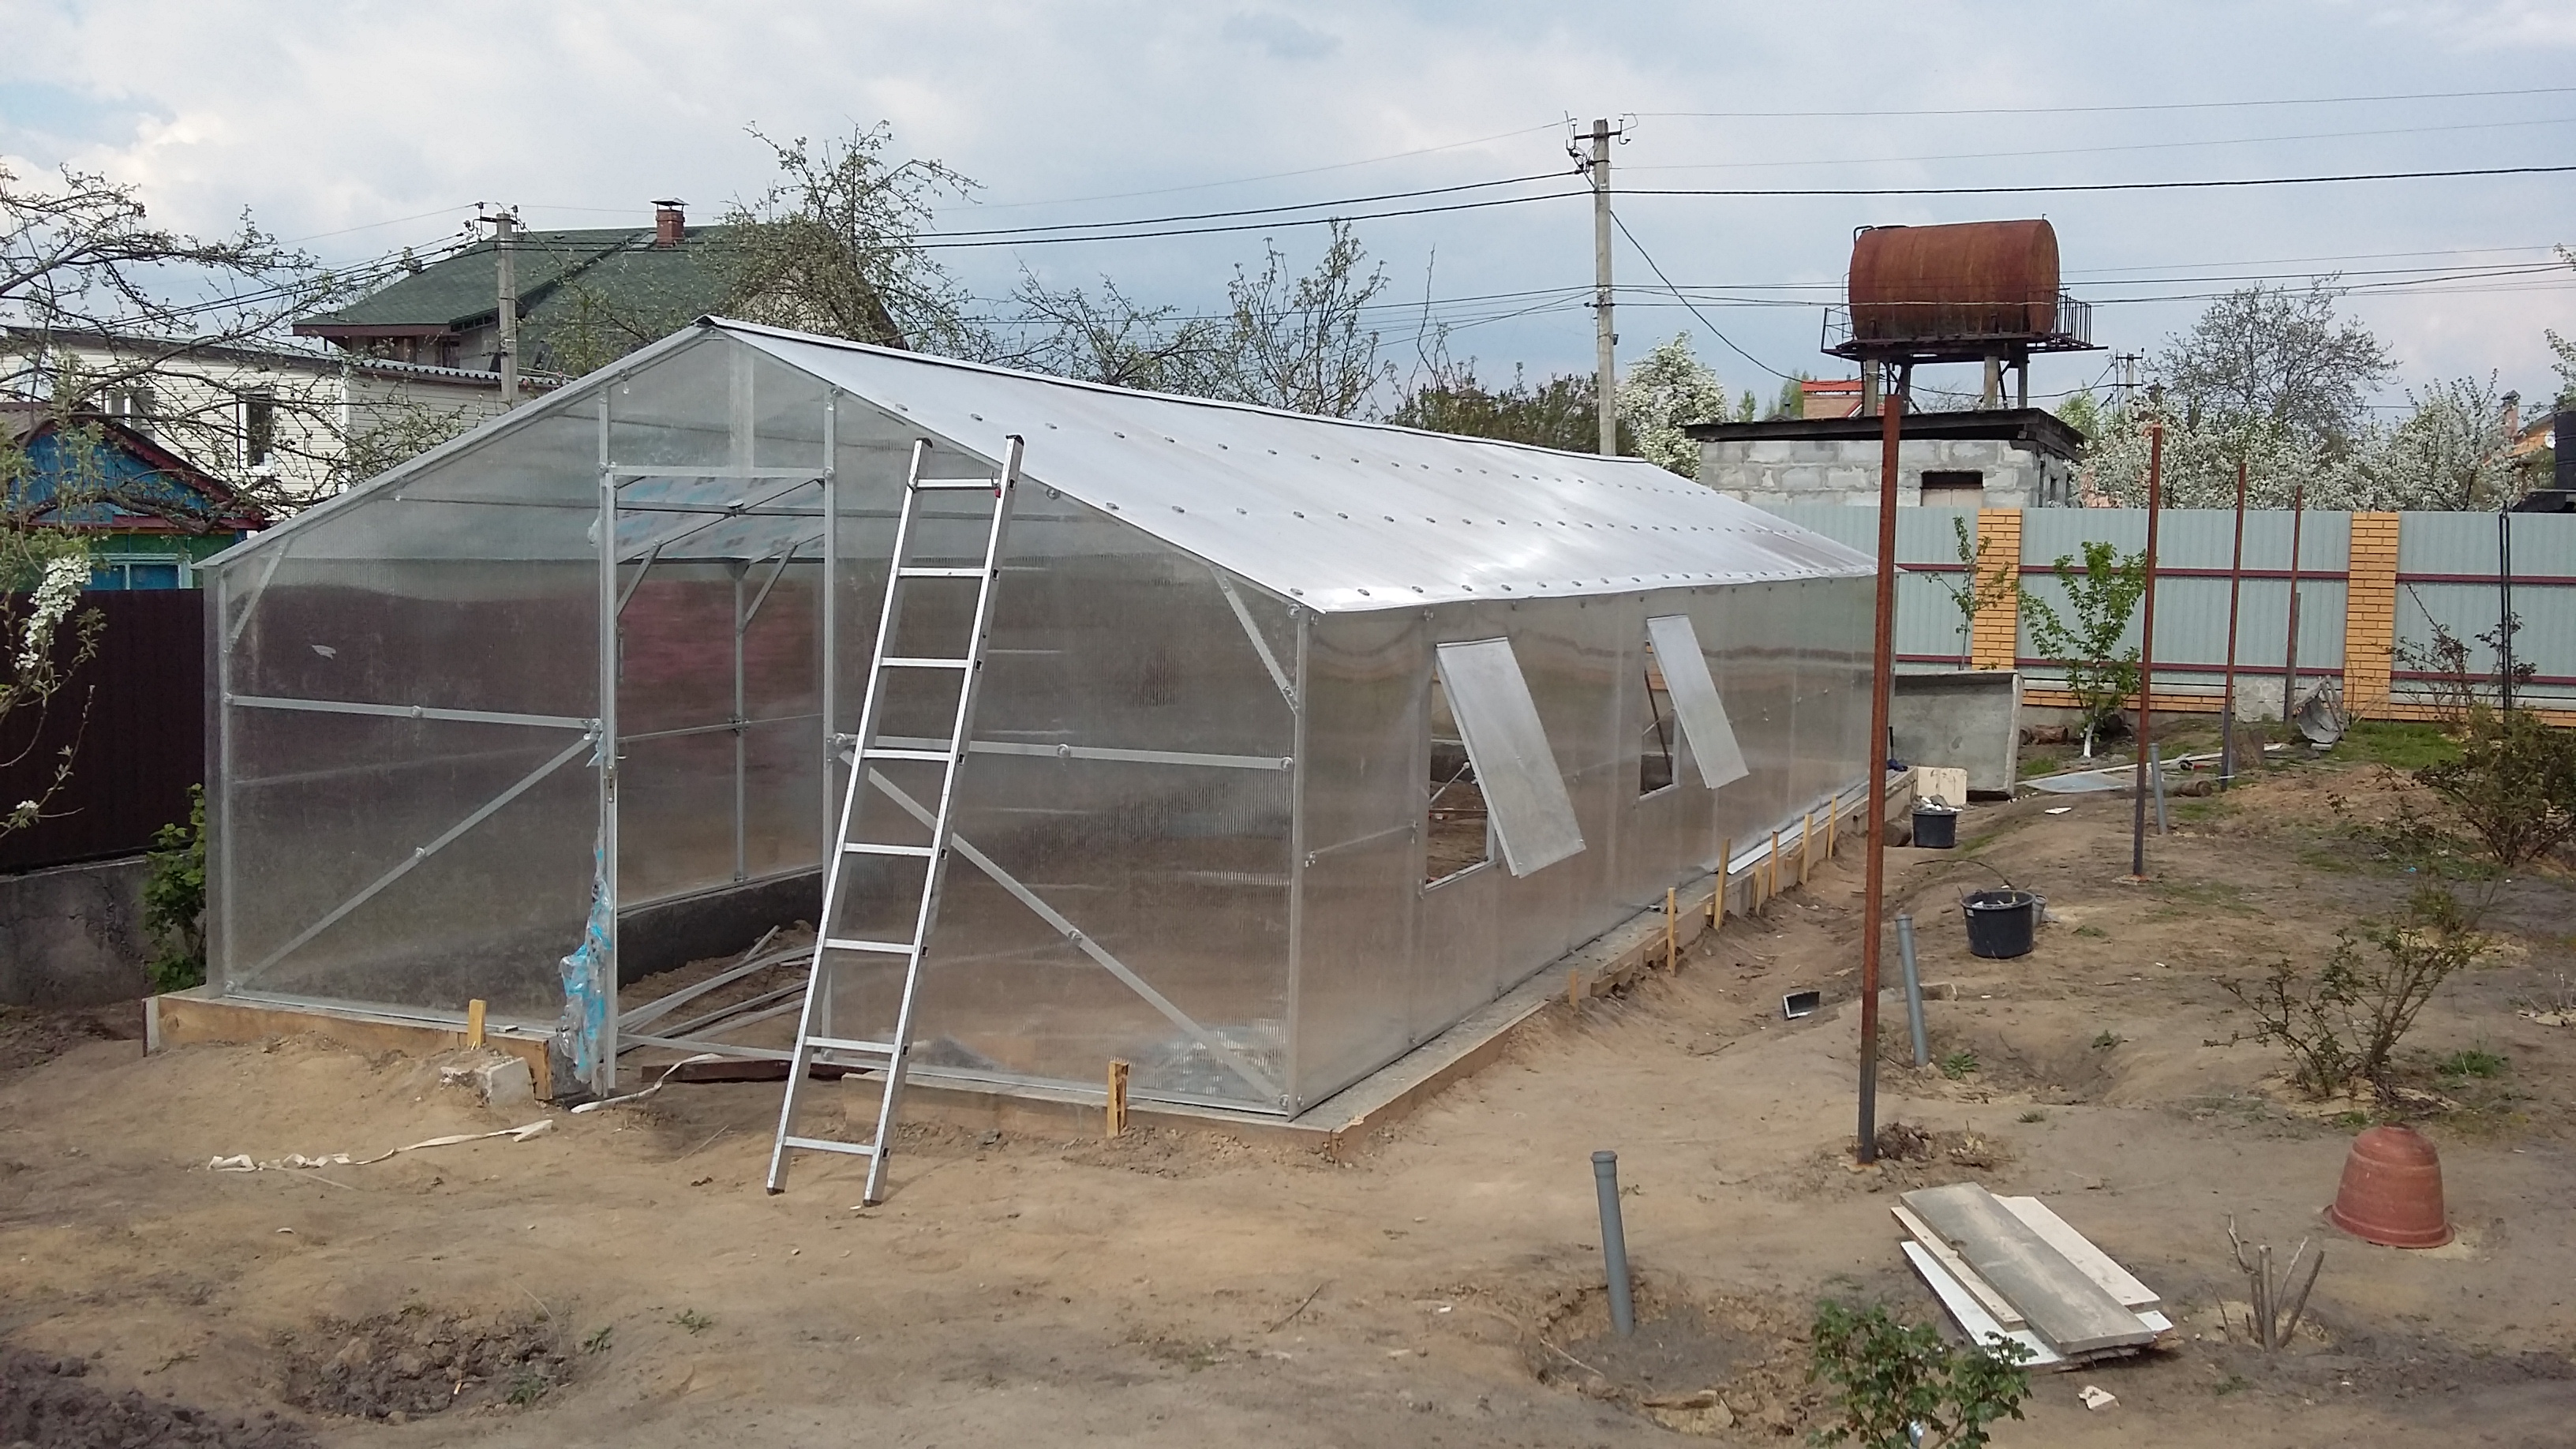
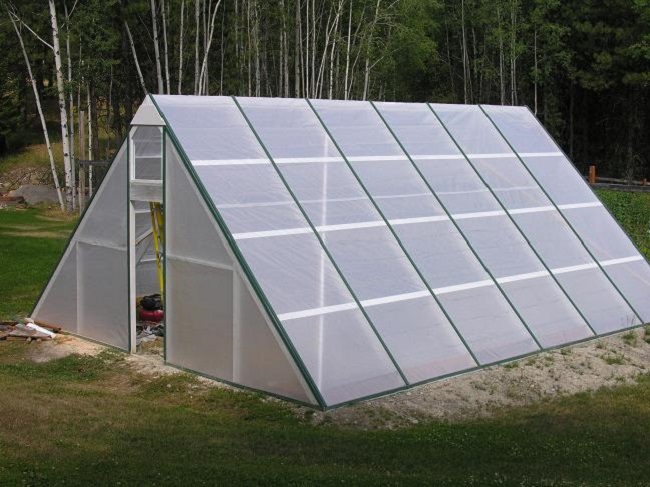
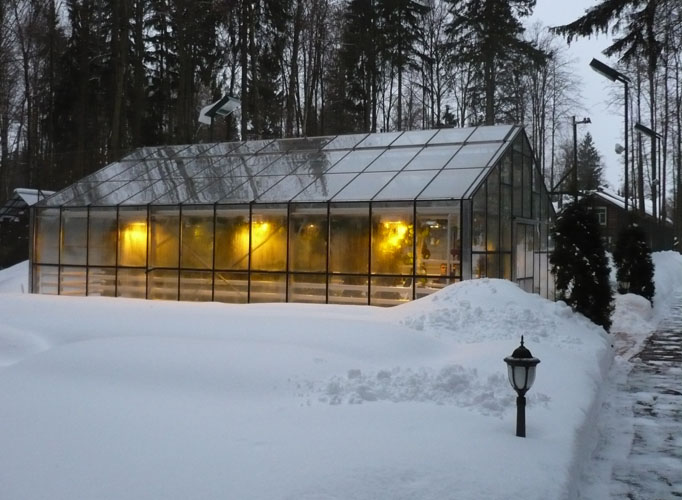
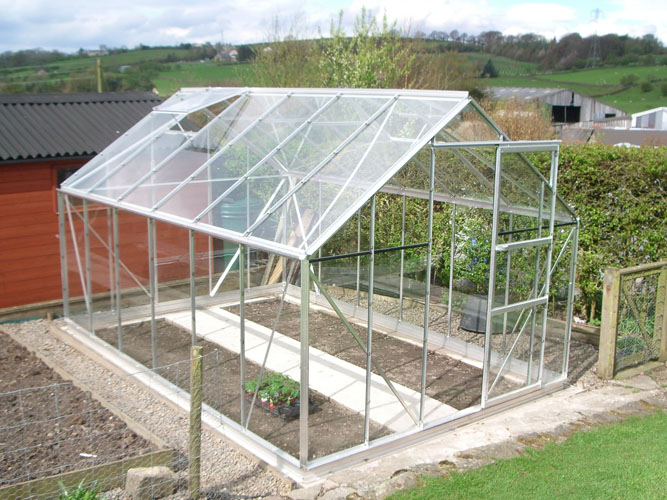
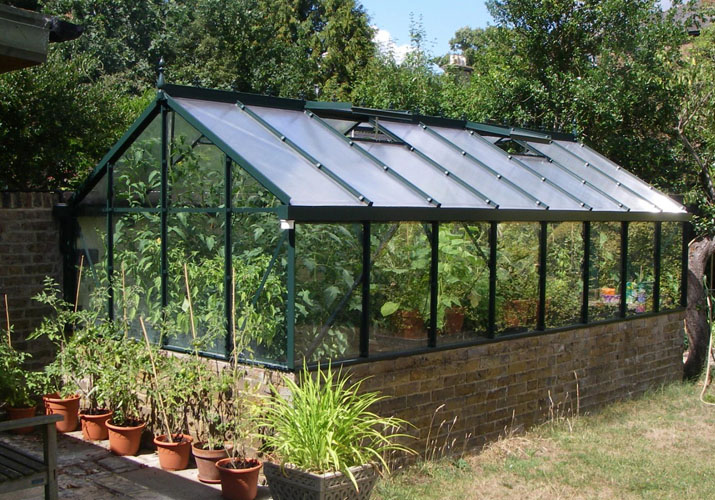
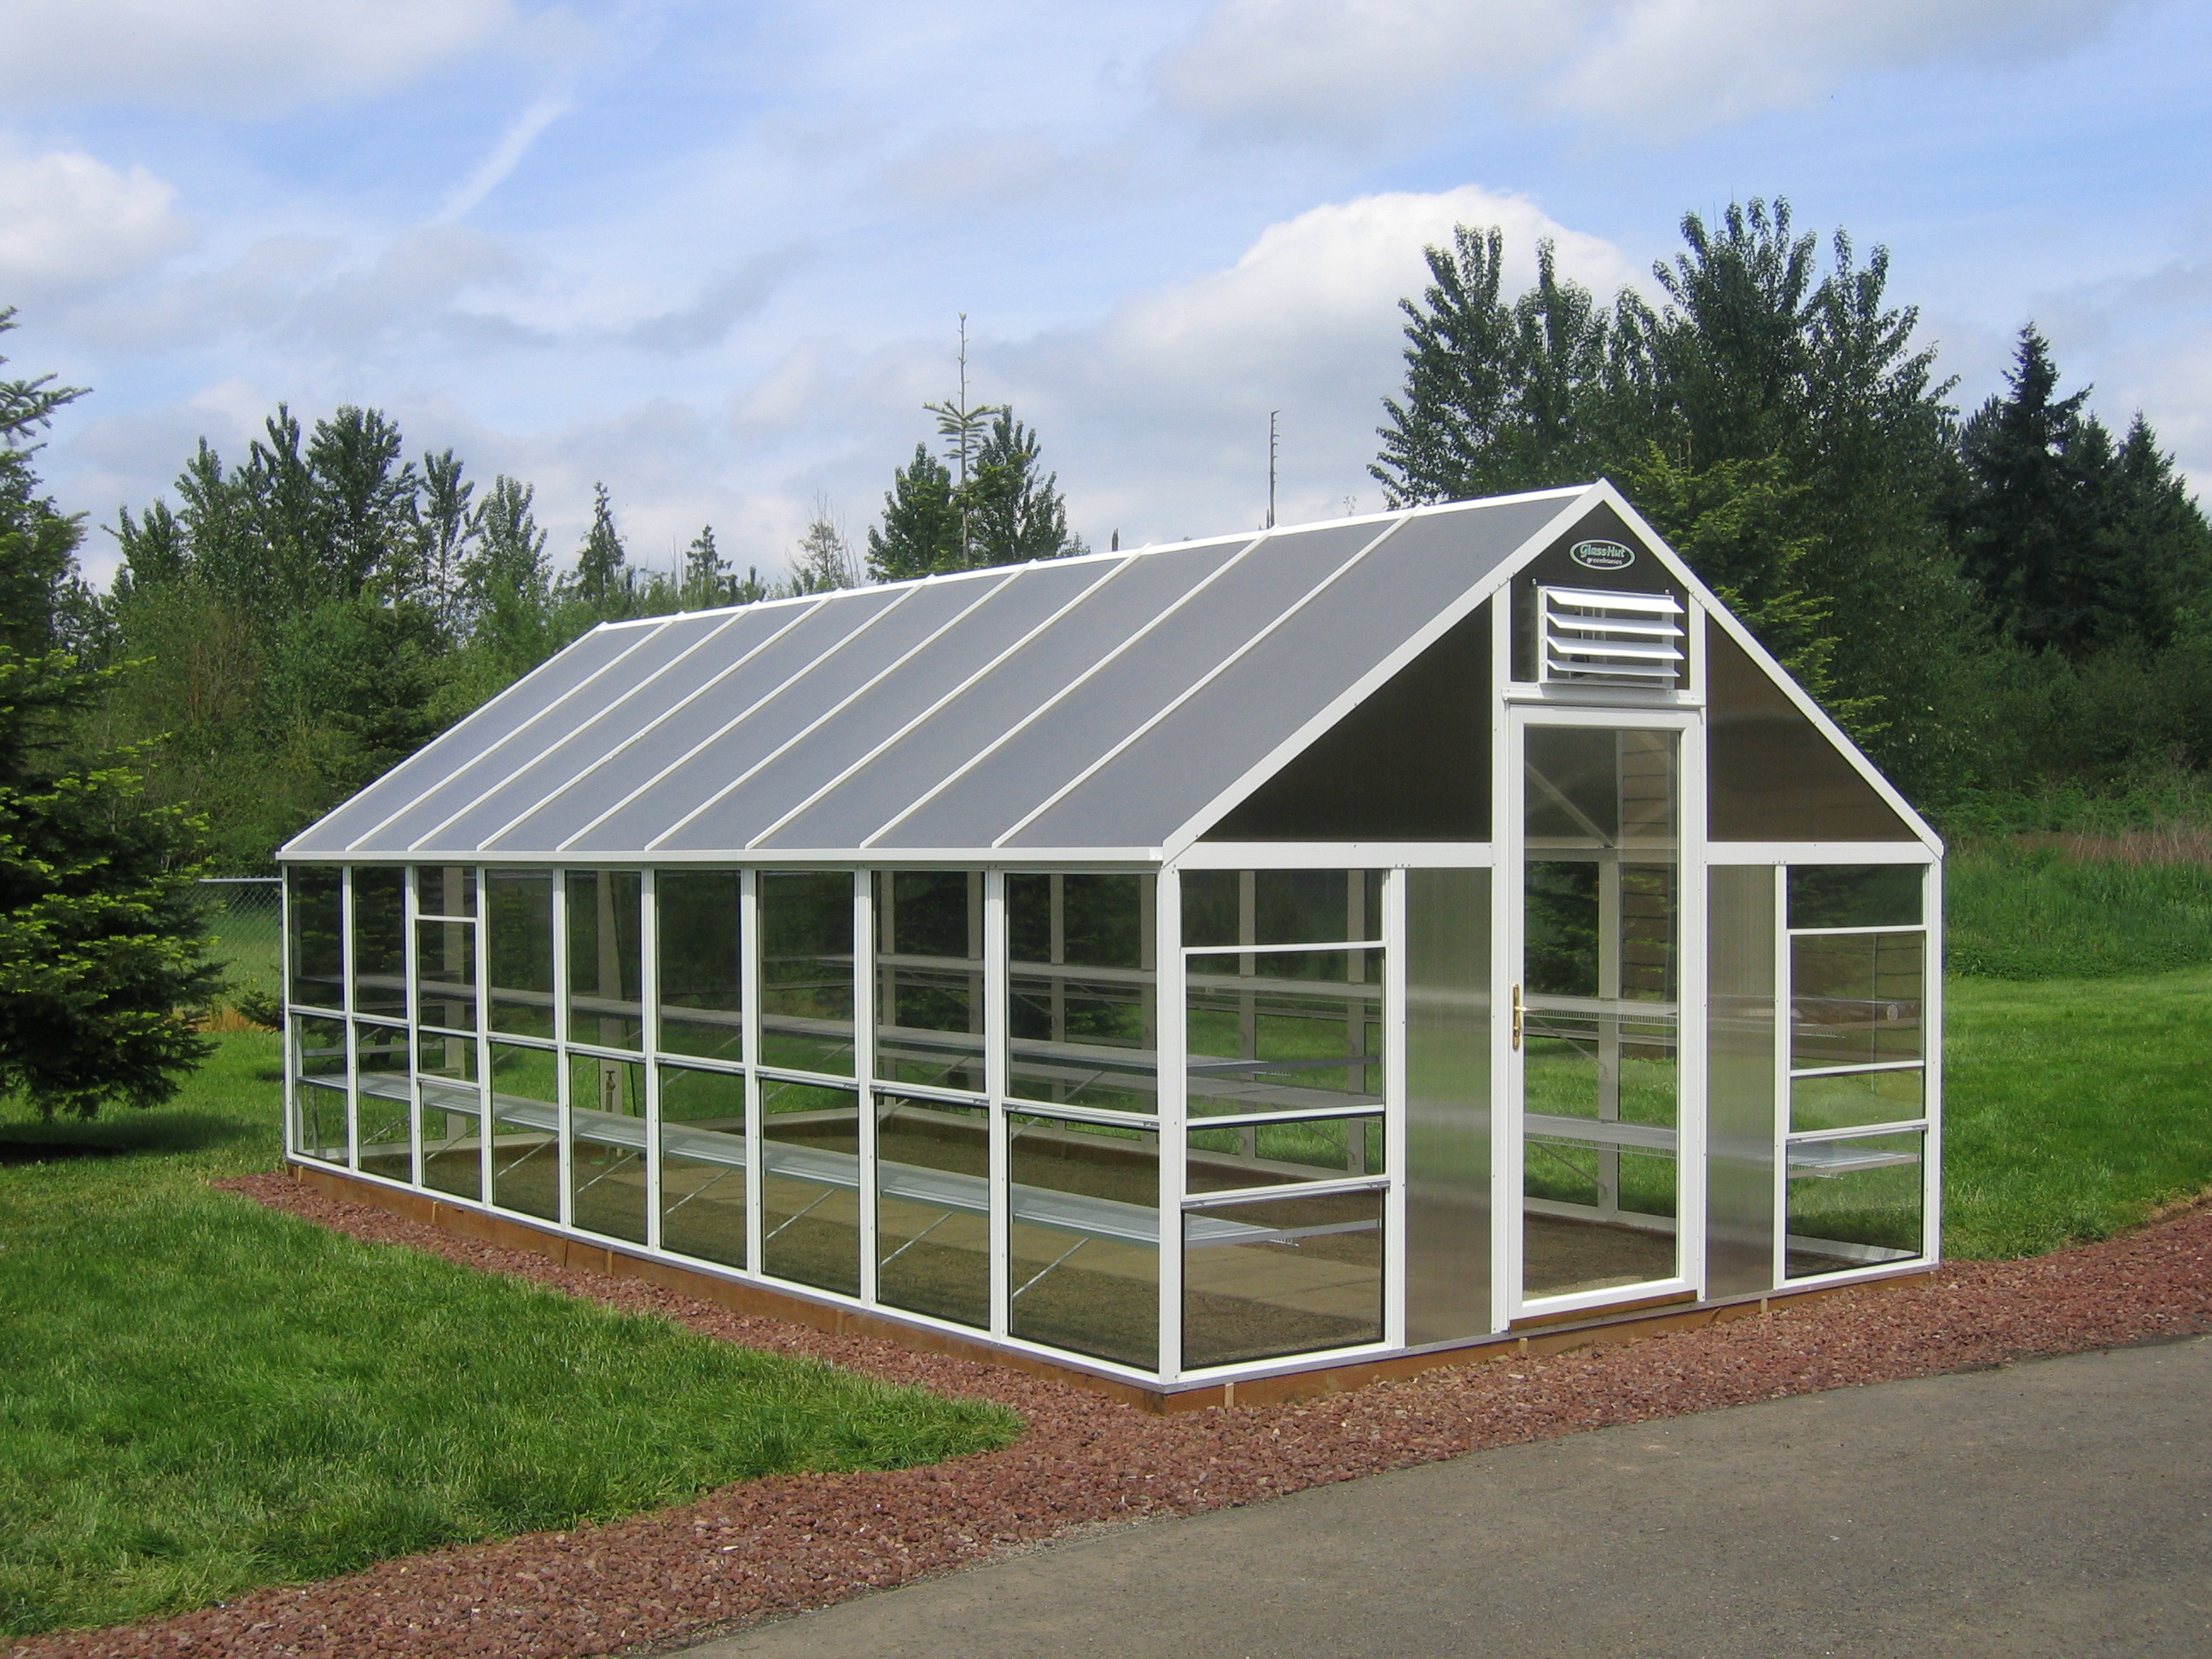
- Gable This form is considered to be classic, as it has been known to people for many decades. A greenhouse has the appearance of a simplified house, which has a gable roof. The advantages of this framework include high rigidity,no problems with accumulation of snow on the roof, no need to purchase a flexible profile, the entire area of the greenhouse can be used for agricultural purposes. Among the shortcomings can be identified a large consumption of material, complex construction and inconvenient roof lining.
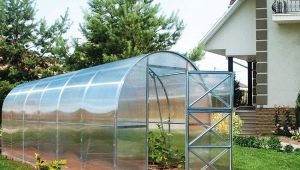
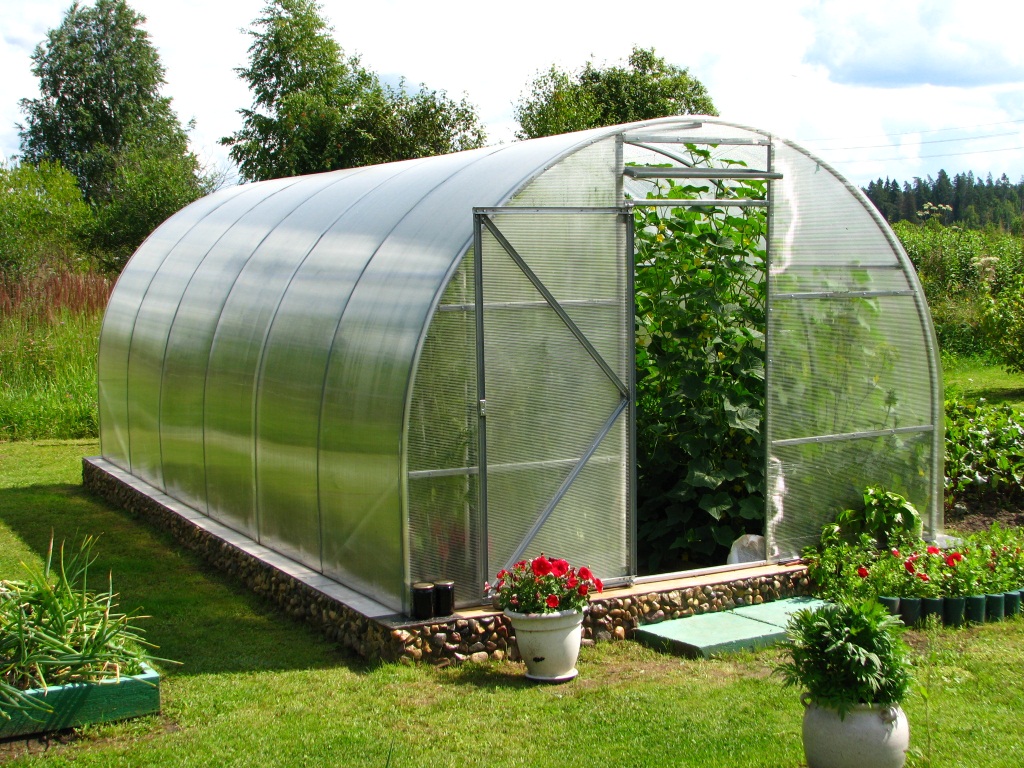
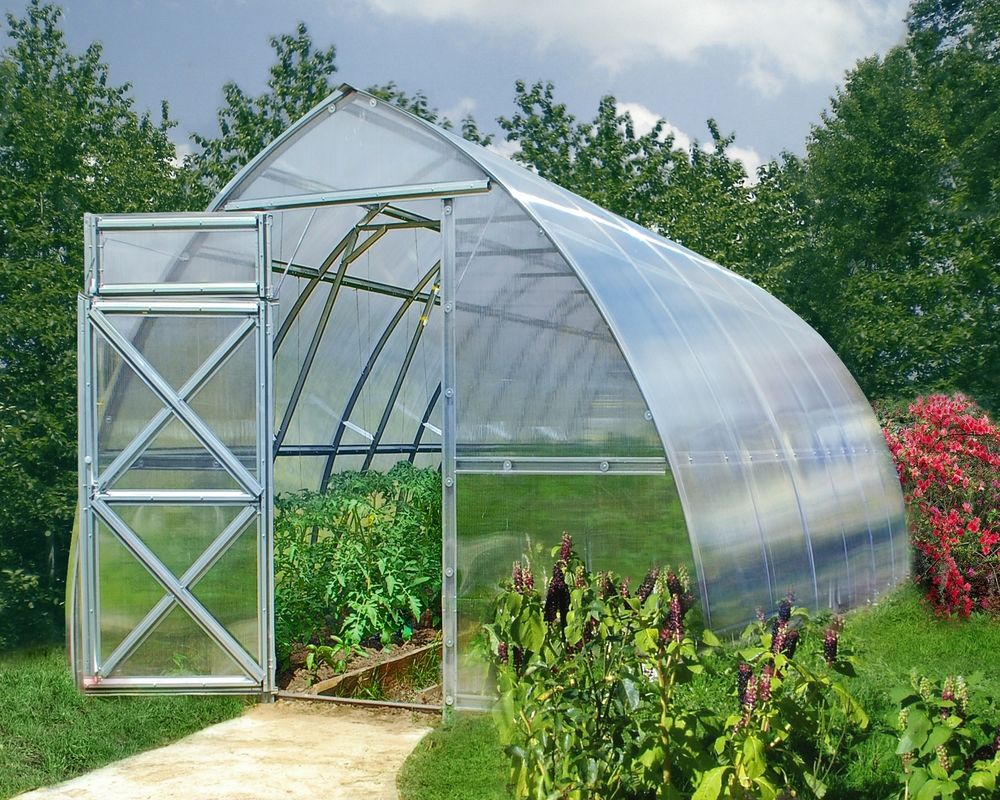
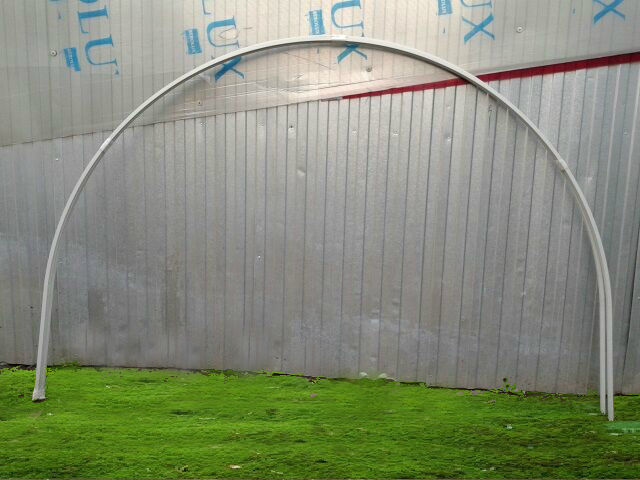
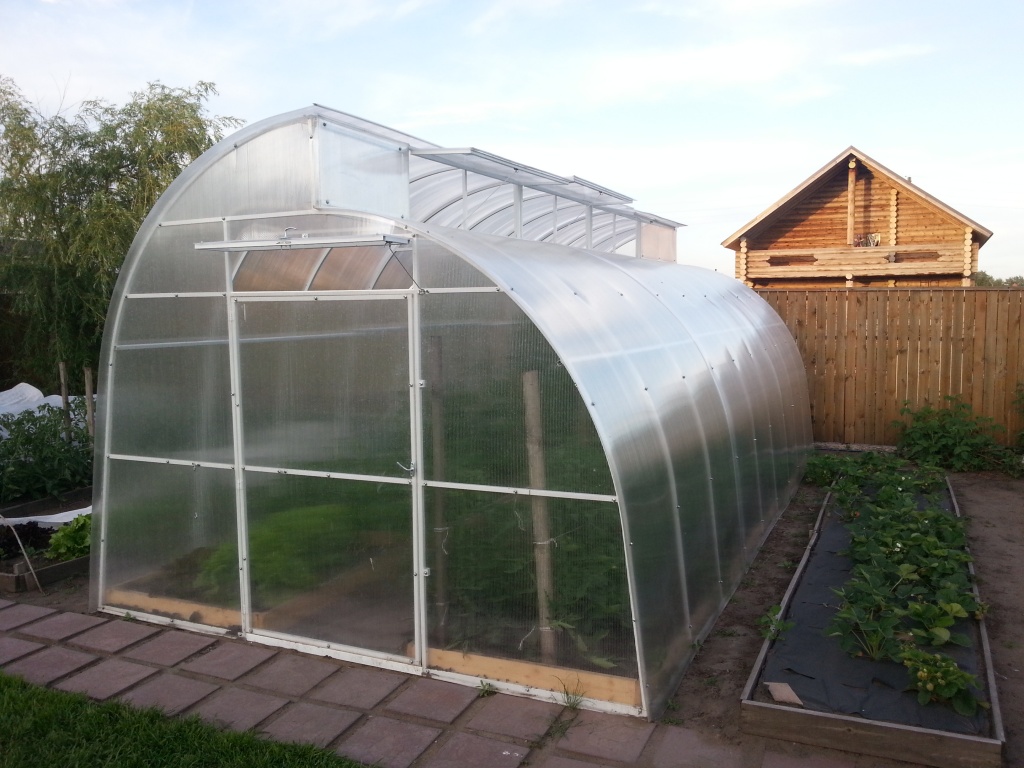
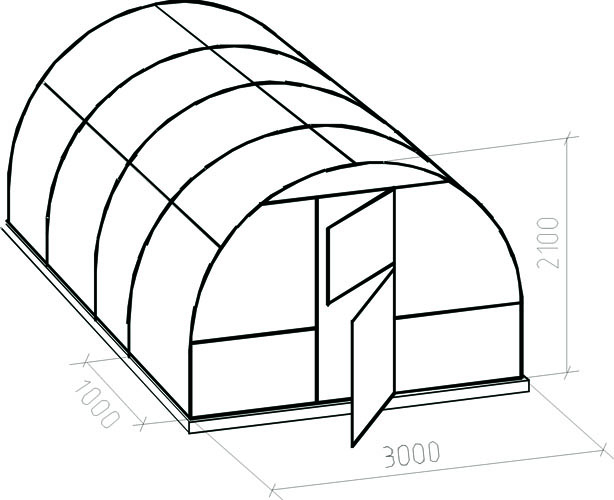
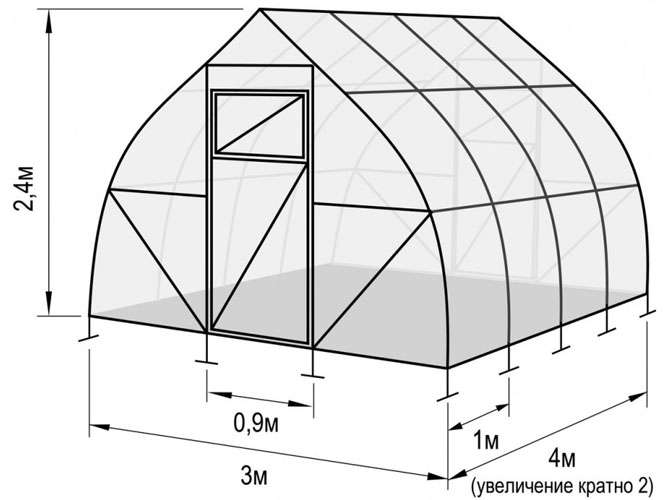
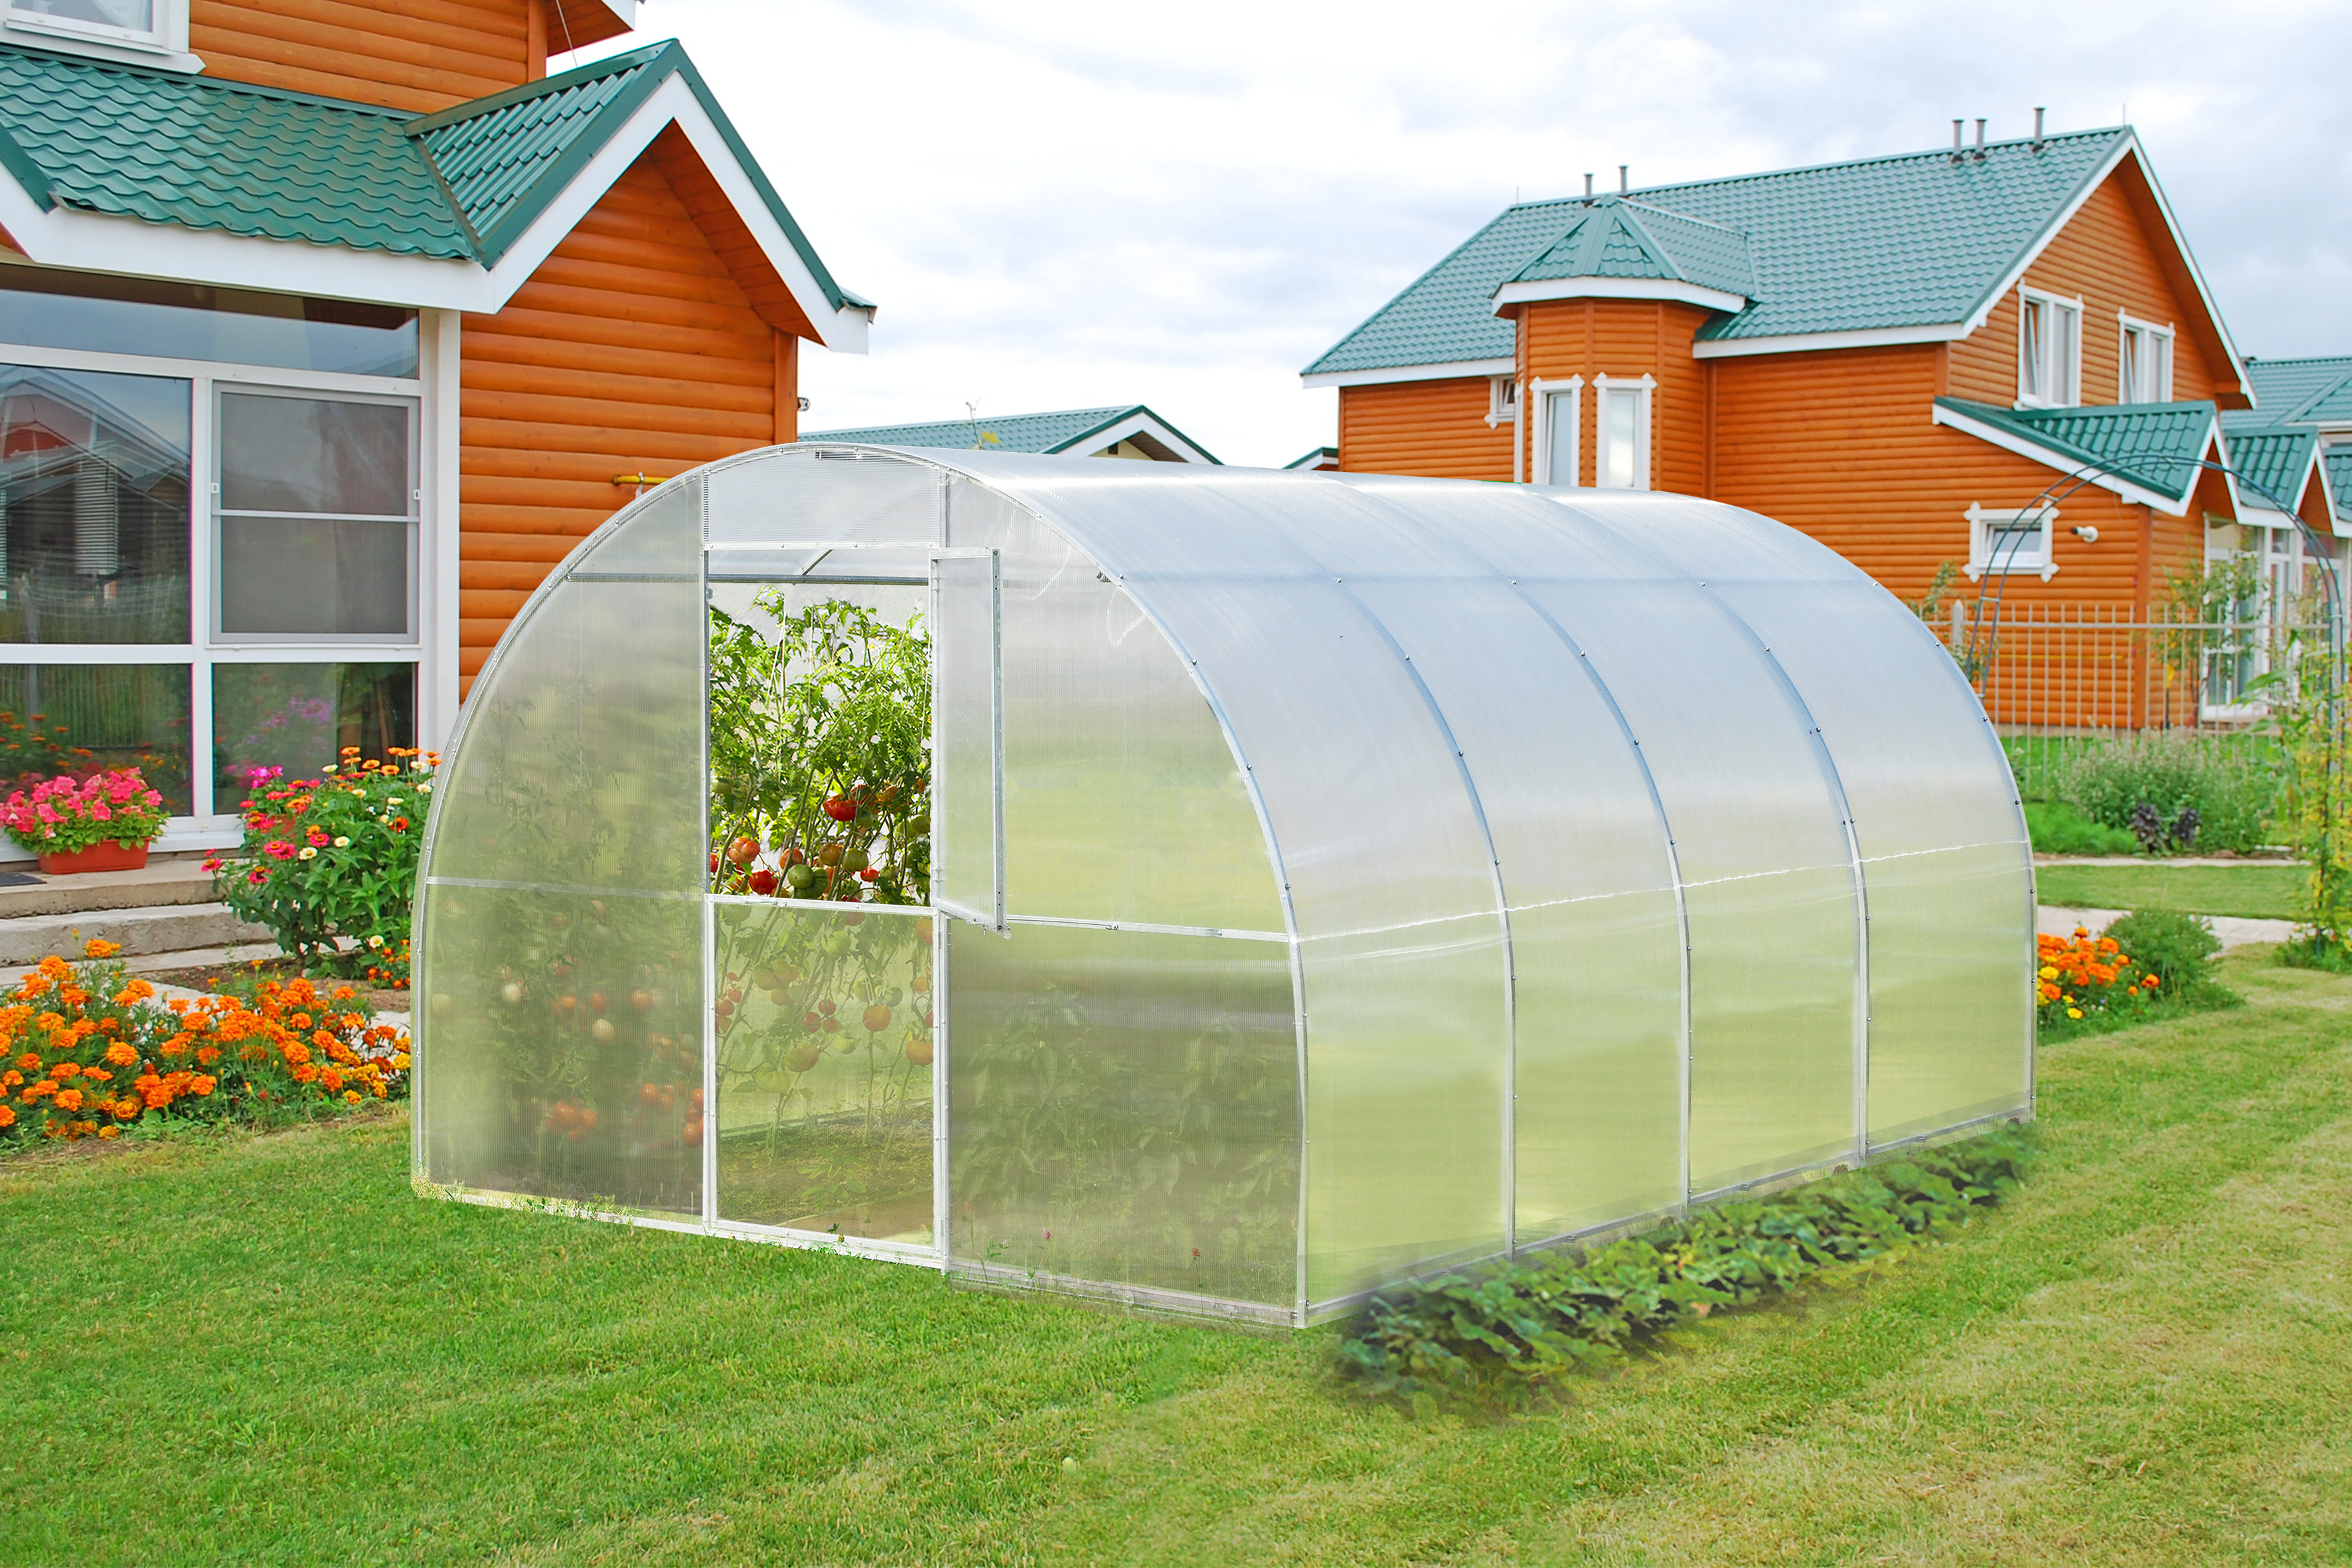
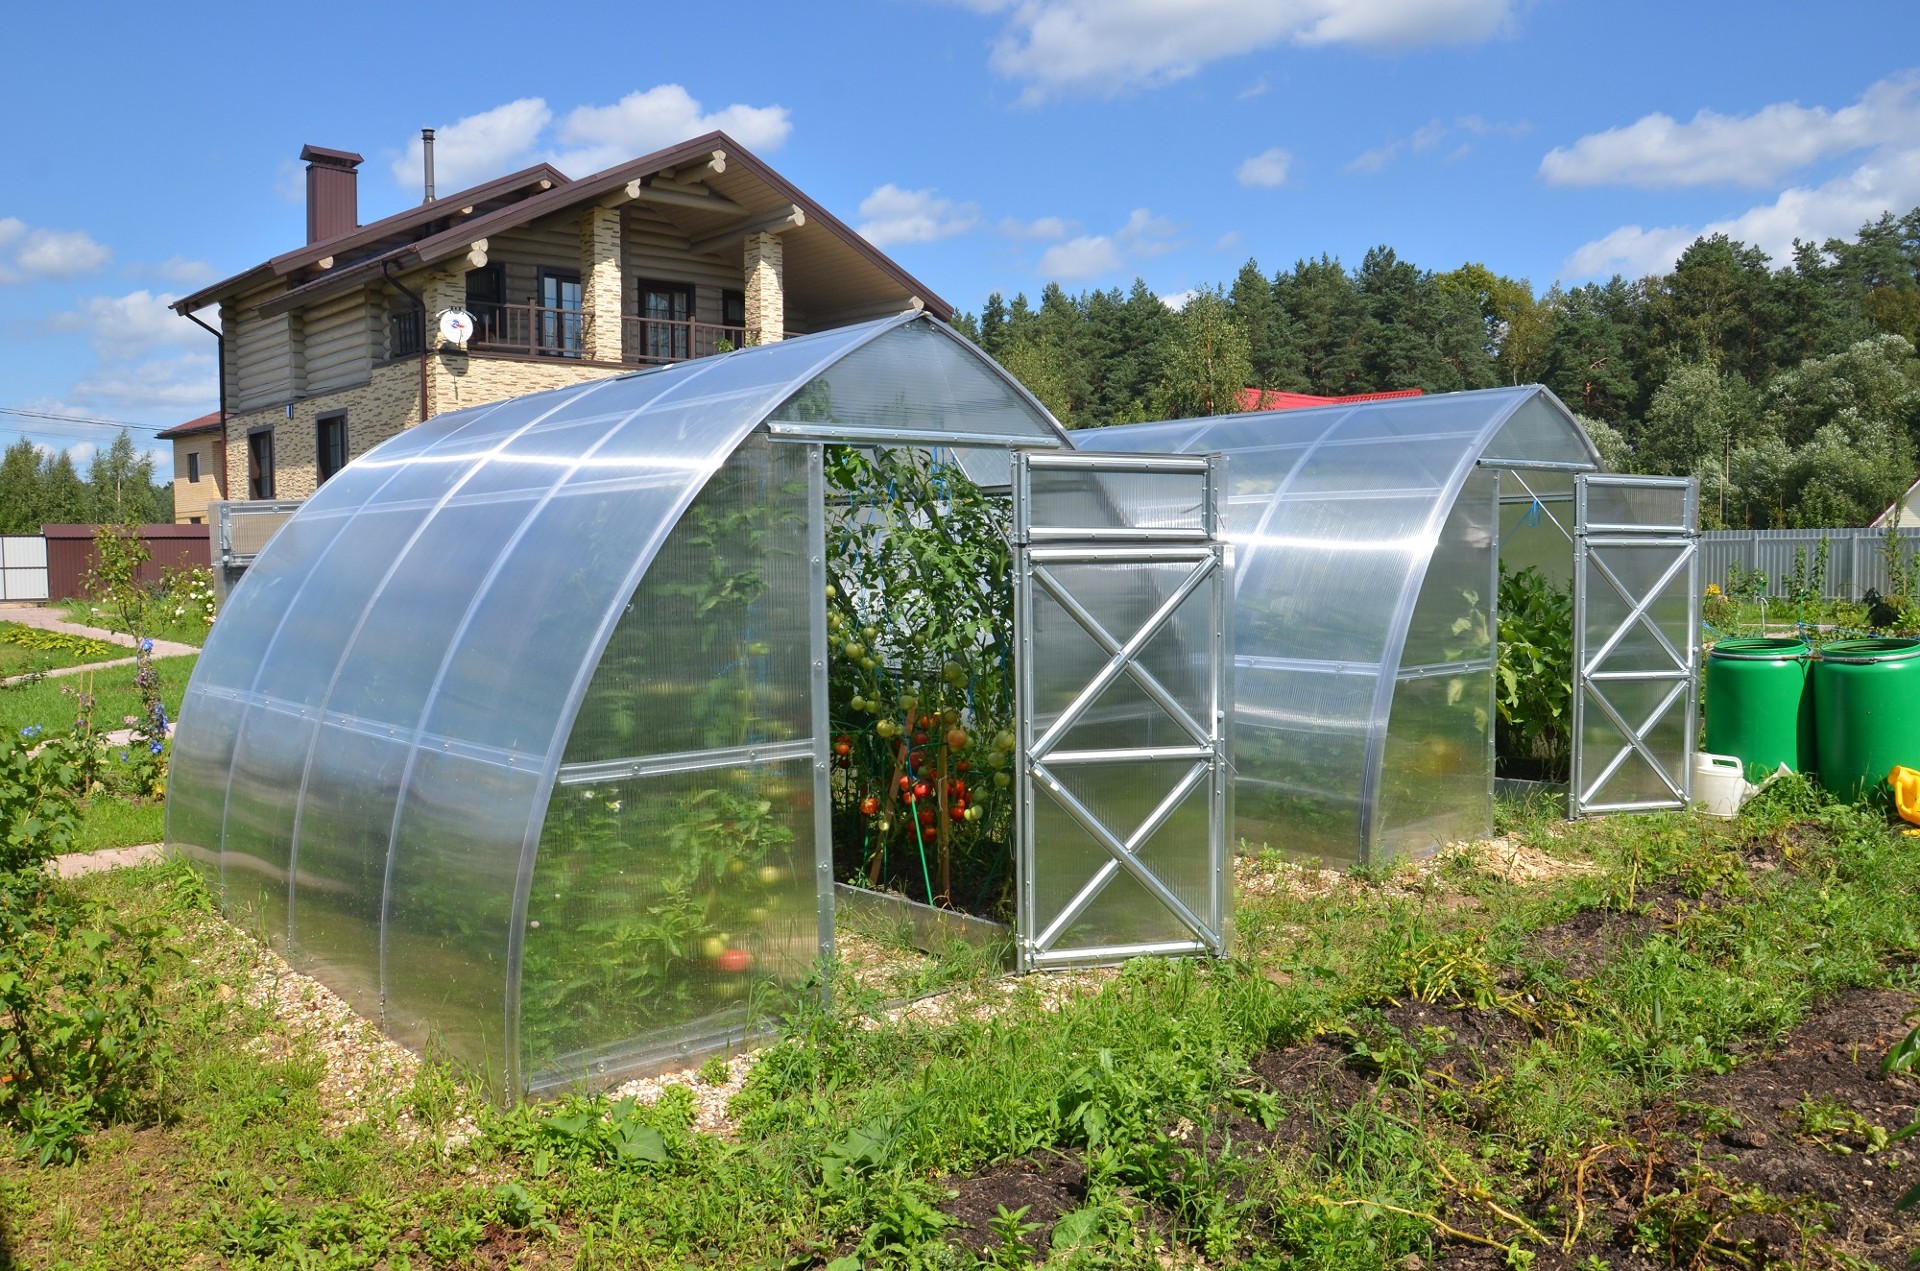
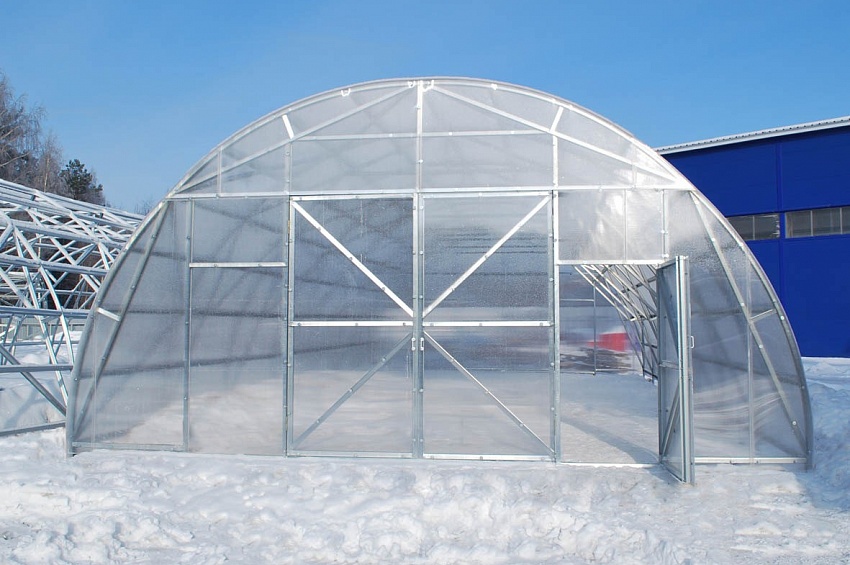
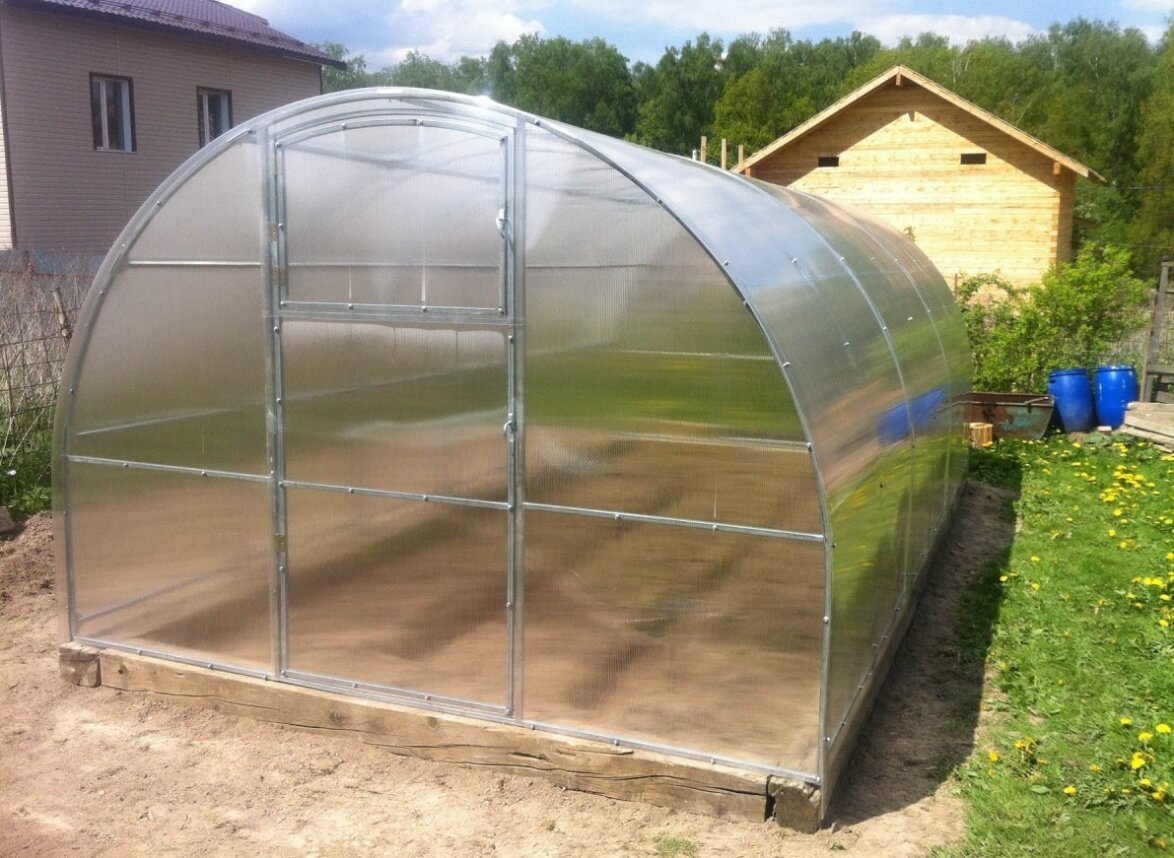
- Arched. Such greenhouses are by far the most common. This is a set of profile arcs that are connected to each other with ties. The advantages of such a greenhouse, farmers consider a simple design, a small amount of material consumption, resistance to wind rush, rapid assembly of the frame and convenient lining. Among the obvious drawbacks of such greenhouses, we can highlight the need for continuous cleaning of precipitation, the need to acquire a flexible profile, as well as tools to bend it. Also, the greenhouse has areas that are unsuitable for use.
- A-shaped. This greenhouse has the form of a triangular roof, which is extended upwards. Such greenhouses due to the unusualness of their design are rare. From the advantages of this design can be noted a lack of care with cleaning the snow, simple assembly and original appearance.Cons: a small amount of space for use, time-consuming plating, inconvenient work on the rows.
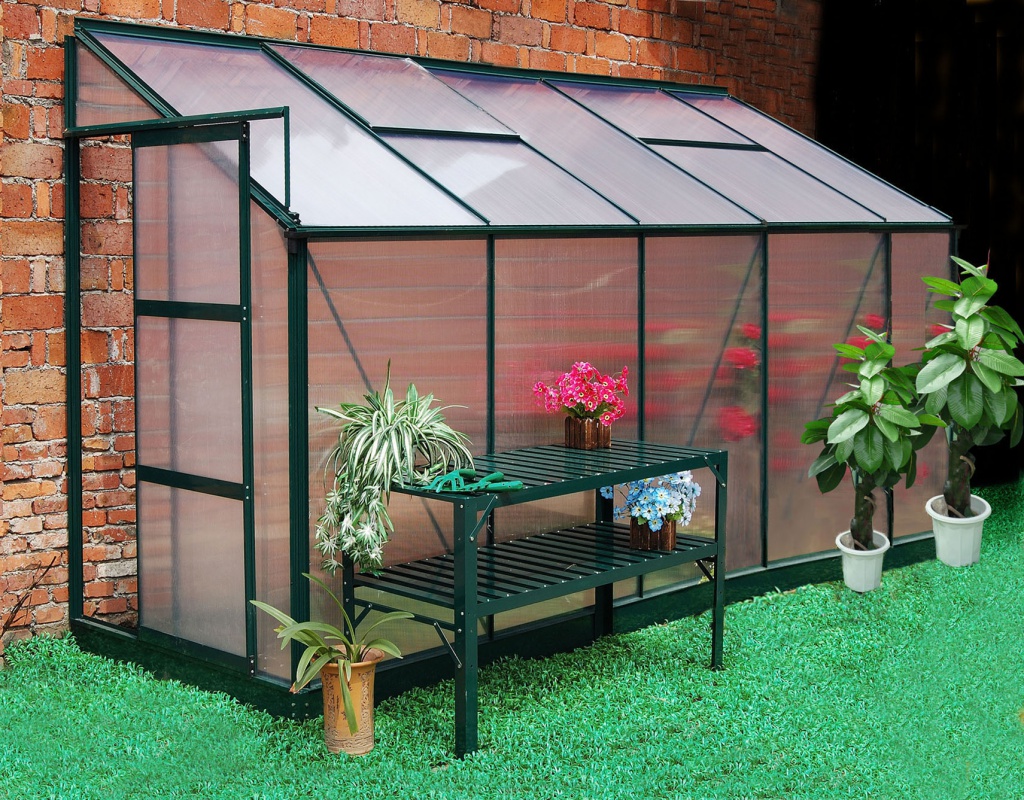
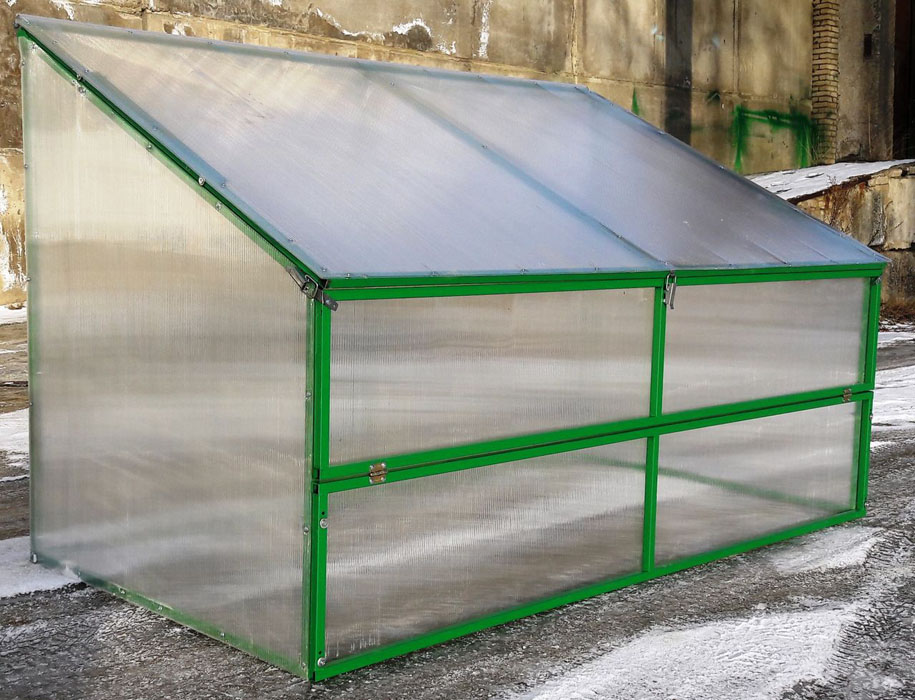
- Shed greenhouse. It looks like an ordinary greenhouse, the roof of which is tilted to one side. The pros and cons of this design are similar to the gable option. This greenhouse can be attached to a residential house that will look pretty organic.
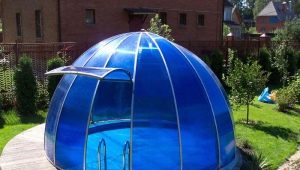
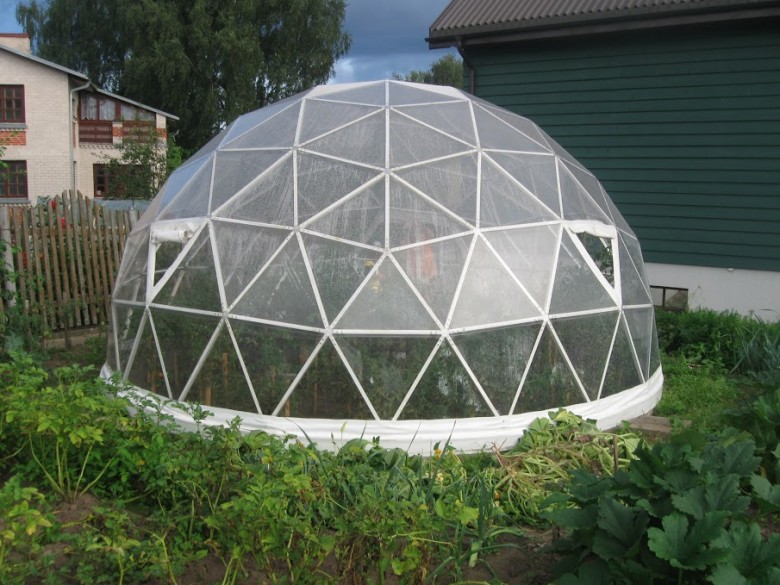
Also known and more complex types of greenhouses, such as ball or dome.
These greenhouses have a rather complicated structure, therefore they are not considered a good option for self-erecting from light metal. An interesting subtype of the construction with a gable roof is Mitlider’s greenhouse. From the original, it is distinguished by the location of the vertices of the slopes that are located above each other, in the vertical wall turned up at the top you can install window vents. This type of greenhouse is considered the best for ventilation efficiency and circulation of air masses.
Design and preparation
Once the shape of the structure is determined, you can begin preparing for the construction of the greenhouse.Dimensions of the future heifer will be determined from the tasks that the greenhouse will perform. Farmers should decide how many beds will be in the greenhouse and their optimal location. The most acceptable width of beds is 1.2 meters, while the side should not have a large width.
For the correct location of the structure should take into account such factors:
- the ability to conveniently go to the greenhouse;
- lighting;
- evenness of the territory;
- direction of the prevailing wind.
Light mode is an important factor for the nutrition, growth and development of plants. A place with poor lighting is the absence of a possible planting of plants that love the light in winter. You can correct the situation by installing artificial light, which will increase the financial costs of the construction of the structure.
If a greenhouse is being constructed, which will be used only in spring, then it is worth picking up a plot with good lighting in the morning. For winter galvanized greenhouses you need to select an open area, where there are no trees and buildings. In a constant year-round greenhouse, the direction of the wind is vital for plants.Such a greenhouse should be well protected from cold wind and heat losses in winter.
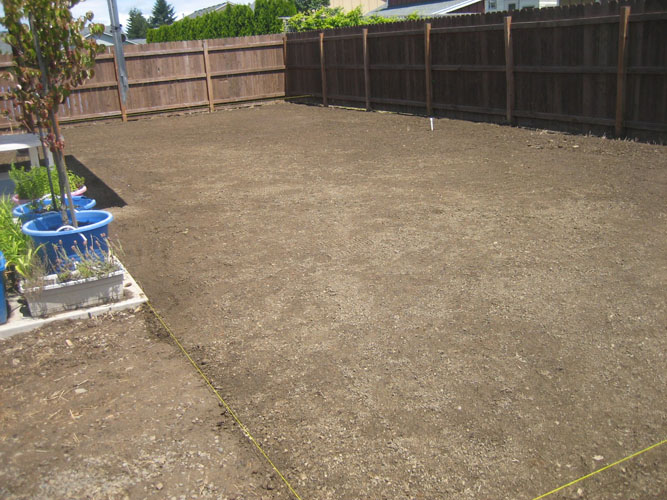
Stop your attention better in the area where the surface is perfectly flat.
Prior to construction, the territory should be prepared:
- removing garbage;
- leveling the soil, not compacting, so as not to violate its fertile function.

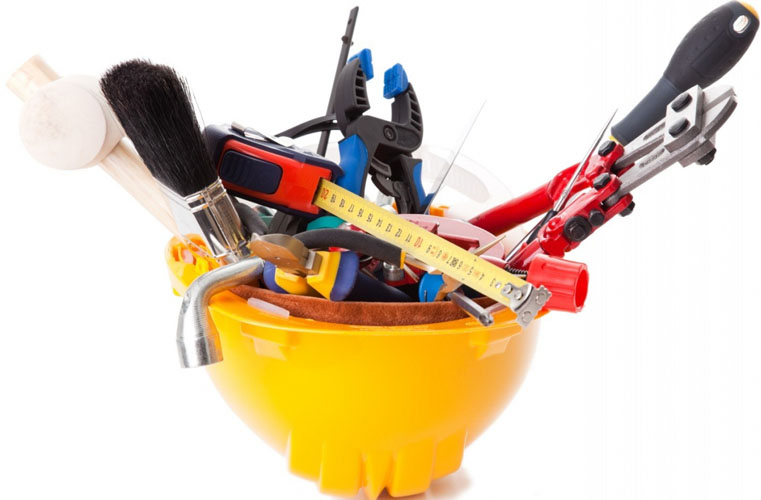
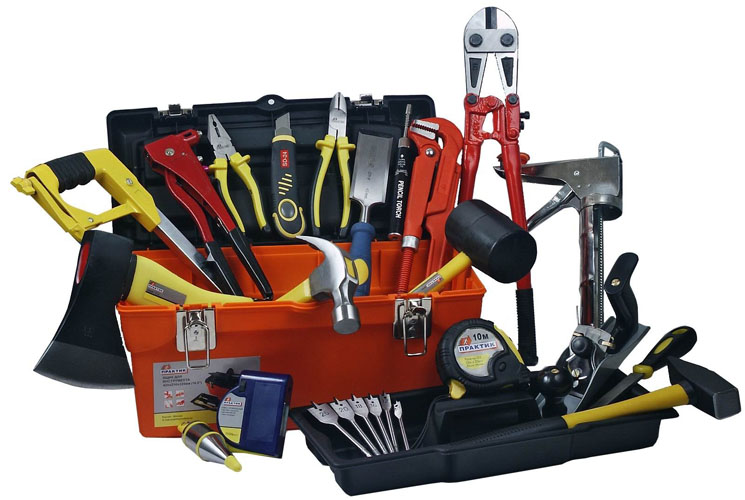
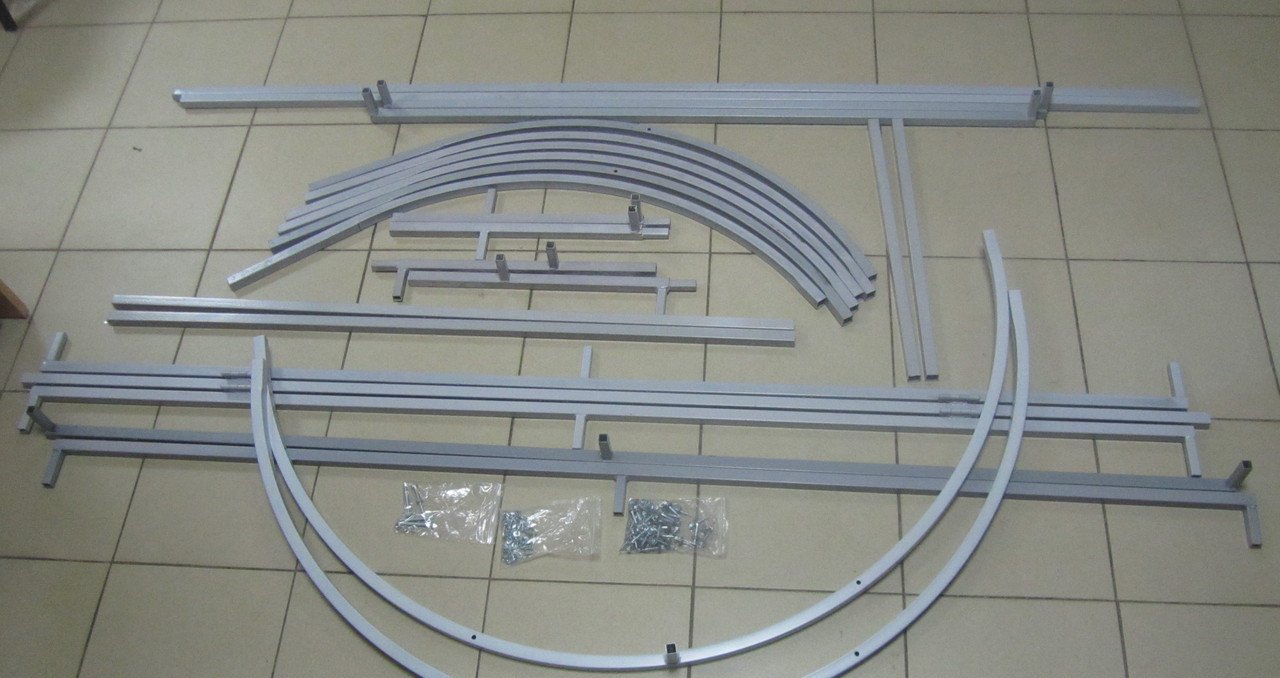
Prepare the following tools and materials:
- measuring tape for measuring;
- galvanized profile, the amount of which will be based on the dimensions of the greenhouse;
- metal screws;
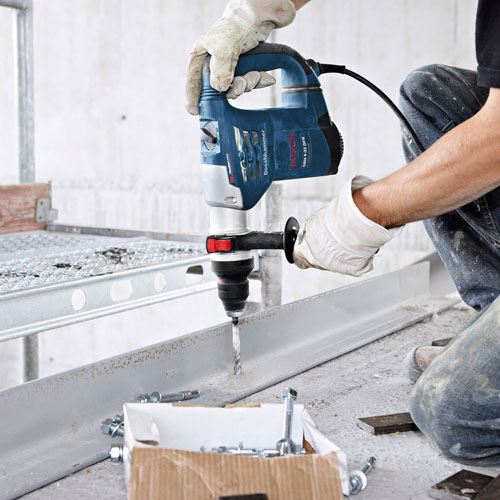
- screwdriver;
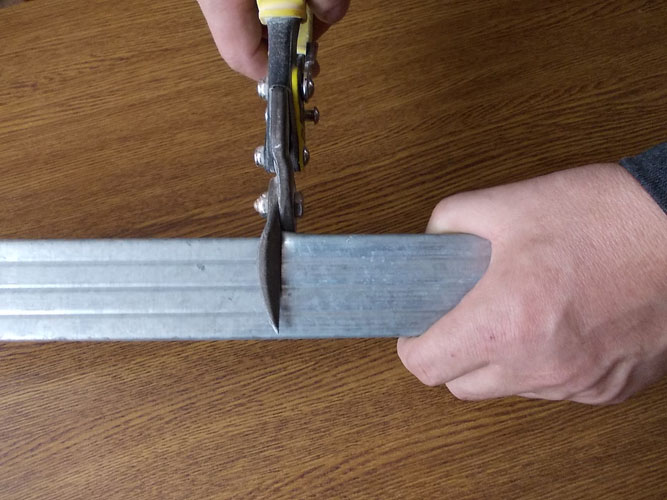
- a knife or scissors for cutting metal;
- Bulgarian;
- polycarbonate sheets;
- plummet;
- door package;
- rubber linings for screws;
- building level;
- jigsaw.
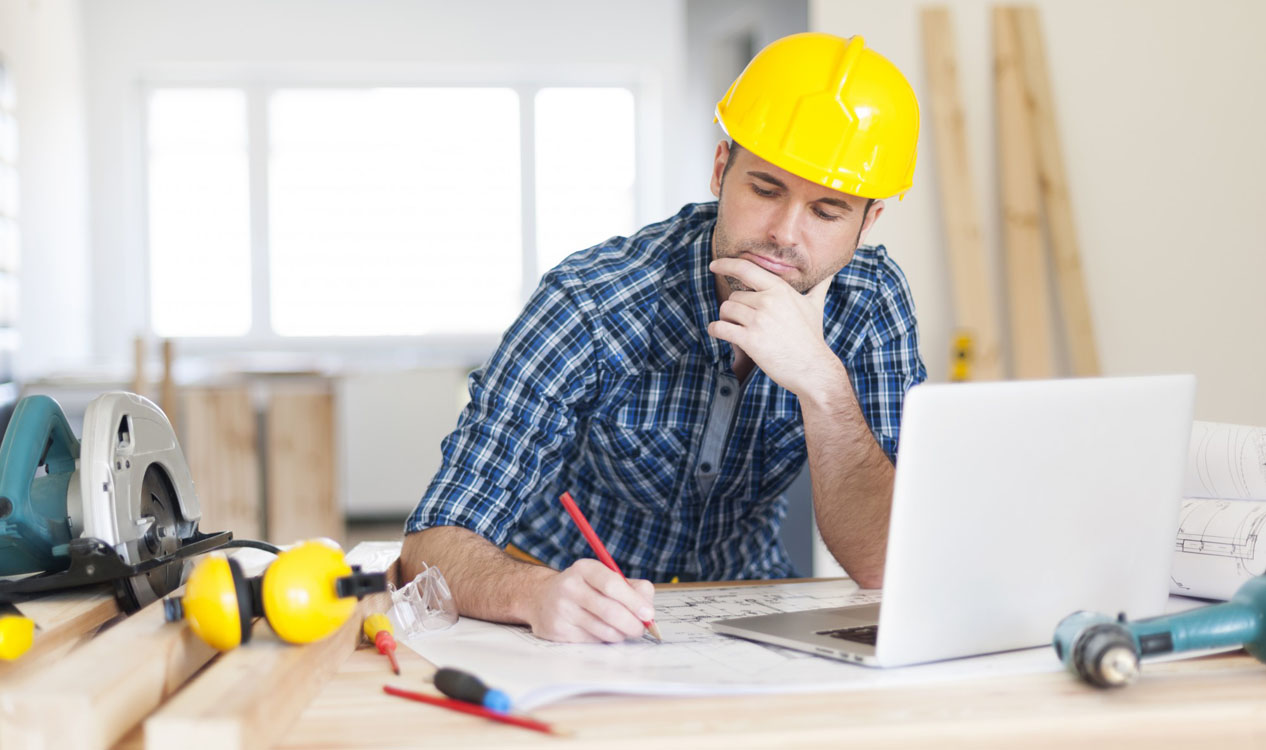
After the form is selected and the necessary materials for the manufacture of the greenhouse, as well as tools, are prepared, you can proceed to the design.
To do this, take millimeter or cellular paper, pencil and eraser. A simpler option to create a project is to use a computer program. If you have experience, then such a drawing can be created using 3D modeling.
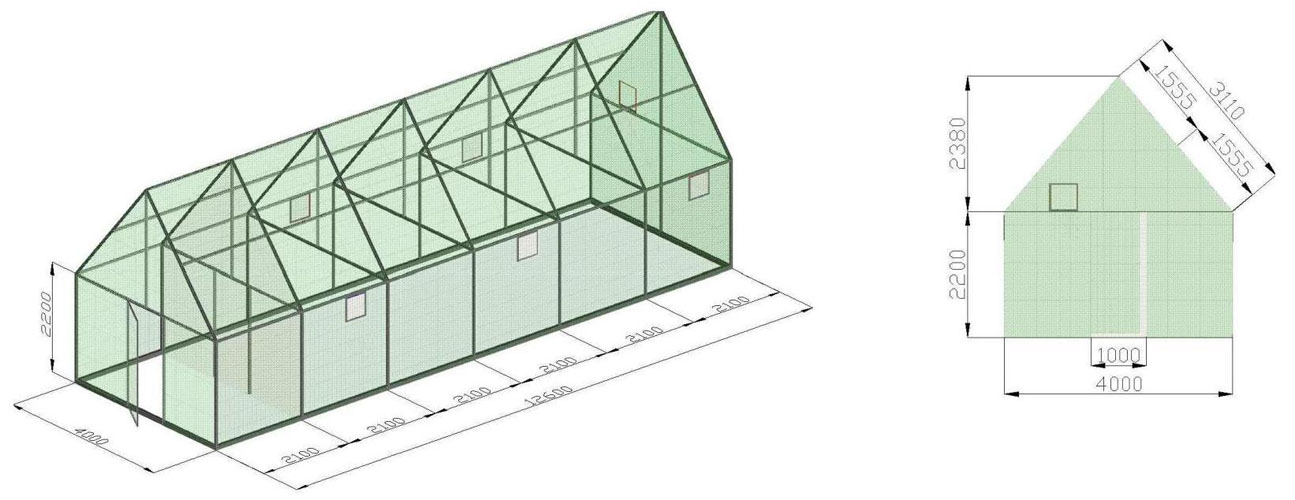
Initially, it is necessary to determine the size of the building, while it is necessary to proceed from the dimensions of a conventional polycarbonate sheet.Also do not forget about the method of connection during plating, which can be either using a connecting profile or overlap. Often, the standard length of the greenhouse is 2-3 meters, and width - 4, 6, 8 or 10 m.
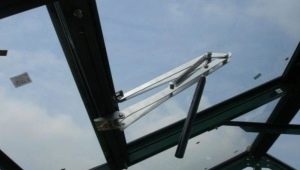
An arched greenhouse is rarely made higher than 2 meters 10 centimeters. As for the gable structures, there are no such restrictions, the main thing is not to violate the angle of inclination of 25-30 degrees. The dimensions of the doorway should be designed with dimensions that are convenient to use. Do not forget about the vents, especially for large-sized greenhouses, since it is in them that plants will need good ventilation.
At the end of the design it is necessary to come up with and draw on the drawing the connection of the profile material together, into a frame. After careful calculation of the required amount of material to the result obtained, it is worth adding ten percent for a possible marriage.

Foundation construction
Some people often think about the need for a foundation before building a greenhouse. The greenhouse structure is not heavy, therefore, no sagging of its own weight should arise.But a greenhouse that does not have a strong foundation can be blown away. Also, the functions of the foundation under the greenhouse include the protection of crops from drafts, freezing, attacks of rodents, various pests and parasites.
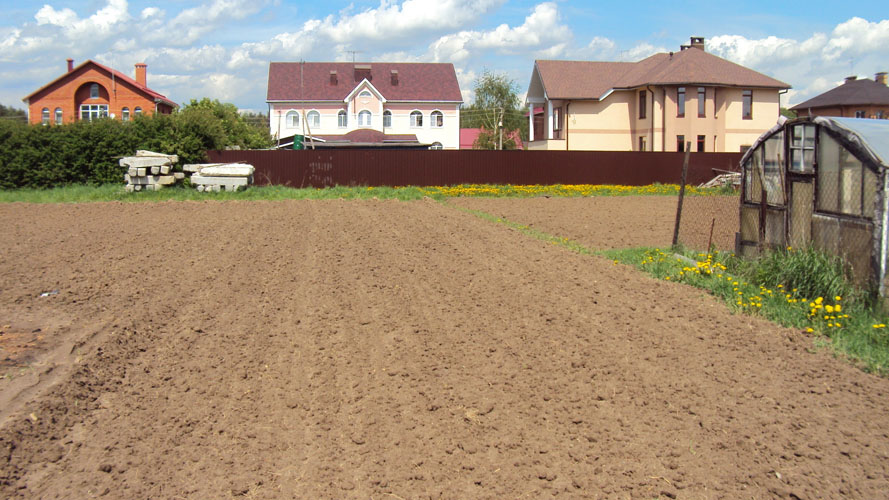
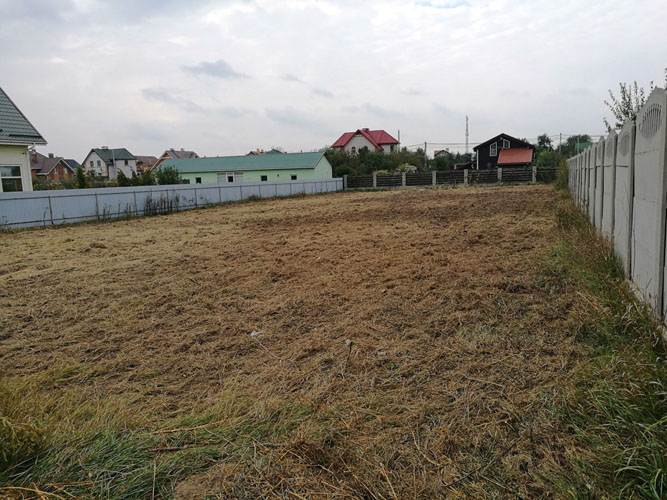
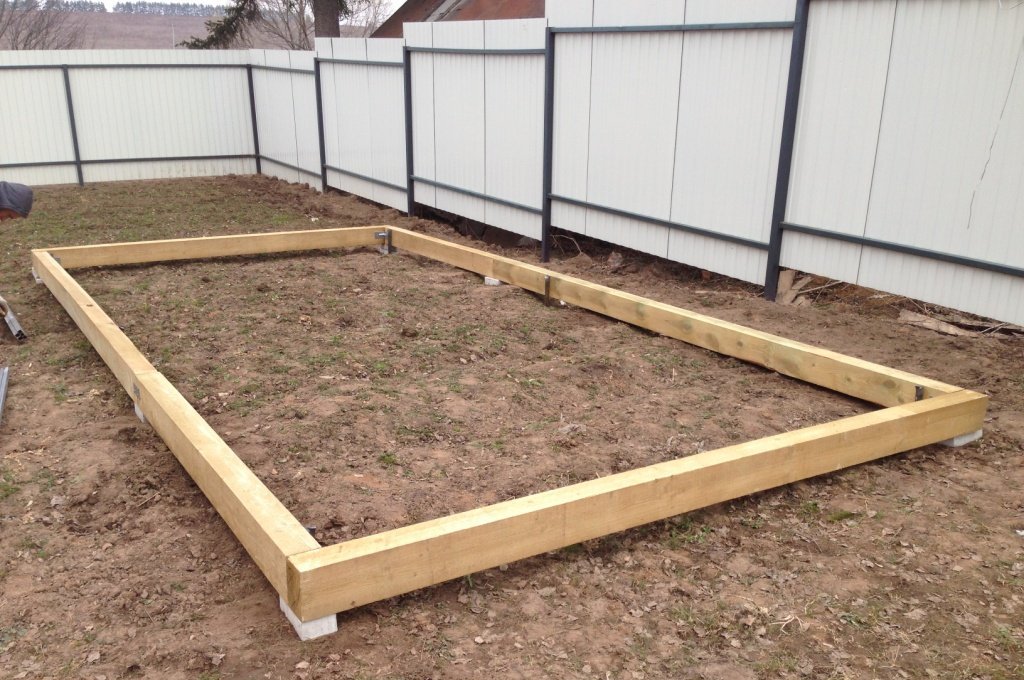
Choosing a place for construction, it is necessary to give preference to a flat plot without a slope, which has rich soil and there is no shade from buildings and fences. The construction, which consists of a timber, is the simplest and most accessible.
There are other options for creating the basis of a greenhouse, but they are expensive and complex in design, which is not considered the best option if you need to make a greenhouse yourself.
Stages of the construction of the foundation.
- Clearing the area under the future greenhouse from debris, stones, weeds.
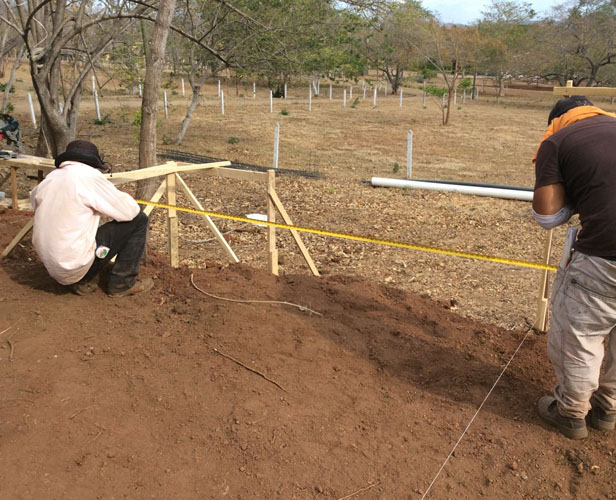
- Markup. In this process, you need to use pegs and reinforcement and thread tension between them.
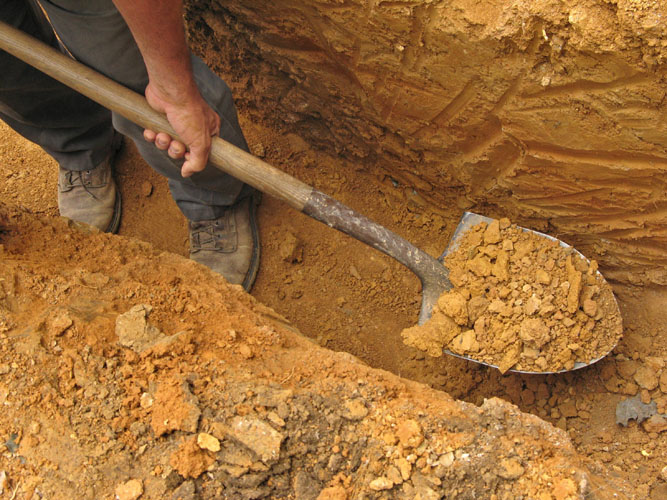
- Determination of soil condition. If the soil is characterized by hardness, it is not worth deepening the foundation of lumber material, as it may be necessary to trench trim.
- With good softness of the land along the greenhouse perimeter is to dig a trench, which coincides in width with the beam and has a depth equal to the shovel bayonet.
- Tamping of the trench bottom followed by backfilling with sand or gravel.At the same time the layer of the embankment should not be more than twenty percent of the dimple deepening.
- Measurement and cut bars in accordance with the size of the greenhouse. The best choice of material in this case will be larch, as it has resistance to decay and mold attack.
- Processing wood material using antiseptic. As an option, you can use copper sulphate, bitumen, machine oil.
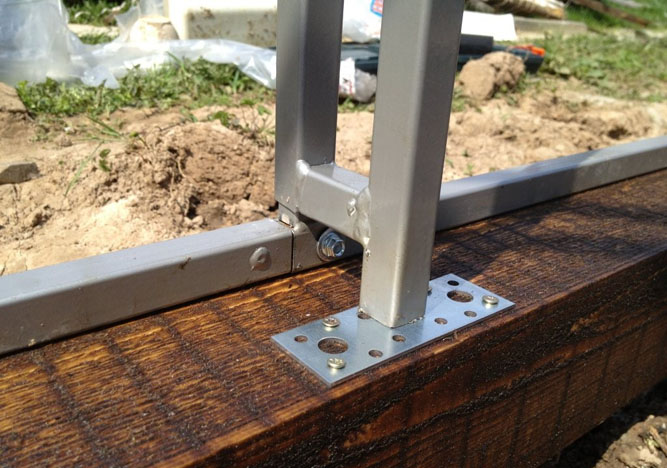
- Build timber in the form of a rectangular box. The connection can be done with dowels or long screws. Many builders prefer to use galvanized corners in their work.
- The transfer of timber construction in the trench, where it is laid and leveling. To this end, you can pour sand, small plates or soil.
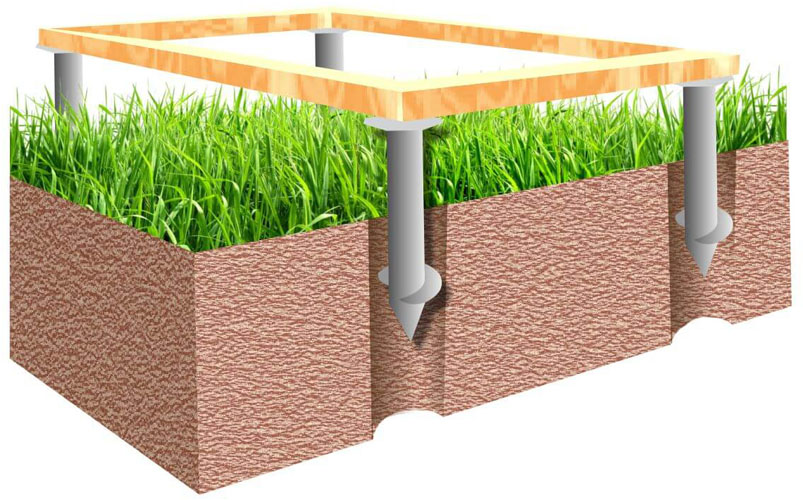
- Drilling holes in the corners of the through type and inserting reinforcing meter pins into them. Next, you need to drive the last into the soil to securely fix the foundation, which can carry a strong wind.
- Sleeping existing slots, which are located on the border between the trench and the foundation. For this purpose it is advisable to use sand, gravel or earth.
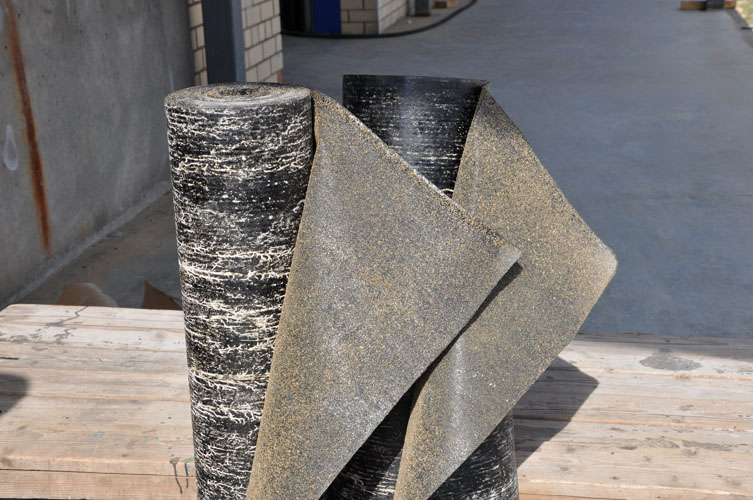
- In order to provide a wooden base with good security, it is necessary to cover it with a ruberoid layer or some other material for waterproofing.

If the area where the greenhouse is planned to be built is on a marshy ground or surface with significant irregularities, then the use of a pile foundation will be advisable. It is hammered or screwed into the ground lower than the level to which the soil freezes.
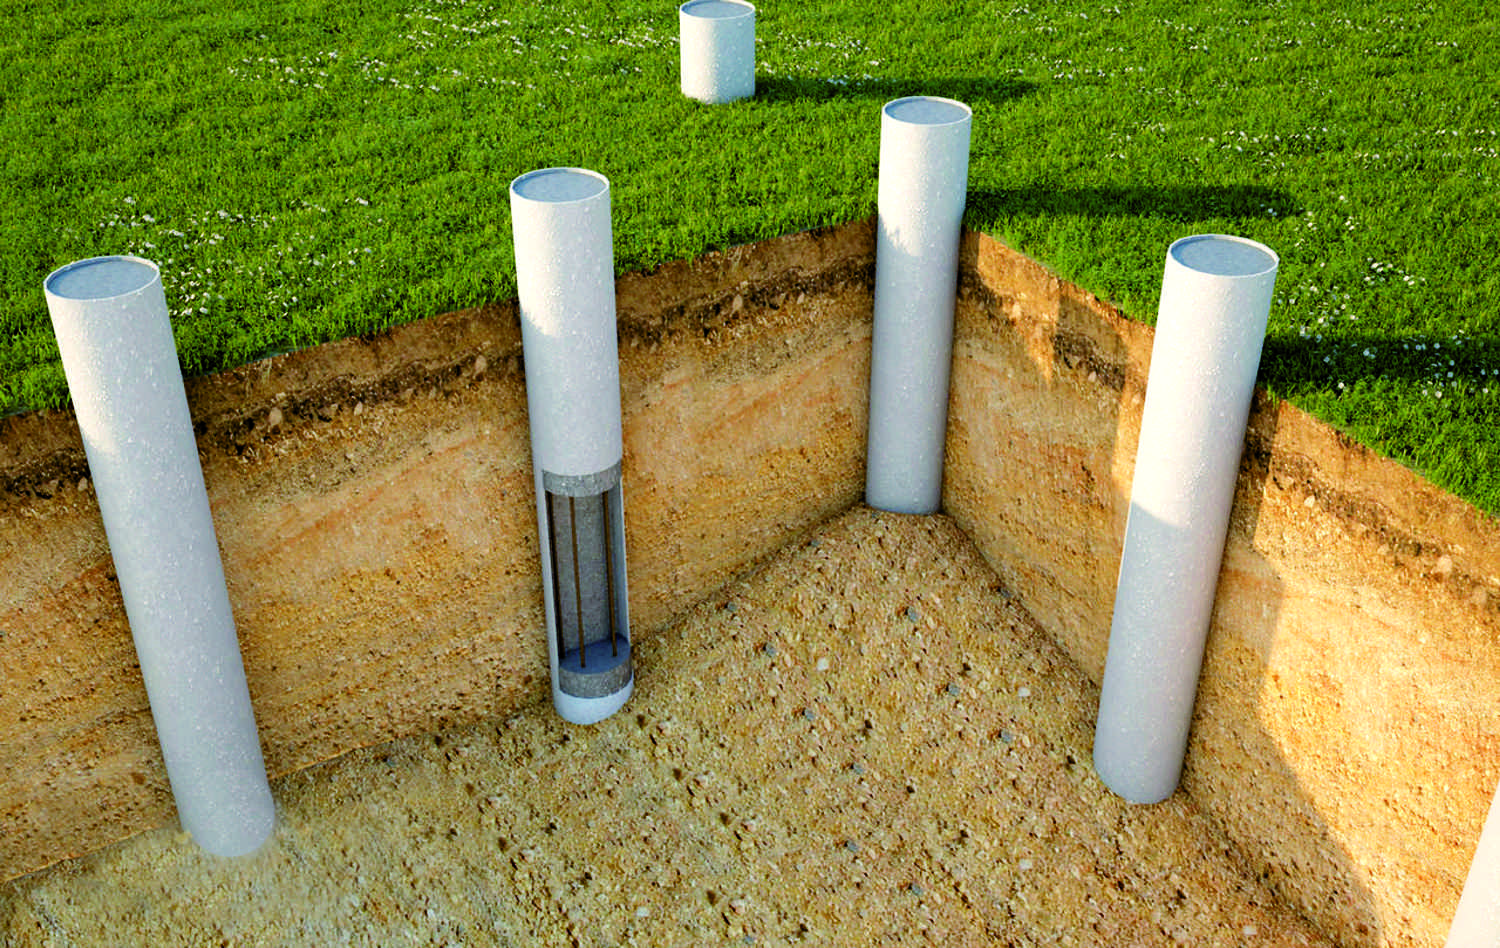
On the territory where constant dampness is observed, the greenhouse from a metal profile can be installed on the foundation of the pillars. To do this, dig holes, mount a pillow, put ruberoid pillars, into which the valve is immersed, and everything is poured with concrete.
Also, farmers often use metal and asbestos pipes, brick or stone laying.
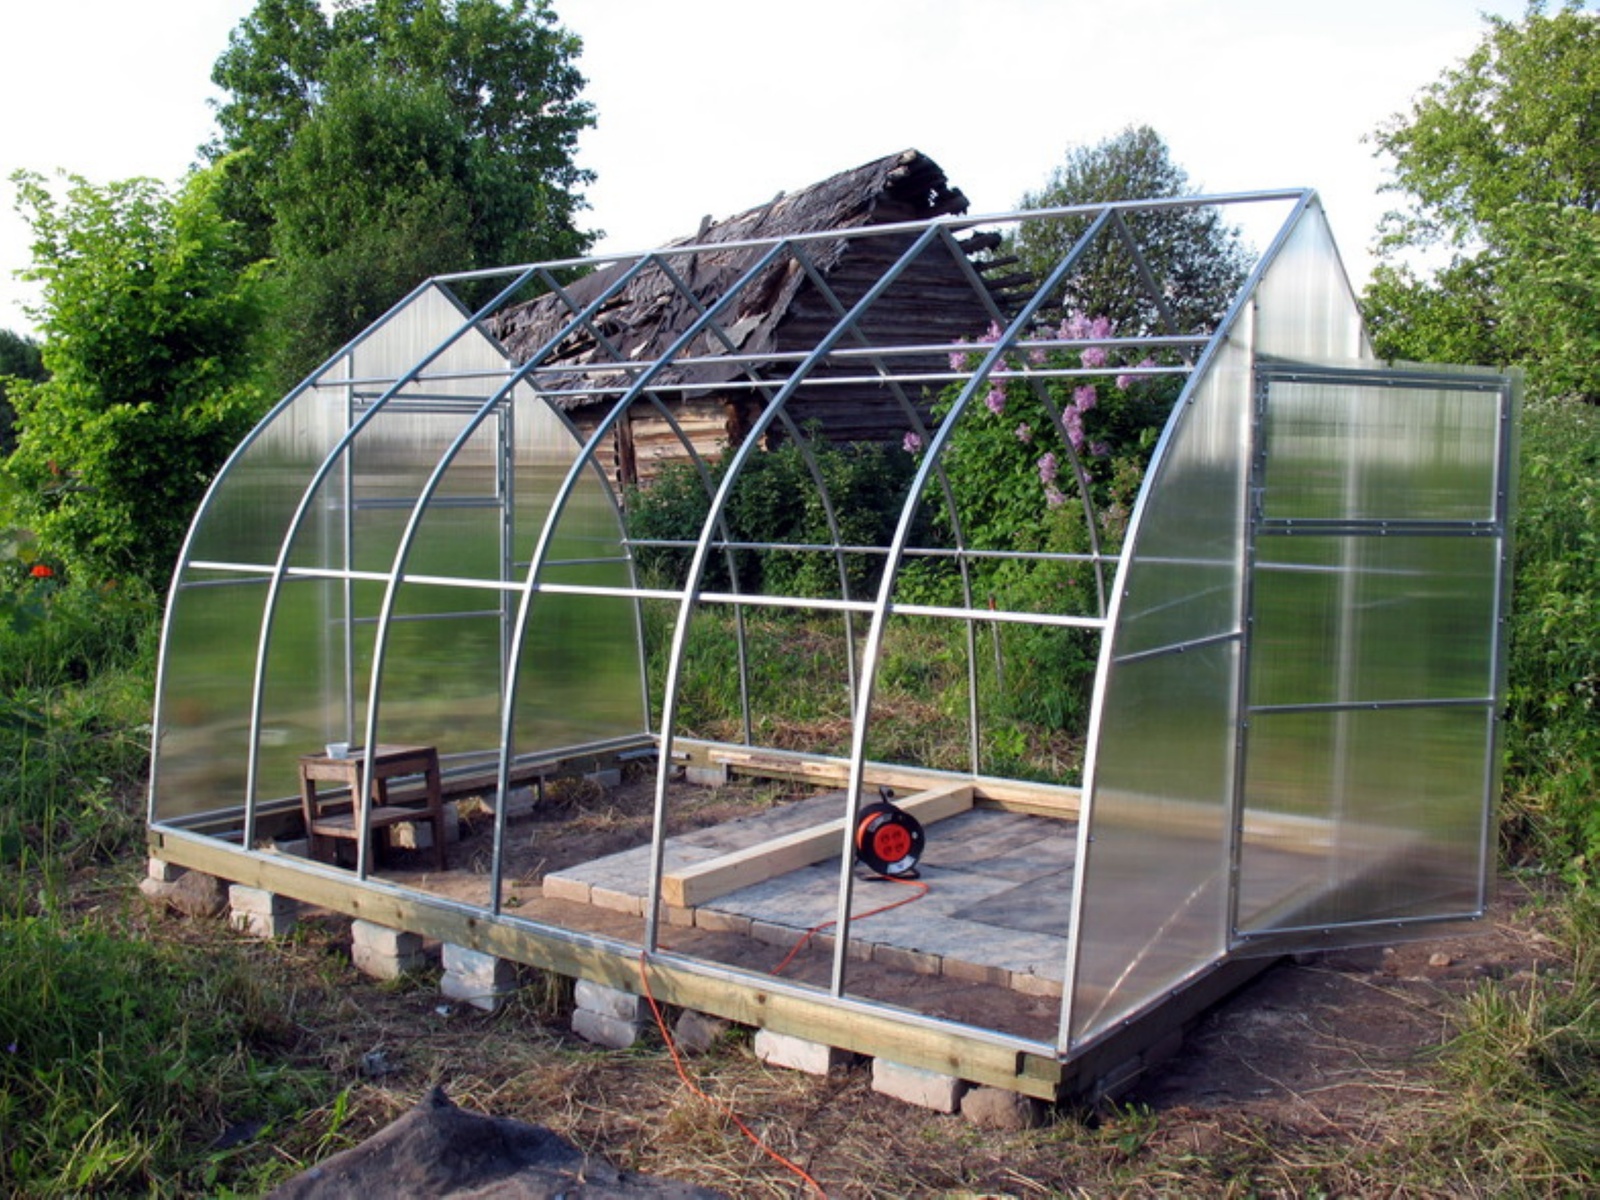
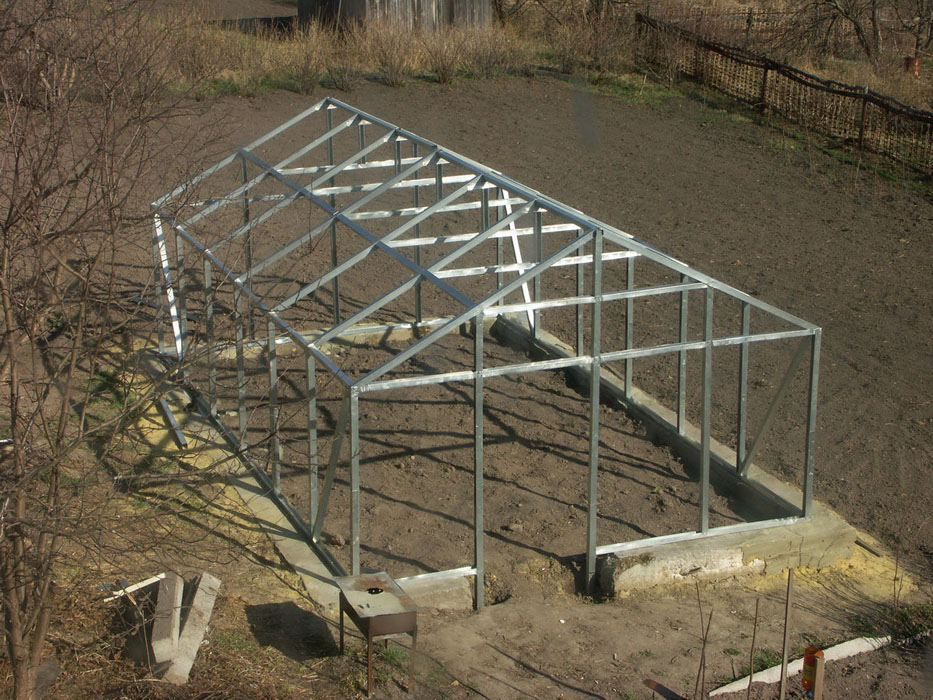
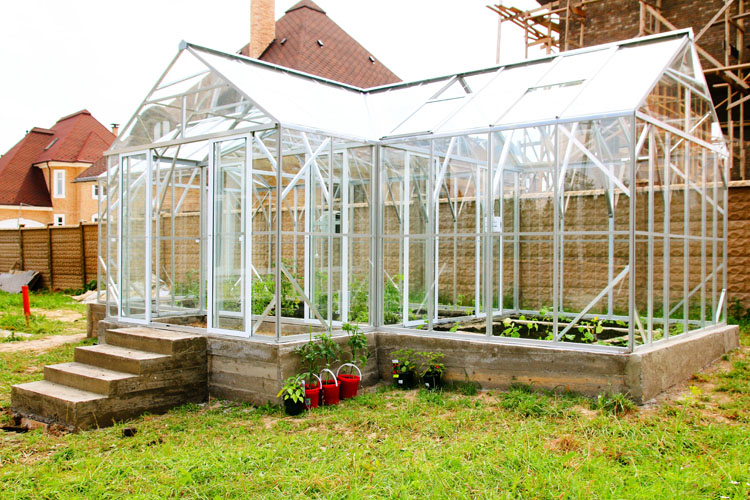
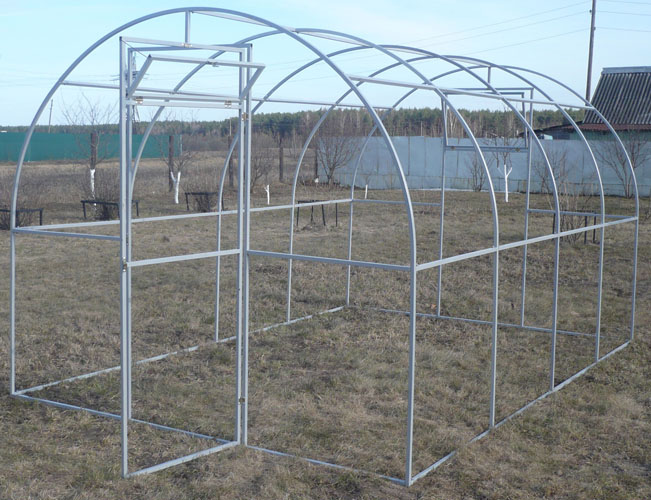
Frame assembly and trim
The most popular types of greenhouses that people build on their own, today are a gable profile construction for drywall, as well as arch type from the V-shaped profile.
Gable greenhouse consists of the following parts:
- gable of the main and secondary type;
- side walls;
- the roofs.
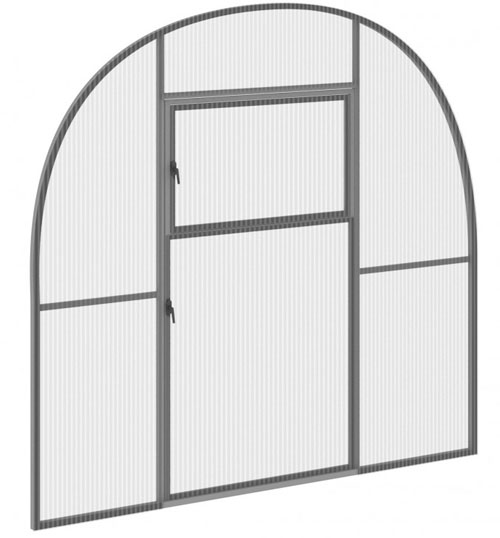
On one or both gables there must be a doorway that is assembled separately. Its assembly includes the base, vertical pillars, upper horizontal beam, roof and strut.
Step by step assembly.
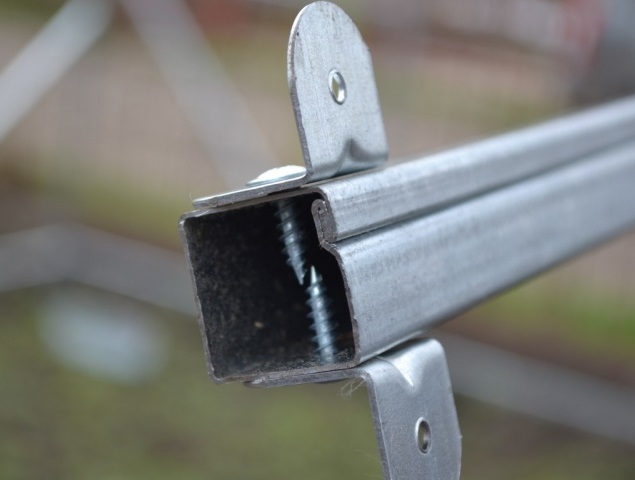
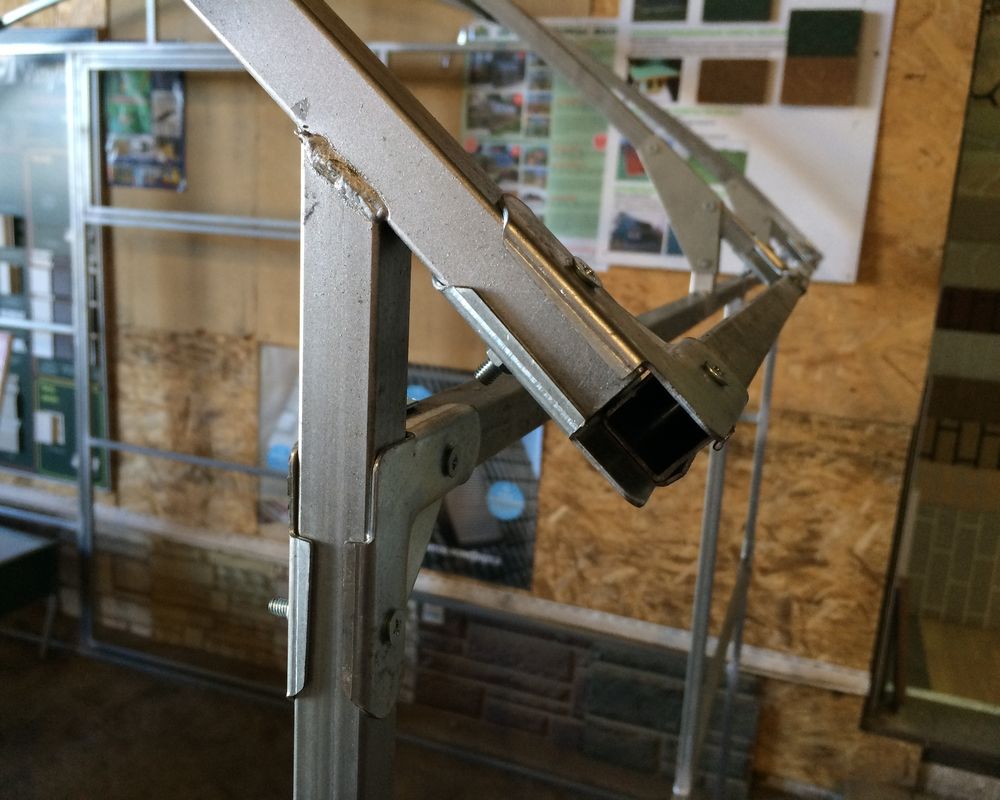
- The profile that will serve as the foundation of the structure is measured and cut to the required size. A UD-profile or ceiling option is considered suitable for such work, on which the ends of the bends are bent at the points of entry of the vertical posts.
- In the base material it is required to make holes through which it will be fixed to the foundation. The distance between the holes should be from 75 to 150 centimeters.
- It is required to insert the extreme vertical posts with shelves left and right. Fasten using screws for each joint.
- In a similar way, it is worthwhile to insert vertical uprights. Using a horizontal jumper, it will be necessary to form a frame for the door. The fastening of the latter can be carried out by several methods: a T-shaped connector or by cutting the edges at the profile jumper, as well as fixation on the resulting petal.
- A surface horizontal beam is installed from the same profile type that was used for work with the base.
- The rafters of the profiles are attached with a gable wall, as well as to each other by cutting the sides and the formation of petals.
- Gable rafters should be provided with fights and stitches to make the design stronger.
According to the above scheme, the construction of the second gable should be carried out. The next stage of the work will be the creation of side walls.
Step by step instruction work.
- It is necessary to measure and cut the material, drilling holes in it that will be used for fixing to the base. Along the edges should be left petals, with the use of which the side walls will be connected with gables.
- You will need to prepare vertical racks with the desired height, connecting them with each other using self-tapping screws. The distance from the rack to the rack should be from half to one meter. The shorter it is, the higher the strength of the structure.
- On top of the racks you need to install a horizontal profile. The connection should be done with screws.
- Two gables and two side walls should be mounted on the foundation, fixing with long screws or anchor bolts.
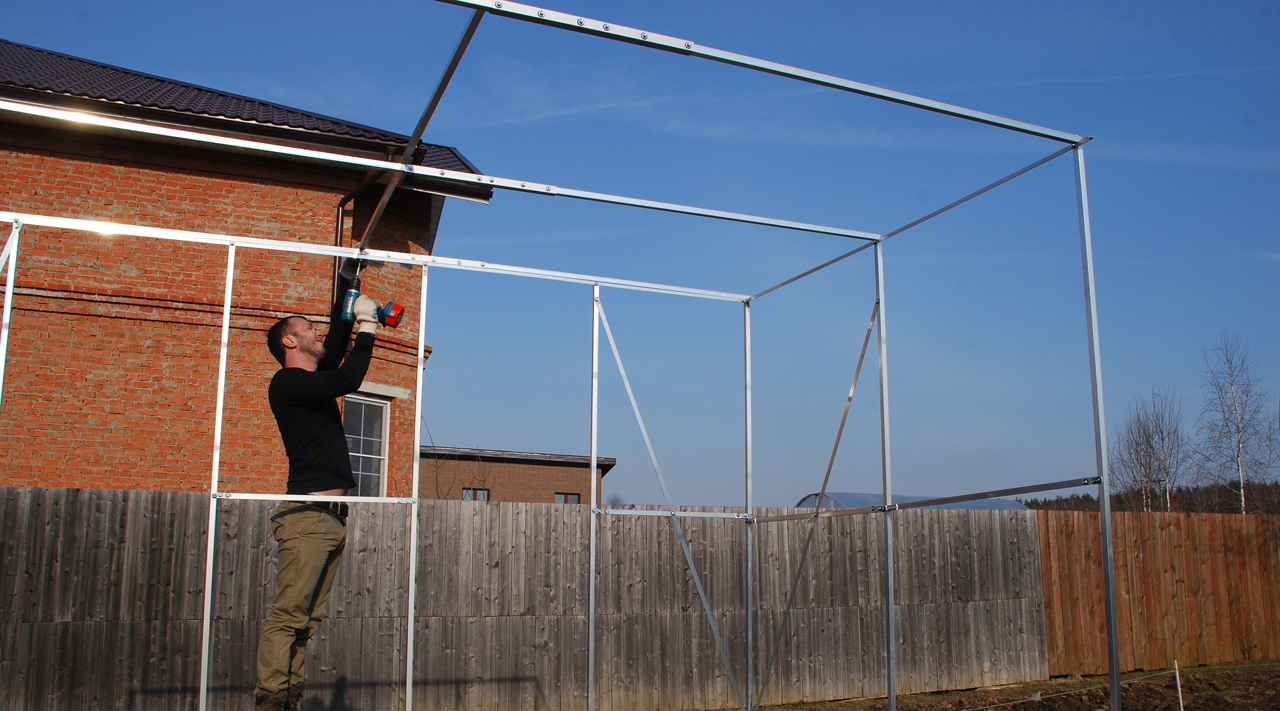
The final stage in the formation of the frame will be the arrangement of the roof.
The principle of its collection is similar to the pediment. The only thing that rafters should be mounted on the upper horizontal beams, using the petals.
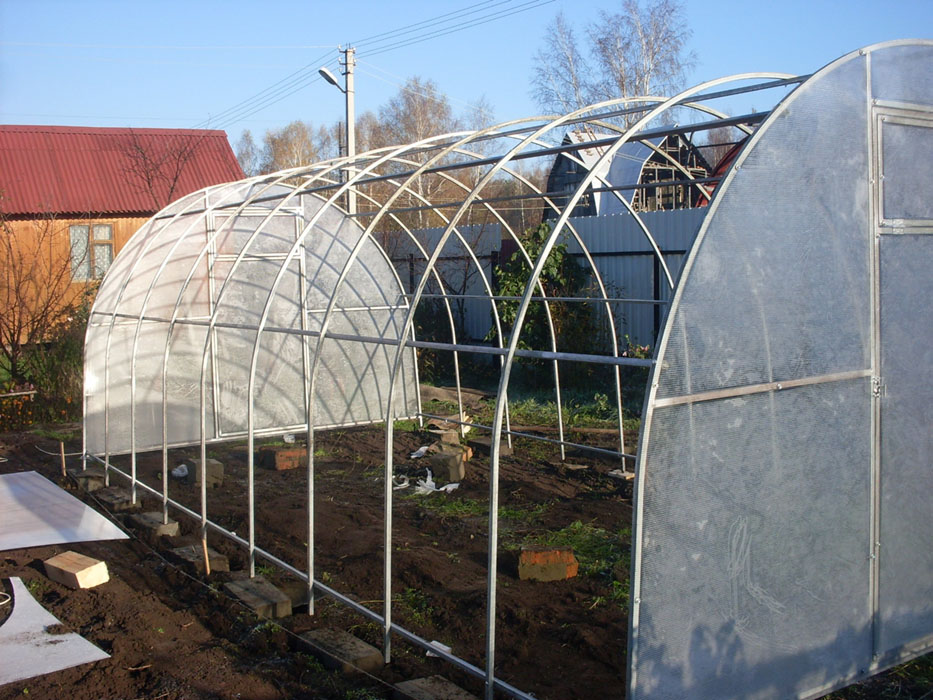
The construction market is filled with arched greenhouses from V-profiles. But if the owner has the desire, tools, materials and some skills, then such a greenhouse can be built on its own.
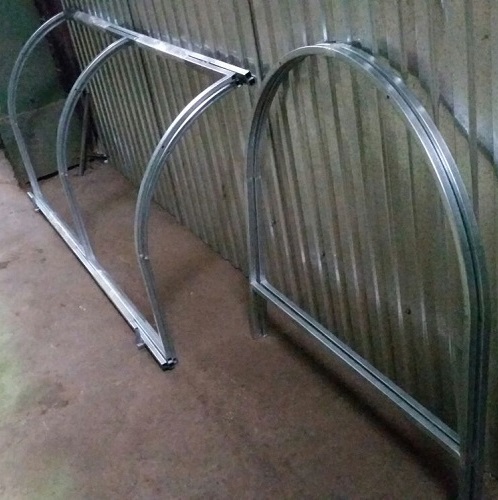
The double curved frame can be welded or built with gables.
- Cut profiles that will become part of an arched greenhouse. The optimal amount is five. In order for each of them to become bent, it is worth using a pipe bender.
- Drill holes in the fasteners. So that the elements are not exposed to corrosion, they can be treated using cold galvanizing.
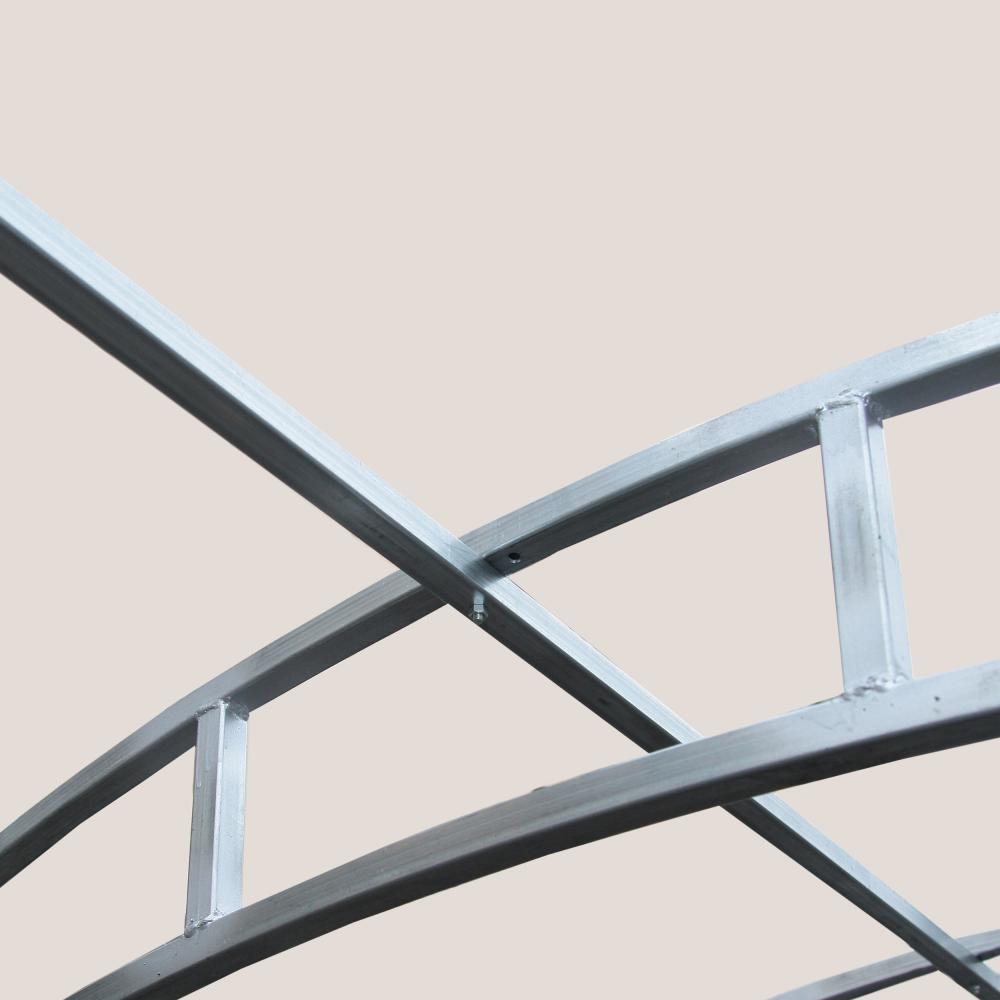
- It is possible to connect the system of arcs into a single whole, which has a semi-squared type, using the nut and bolt in the required quantity.
- Connect each strut and crossbar to the arch.
- With the use of corners and triangular plates on the gables, vertical stands, a frame, and also oblique cross-pieces are mounted. In addition, it is worthwhile in advance to fix the corners for horizontal greenhouse screeds.
- On the gables it is necessary to fix the horizontal ties of the lateral and upper type.
- Intermediate arches must be attached to the screeds using bolts.
- It is required to repeat the previous two stages several times in order to form a one-piece greenhouse frame.
- On the reverse side it is required to assemble a second gable, in which there will be no frame under the door.
- The frame, which turned out, must be attached to the foundation with corners and screws. After checking the reliability of each of the mounts.
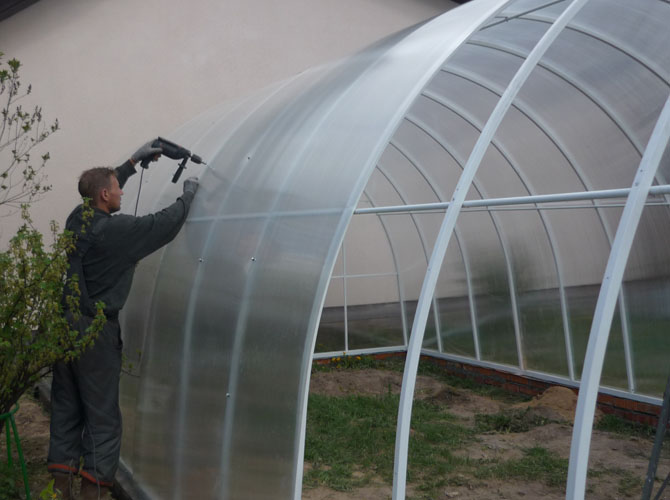
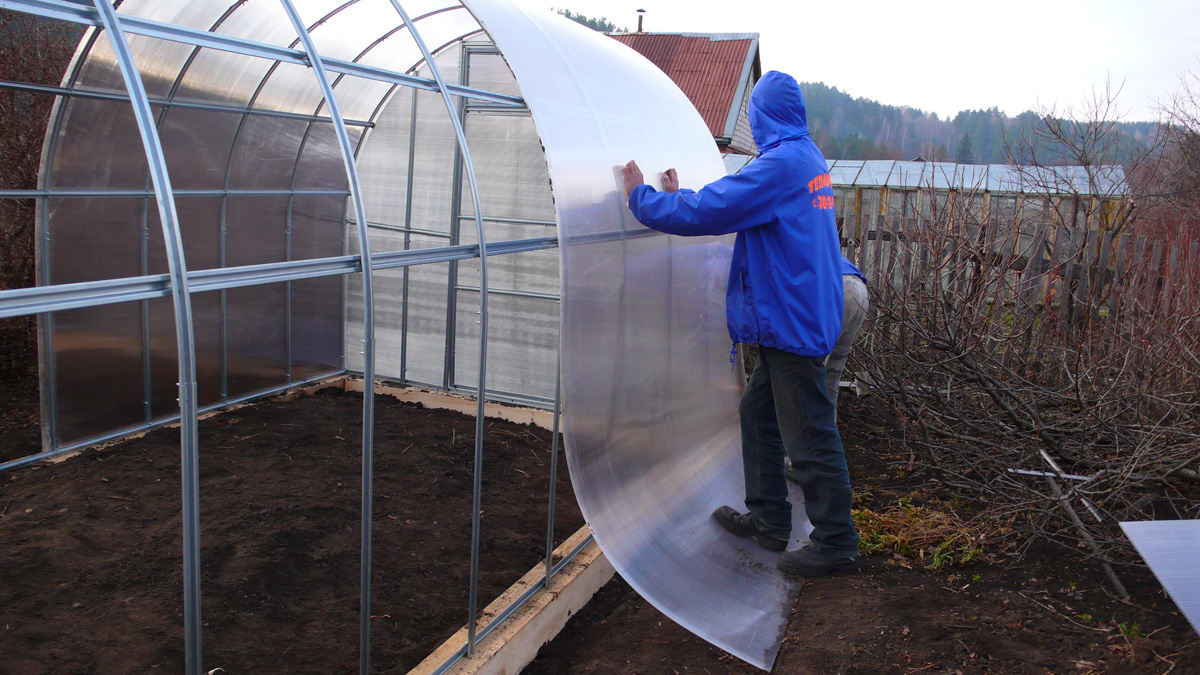
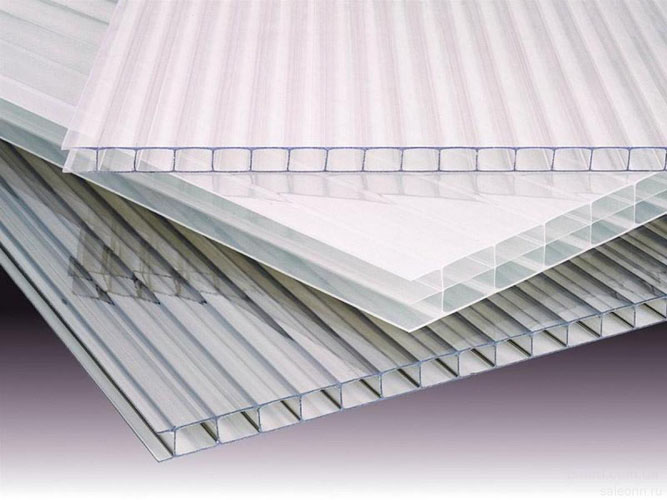
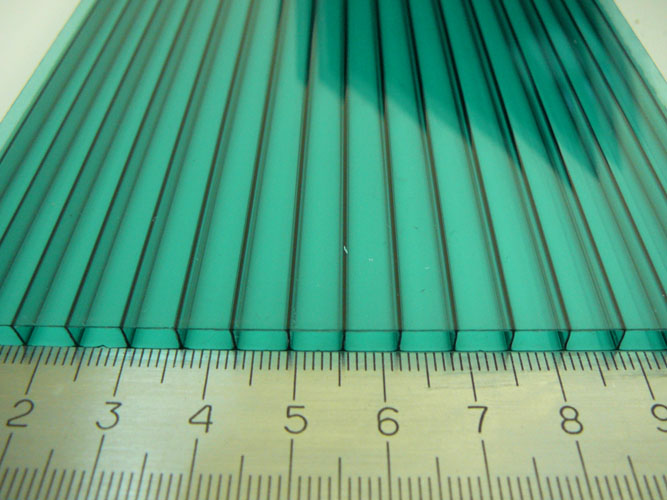
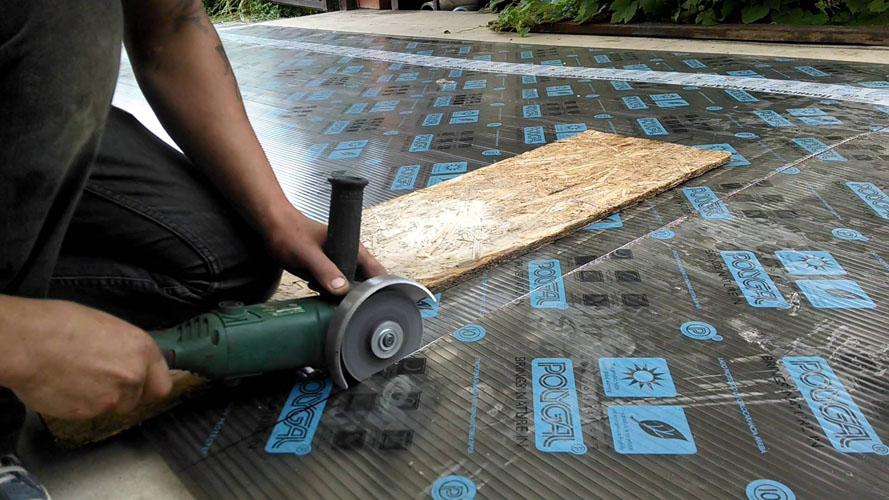
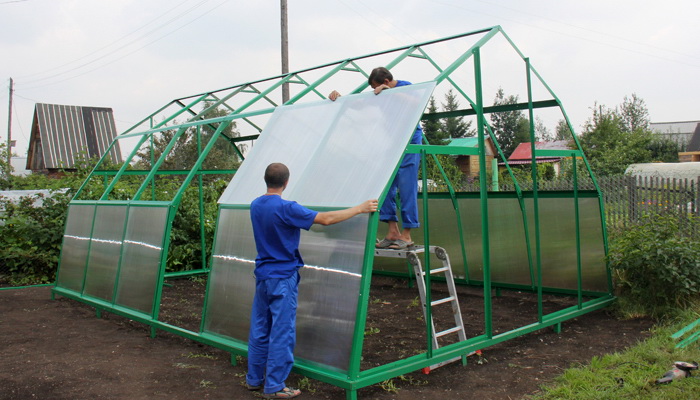
The most recent stage on the way to the finished greenhouse will be its trim. Often, farmers use for this purpose polycarbonate with a thickness of 4 millimeters.
The stages of plating.
- Unpacking the material, as well as determining the side of the stabilizing coating.
- Cutting the material into two halves.
- Removing the protective film type and sizing each end, using a perforated tape from the bottom, and at the top - material for sealing.
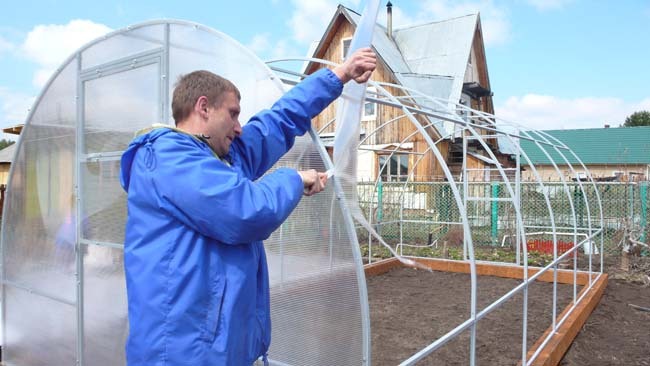
- Applying one part of the sheet, which is cut to the gable, so that the stabilizing coating is on the outside.
- Fastening polycarbonate sheets on the gable, using roofing screws and plastic heat washers.
- Trimming extra items from materials. Cutting planes under the doors and windows.
- The repetition of the entire above scheme for the second gable.
- Laying sheets on the roof, walls of the greenhouse. Mounting should be carried out with a stabilizing layer upwards. Sheets next door fold overlap.

In addition to polycarbonate, gardeners often use a film of polyethylene to cover the greenhouse.
This material is attached using slats. They need to be screwed using screws or using hoops. Greenhouses from a double-glazed window are considered to be reliable structures nowadays, therefore, with the availability of funds, it is possible to build such a structure.
From the foregoing it follows that with a great desire and minimal cost to any owner, it is within the power of their own to build a greenhouse from metal profiles. As a result of hard work, you can get a reliable, lightweight, durable, durable construction, which is characterized by high thermal insulation characteristics and resistance to temperature changes.
Review the greenhouse, made by hand from metal and polycarbonate, see the following video.