Production options for polycarbonate greenhouses

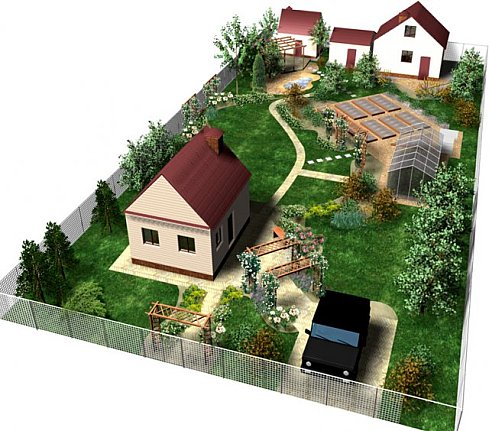
Nowadays, many gardeners install greenhouses on their plots, which allow access to fresh vegetables and fruits all year round and not depend on natural conditions. During the construction of greenhouses using various materials, many of which appeared relatively recently. And today it will be a question of such a decision, which is now being actively used to create such buildings - on polycarbonate.
Features and types of material
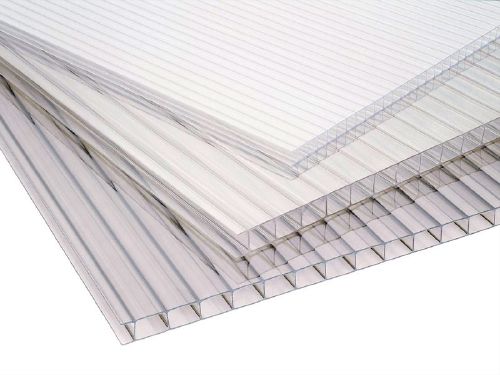
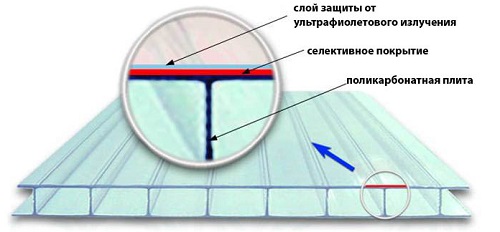
Polycarbonate is a hard and fairly light plastic, consisting of several layers and characterized by a cellular structure. The material is usually supplied in sheets of different thickness.Its distinguishing feature is its excellent resistance to large temperature fluctuations, as well as high transparency, which reaches 90 percent. Due to the presence of internal ribs, the material is durable and tough, but at the same time it is easy to bend it.
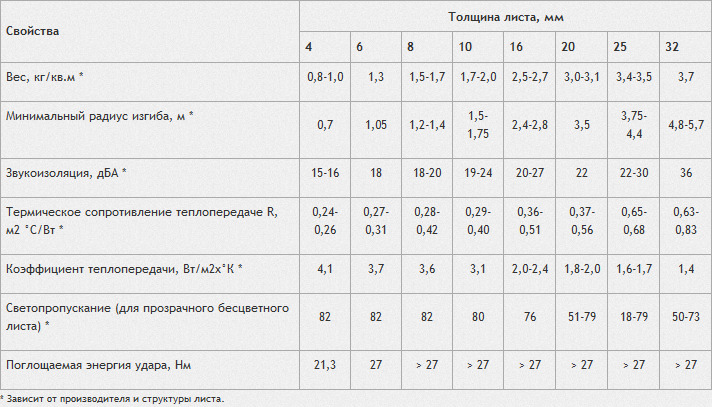
The presence of the cellular structure makes it possible to create an air gap in the polycarbonate sheet, which will be the best heat insulator. If polycarbonate will be used to create a greenhouse, it is better to buy sheets with a thickness of six to eight millimeters. The greater the thickness, the higher the strength, but the ability to transmit light will begin to decline. But this does not mean that you need to buy too thin polycarbonate. Such solutions are usually used for the installation of windows or some kind of advertising design.
Other criteria to pay attention to are the mass of the material and its density. Cheap lightweight version will have a small strength and is unlikely to last a long time. Sheets with a thickness of seven millimeters are usually used for winter as well as industrial greenhouses.From the above, it is clear that the light transmittance of the panels, which are 10-25 mm thick, will be much lower, which is why they can be used except for glazing of buildings.
Polycarbonate can be monolithic and honeycomb. The latter is used to create various buildings, including greenhouses. Honeycombs inside the structure allow for low thermal conductivity. Depending on the category of material, the characteristics of its different types may differ, but their advantages will be the same.
If we talk about the merits, it should be called:
- good refractory properties, heat resistance, flexibility;
- mechanical stability and strength;
- even light scattering and transparency;
- durability and pleasant appearance;
- easy installation, providing good conditions for plants.
Given all of the above, polycarbonate would be a great solution for building greenhouses of various sizes. By the way, the constructional shape can be any due to the fact that the material is quite flexible and is simply fixed.
However, this material has certain disadvantages.It should be said that one of them is the need to follow the installation rules as accurately as possible. The end parts of the sheets always perfectly protect against the ingestion of bacteria, moisture and insects. In case of violation of the installation technology and getting them inside, the material may deteriorate.
To fix these sheets are usually used screws. During screwing in, the clamping force must be taken into account in order not to damage the fastening element. Then a hole may appear through which moisture will begin to leak, and the material will soon become ineffective. To avoid deformation of the outer layer of material protection, metal objects and abrasive-based products should not be applied to it.
In general, we can say that polycarbonate is a good solution for a greenhouse, which still requires maintenance.
Pros and cons of design
To begin, consider dignity constructions.
- Speaking about the advantages of a polycarbonate greenhouse, it is necessary to name strength first of all. It is known that polycarbonate is stronger than glass and polyethylene and better tolerates physical impact.
- It is less susceptible to ultraviolet exposure, which gives plants the opportunity to better irradiate them. The greenhouse has a higher thermal insulation quality due to the fact that polycarbonate is a material of two layers.
- The material is also quite resistant to temperature. Polycarbonate design will easily withstand not only extreme heat, but also anomalous cold.
- The material is simply drilled, making it convenient to work with.
- The advantage of this design will be the fact that, unlike the glass analogue, the polycarbonate greenhouse can dissipate ultraviolet light, which reduces the likelihood of the plants burning out at high temperatures.
- Another advantage of this design is its cost. Typically, the construction of polycarbonate greenhouses is much cheaper than glass counterparts.
- This design will provide the highest possible illumination and it can be operated year-round. In addition, it is the most fireproof.
Among the disadvantages of such greenhouses are the following points.
- Low resistance to abrasives.The material is simply scratched, although minor damage to the sheets is not noticeable.
- The ability to change the linear dimensions with temperature fluctuations. The material may expand or contract, which may cause difficulties during the installation of the polycarbonate greenhouse.
- The probability of deformation under ultraviolet exposure. Usually this problem is solved using a special film to protect the polycarbonate.
- Low durability of the material. If there is a lot of sunshine, then polycarbonate just starts to burn out, which can cause rapid wear and weaken the reliability of the greenhouse design.
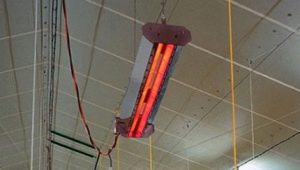
- Difficulties with additional heating greenhouses. Polycarbonate melts easily, making installation of furnace heating difficult.
- Quality sheets. Today on the market you can find a large number of low-quality polycarbonate products, which can cause serious problems in the future.
As you can see, this design has both disadvantages and advantages. But the latter are significantly larger, and a number of drawbacks are easily eliminated.
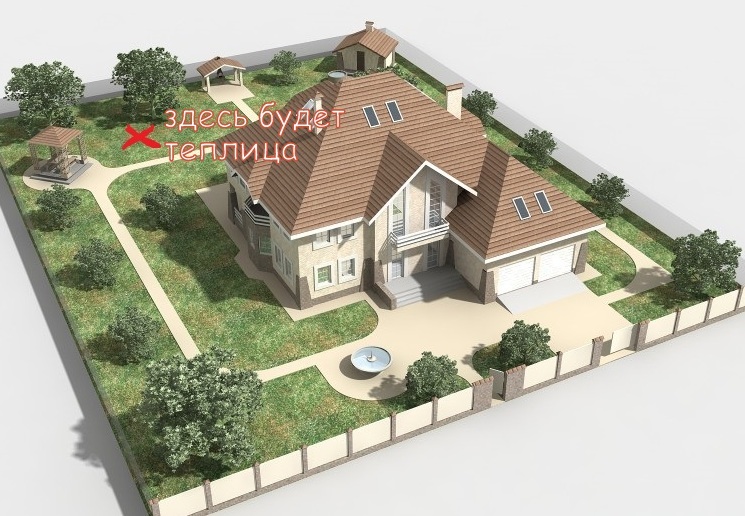
Location
There are a number of important points which should be taken into account when it comes to choosing a place for the installation of the greenhouse:
- side of the world;
- soil composition;
- landscape features.
Now tell a little more about all the factors. Speaking about landscape features, one should take into account the dynamics of the state of the land and the nature of the terrain. That is, if the greenhouse is located on a slope, then it will not be flooded with rain or snow. Pay attention to the level of groundwater. If it is above 120 centimeters, the rising water can wet the roots of the plants, and they will simply rot.
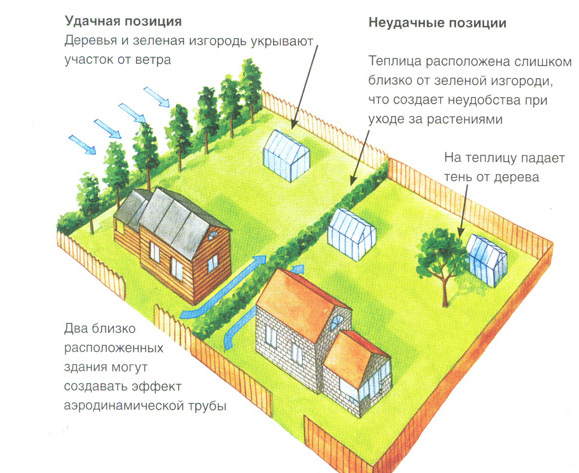

In addition, before you make a greenhouse, it should be understood that in the right place there must be a fertile layer. The ground should be dry and level. If in the place where you plan to install a greenhouse, dig a small hole and find clay there, then it is better not to build a structure here. Clay usually retains moisture, which means that after watering, water can stand on the surface for quite some time.
The best type of soil for the construction of the greenhouse will be sandy soil. If there is no sand, then you will have to dig a trench, put in a layer of sand gravel and a pillow of sand, then cover everything with a layer of fertile soil.
Another important factor is the choice of the light side.The correct location of this criterion can contribute to significant money savings. If the greenhouse receives a sufficient amount of ultraviolet light, then there will be no need to create an artificial lighting system. And the sunlight will provide plants with heat in the right amount.
There are two excellent ways to install a polycarbonate greenhouse relative to the light sides:
- from North to South;
- from east to west.
The second option can be called the most effective, because the plants will then receive light all day. But if the construction is square, then all these moments do not concern it. The definition of light sides is required for greenhouses, the dimensions of which are three by six meters, three by eight and more. Square option can be set as you want.
The location of the building with respect to trees and structures of economic orientation also plays a significant role. The shadow of various objects should not fall on the greenhouse. If you install such a building near the tree, then foliage will begin to accumulate on the roof, which will worsen the penetration of light from the sun into the building.That is, it is necessary to constantly check whether the roof is clean.
Project
Before the construction of a polycarbonate greenhouse, it is necessary to calculate everything to the smallest detail. It is necessary to make a project and drawings. Any construction begins with this stage. There is a considerable amount of both individual solutions and typical ones. A very important point is the choice of material for the frame. Now they often make the basis of plastic tubes. Although the wooden frame is still very popular. About the nuances of the choice of material in more detail below.
But the most important thing to start with is the distribution of crops. It is necessary to decide which greenhouse will be in shape and frame solution.
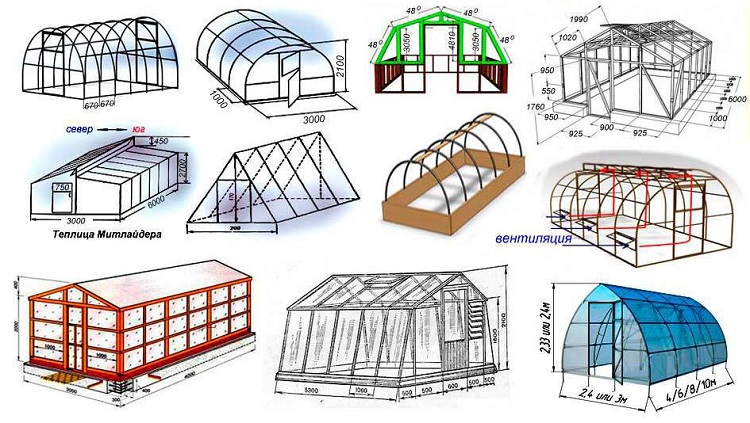
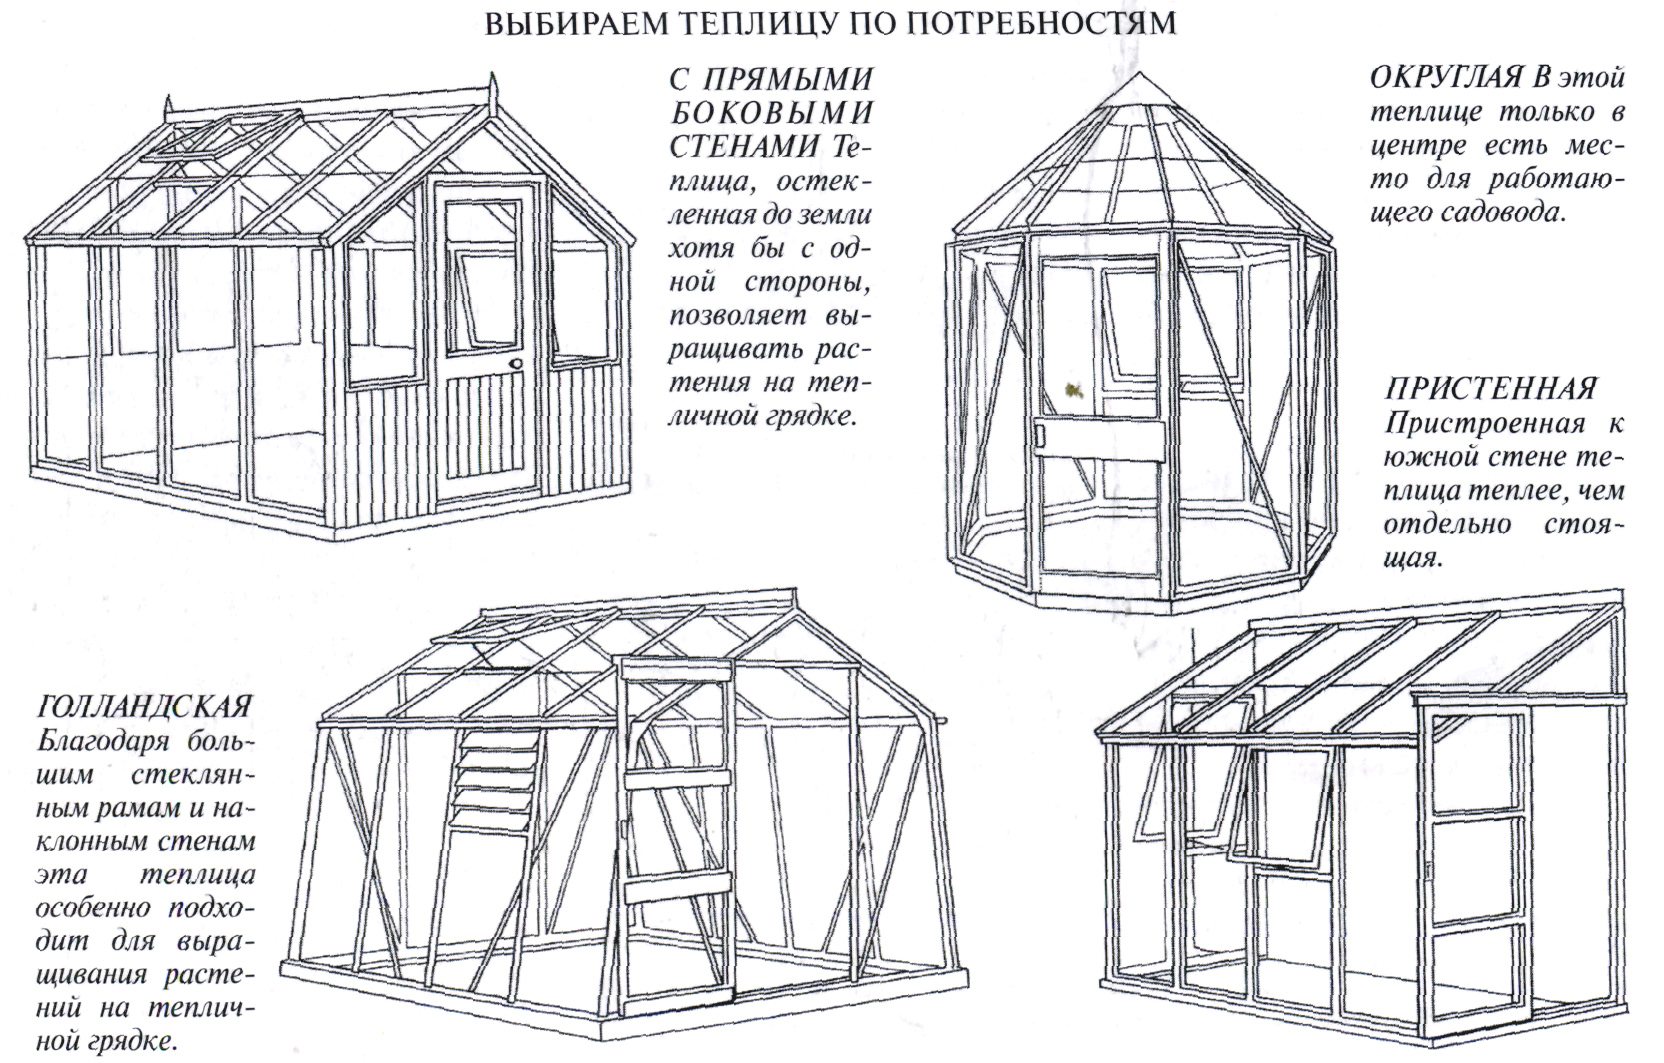
If we talk about the configuration, the polycarbonate greenhouses can be:
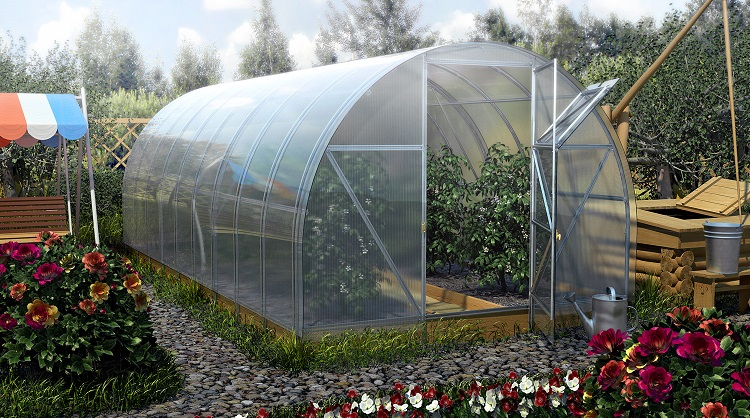
- with a lean-to roof of a semicircular shape (the most popular option);
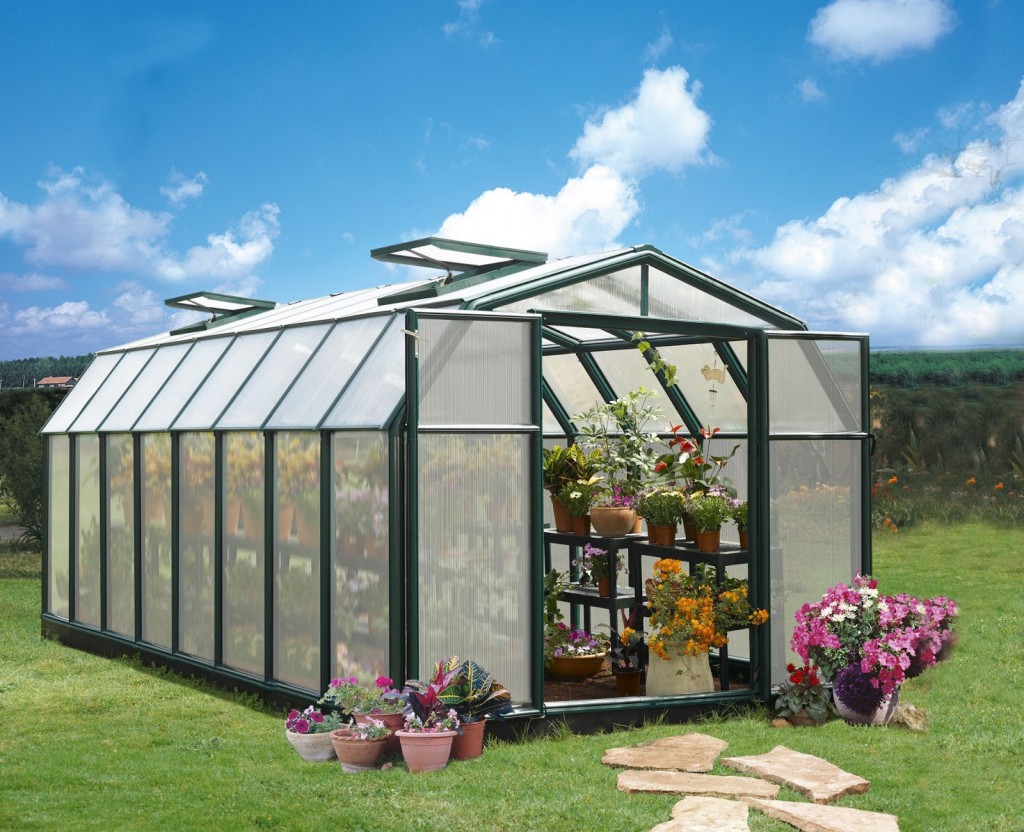
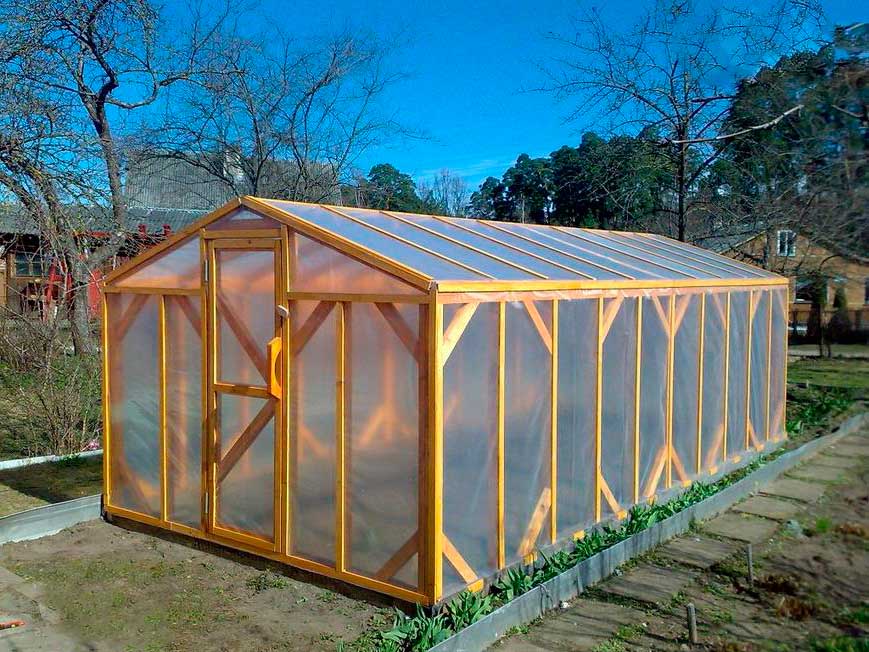
- with a double-slope roof: as a tent or a house.
Which option to give preference? It all depends on human needs, the category of plants grown and finances.
The project itself requires a certain sequence and consideration of the following nuances.
- Calculation of the structural base, where the frame and the greenhouse cover are indicated.It's about polycarbonate.
- The choice of location for the greenhouse, as already mentioned above.
- The scheme for calculating the loads that will be in future construction.
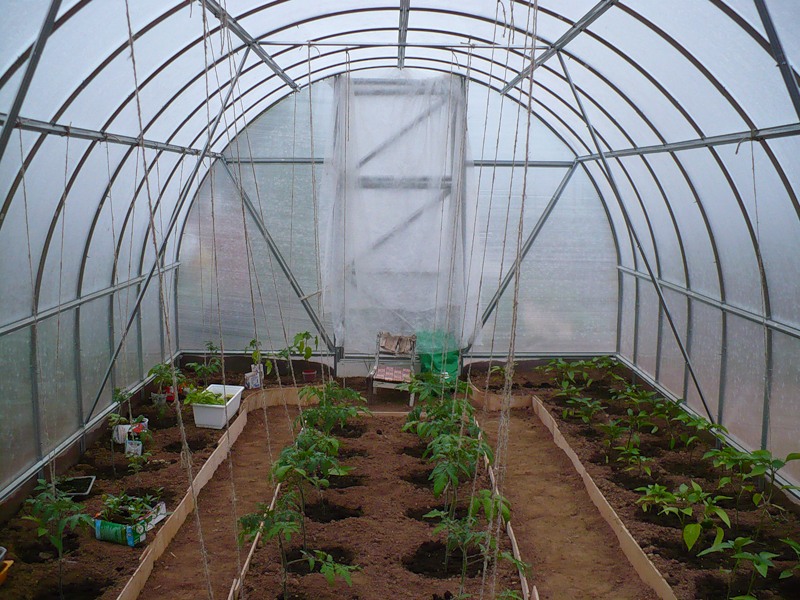
- Calculation of the distance between the beds.
- The calculation of the required number of shutters, doors, windows, etc. Even if there is a window leaf in the building, this should also be reflected in the project.

You can make a plan for the future polycarbonate greenhouse yourself, but you should take into account all possible moments as much as possible. For example, a wooden greenhouse may turn out to be slightly larger than the planned one, since wood is afraid of water, which will be much in the greenhouse. If a winter greenhouse is being made, the effect of low temperatures on the tree should also be taken into account.
But it is better, in general, to abandon the use of wooden frames in favor of PVC pipes. They will cost more, but their lifespan will be significantly longer than that of a tree. Another important point: if you plan to build a greenhouse of a seasonal type, then the scheme should provide for the possibility of its quick disassembly.
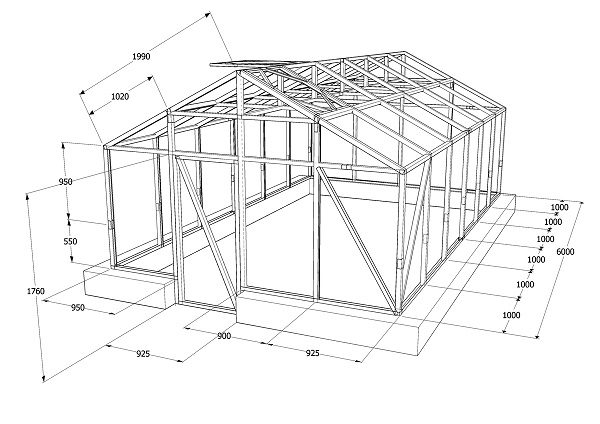
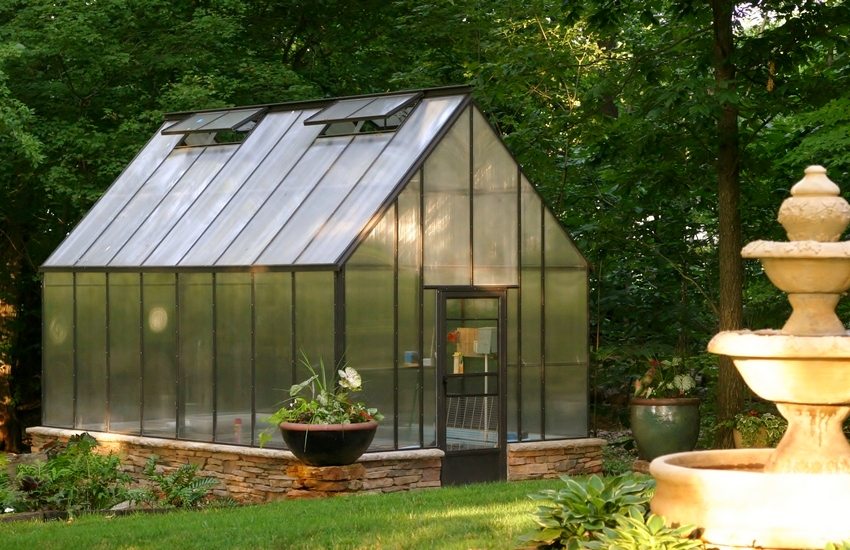
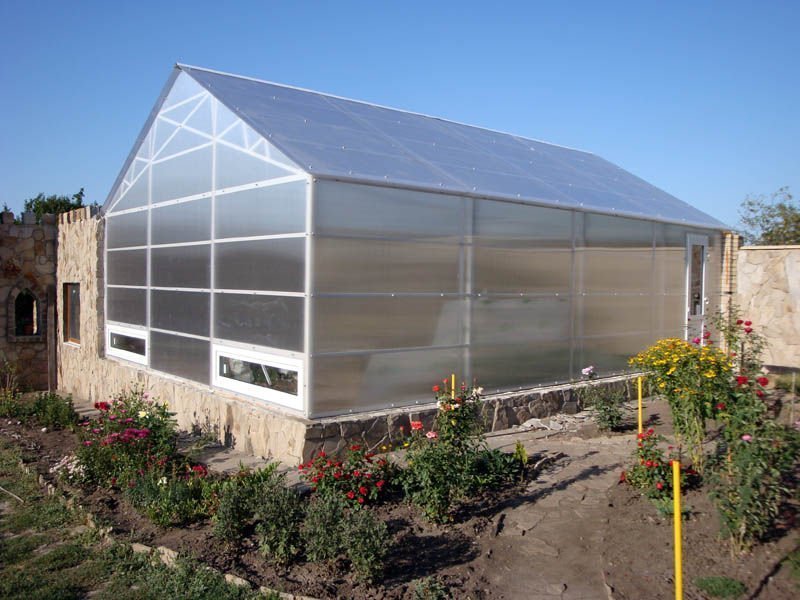
Forms and sizes: how to choose?
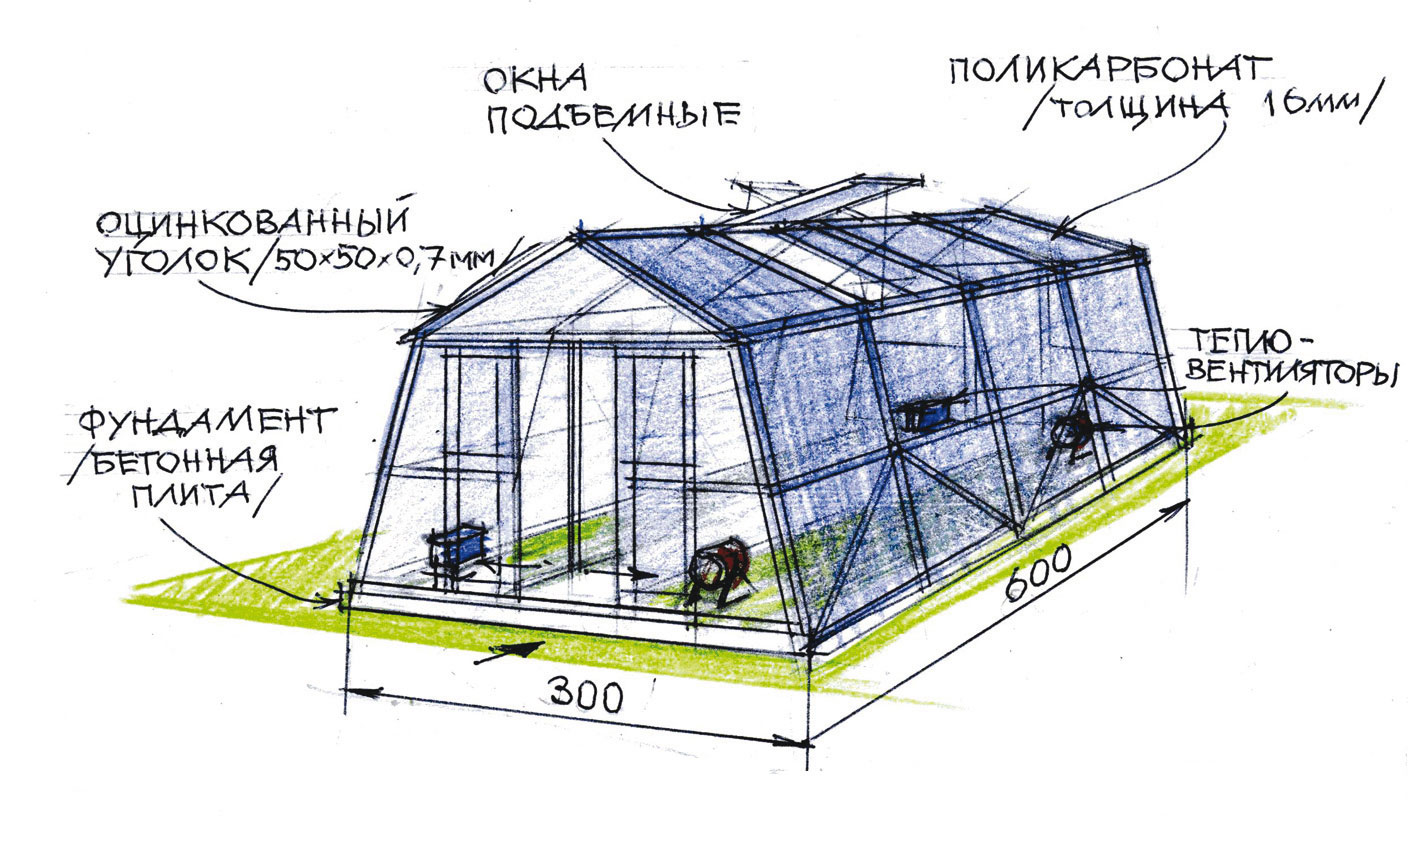
In the opinion of the majority of summer residents, it is best to create a greenhouse that is made of large polycarbonate of cellular type. For any design, the length, width and height of the building are important.
In determining these parameters, the following points should be taken into account.
- Width. This parameter will determine how comfortable the plants will be in the greenhouse, as well as how comfortable it will be to the gardener to do all the necessary work. In a wide building it is convenient to work and the risk of damaging the plants will be minimal. Usually, to determine the parameter, it is based on the fact that the smallest width of the door is 56 centimeters, and the maximum distance between the racks should be 60 centimeters.
- The length of the structure. This parameter is probably the most important. It will directly depend on the needs of the summer resident, as well as on the amount of material left to create the elements of the greenhouse. Factory solutions usually have a length of 120 centimeters. This value corresponds to the standard length of the polycarbonate sheet. To choose the size, you should decide on the number of pallets that will be placed on the racks. It is undesirable to make too large a construction due to the fact that it is difficult to maintain a certain level of temperature. Yes, and in the winter to heat such a greenhouse will not be easy.
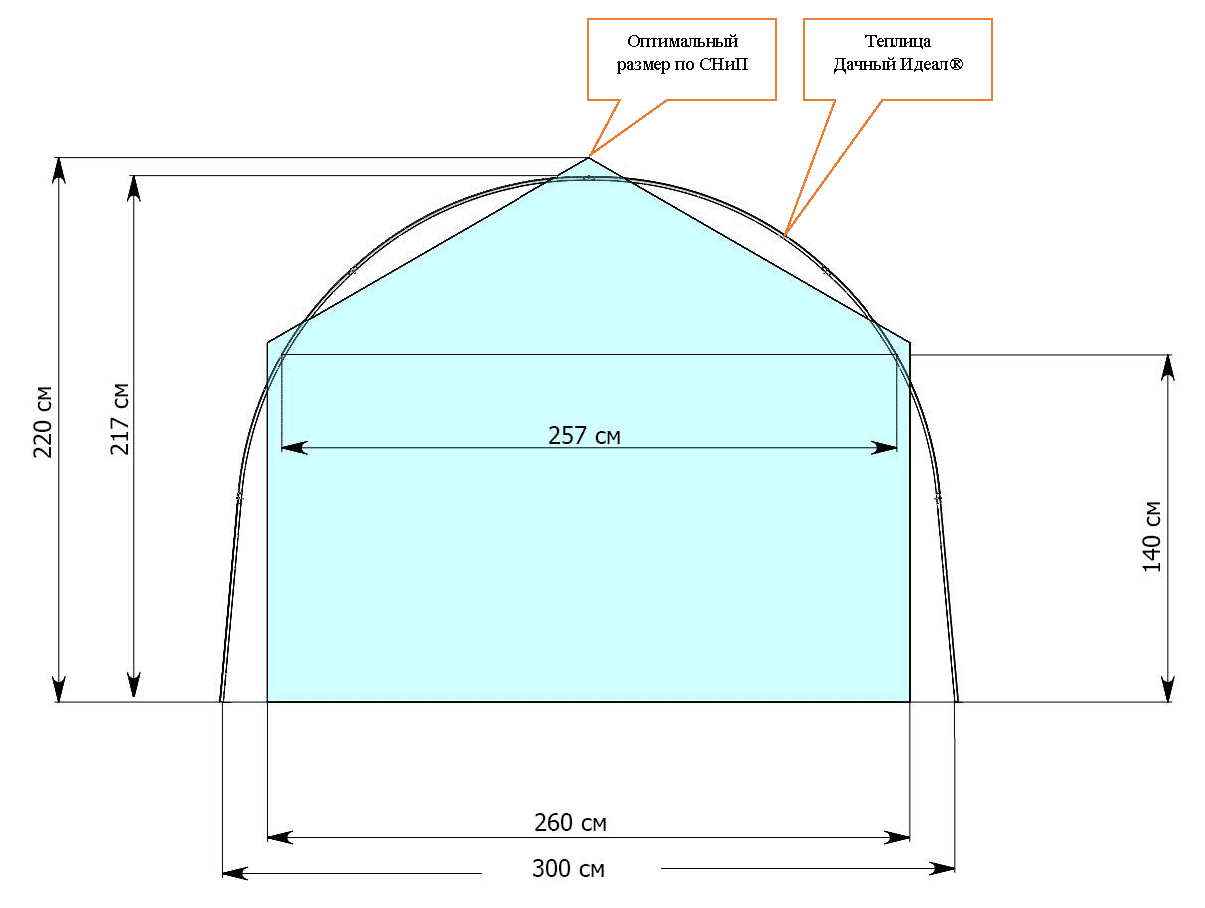
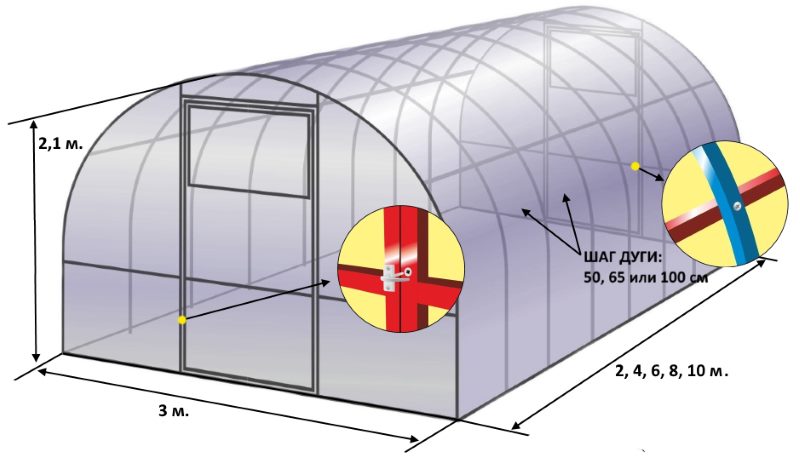
- Height. This indicator can be anything, although here everything will depend more on the structural form. Roof vaults should be sloped to prevent the accumulation of water and snow. The choice of height will be important only when the summer resident is going to grow some tall trees. Usually the size of the greenhouse construction in height is 1.8-2 meters. It should be borne in mind that there must still be free space over the plants. It is about a level of about fifty centimeters.
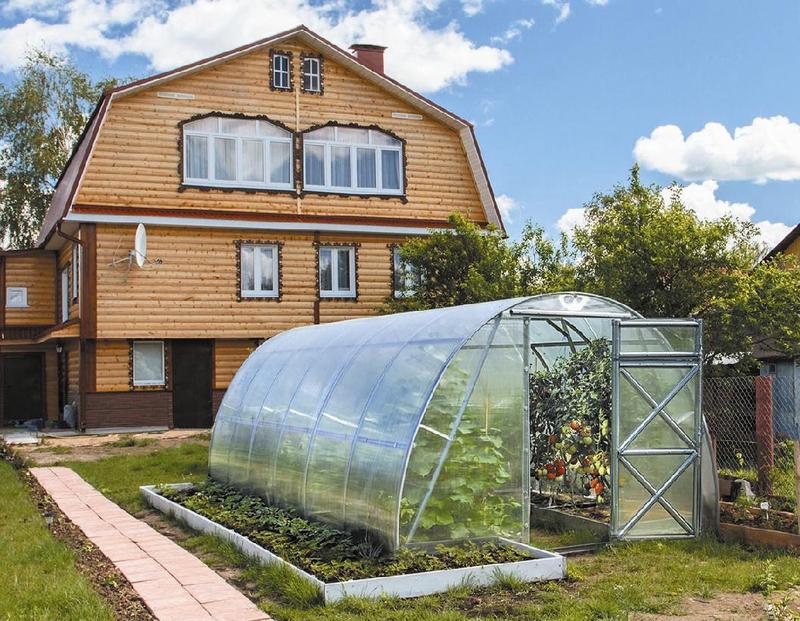
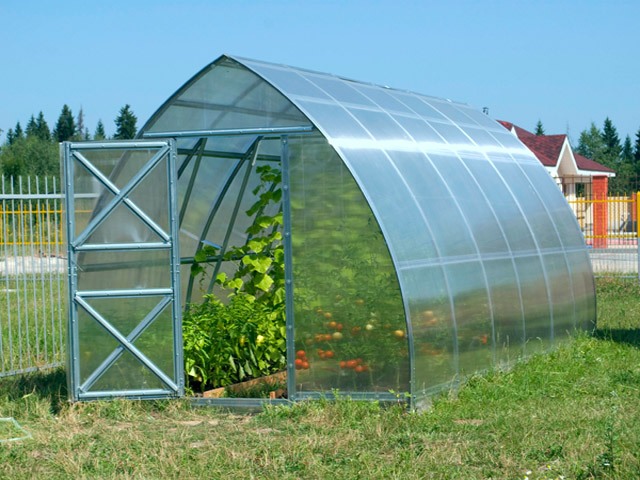
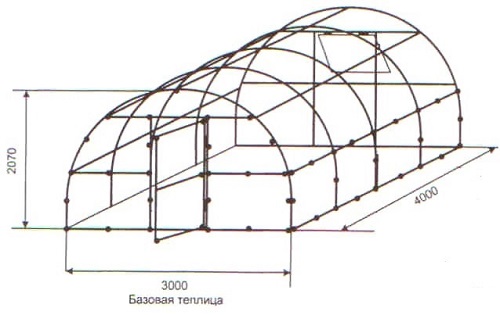
Speaking about the size, the ideal is the draft greenhouse parameters of 3x6 meters. If we talk about the forms, then that the snow was not kept on the greenhouse roof, it should have a good slope. It is best if the building has the shape of a hemisphere or a slightly elongated vertex with an acute angle. But in order for the rays of the sun to warm the space inside as much as possible, it is necessary to provide for the presence of flat areas.
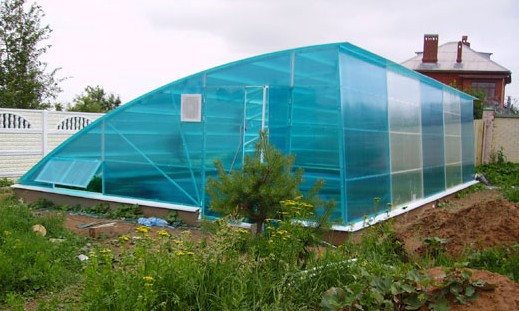
If the angle of the bend of the roof is very large, then glare may appear on it more often than usual. If we talk about the shape of the frame itself, then you can bend a channel or pipes made of metal using a grinder.First we mark such pipes, putting marks on them, the frequency of which will depend on the angle of bending. Now in the marked places with the help of the Bulgarian we make cuts in half the height. Bend the profile and weld the incisions again.
Today you can find various forms of greenhouses.
The most popular are:
- tents;
- arched.
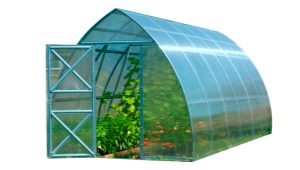
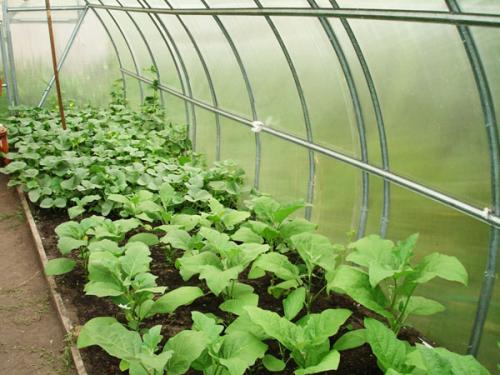
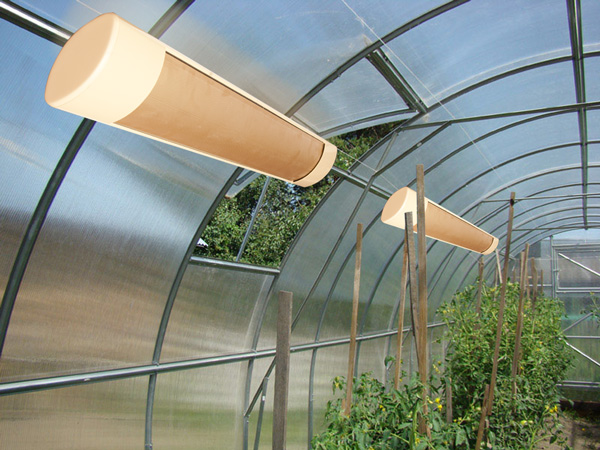
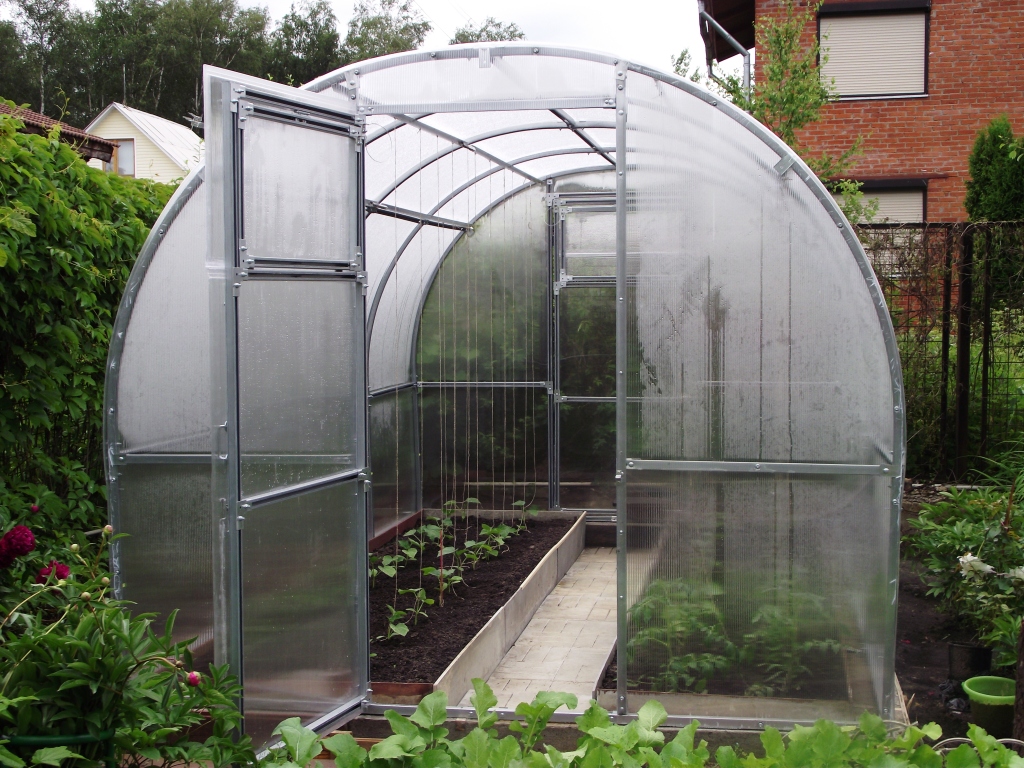
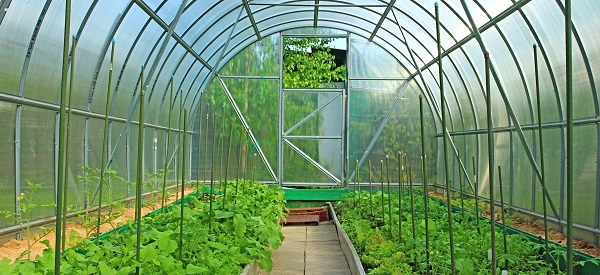
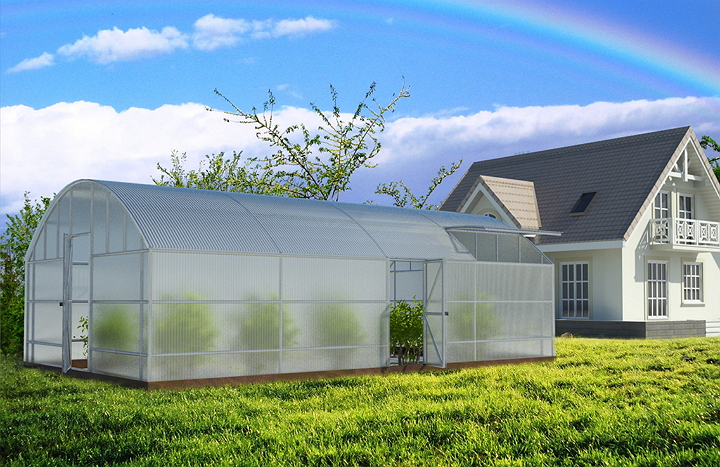
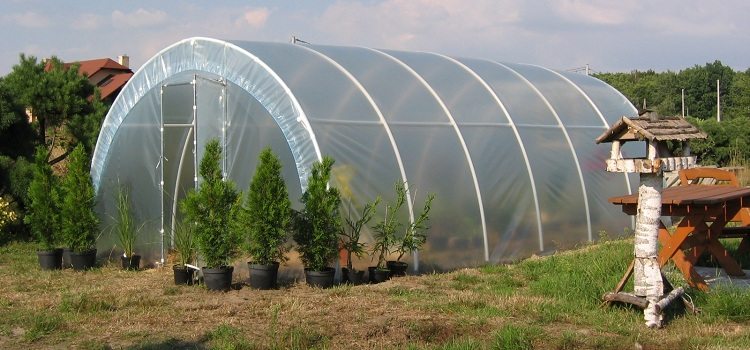
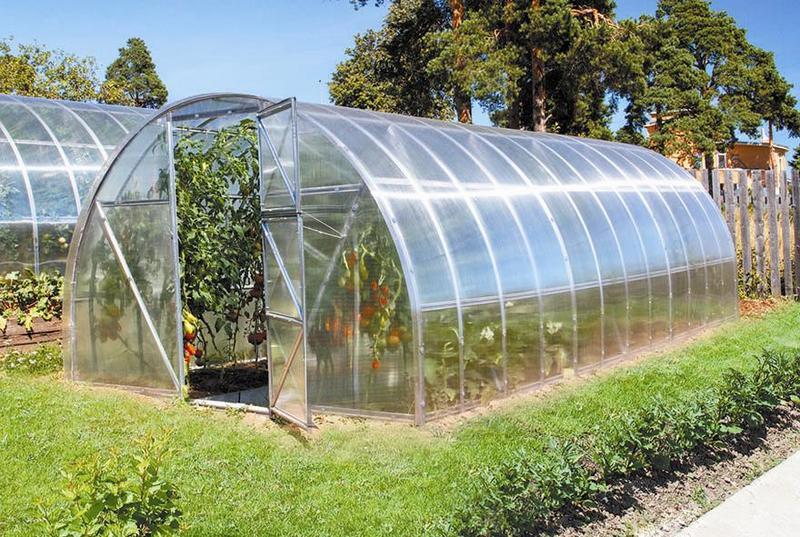
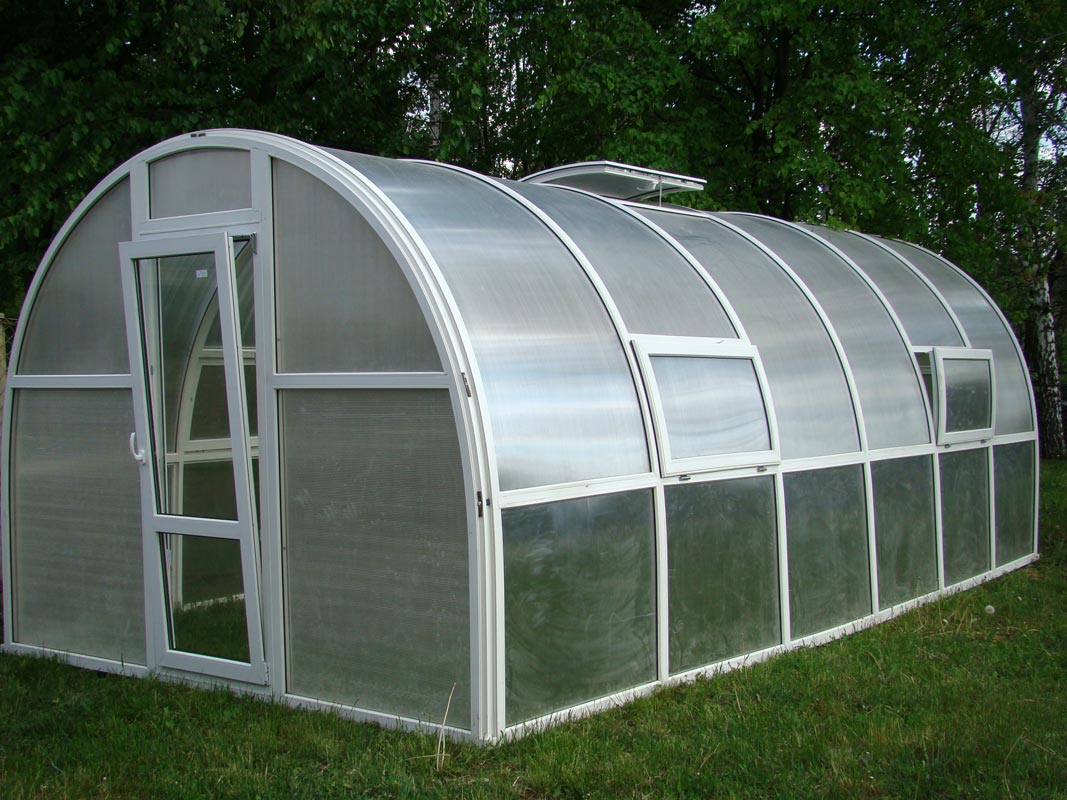
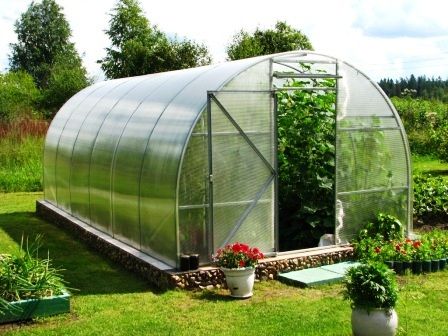
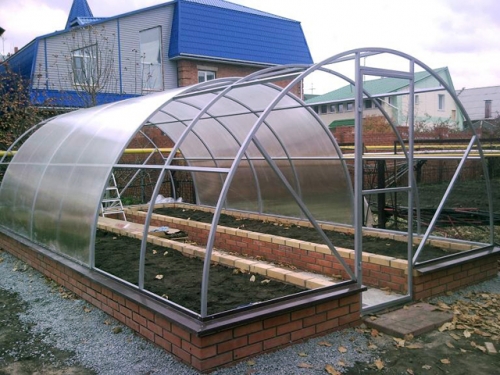
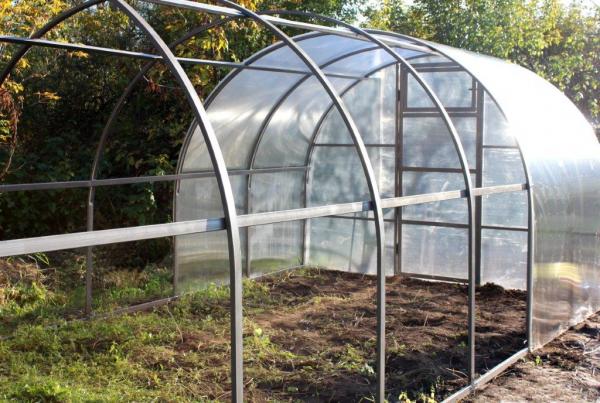
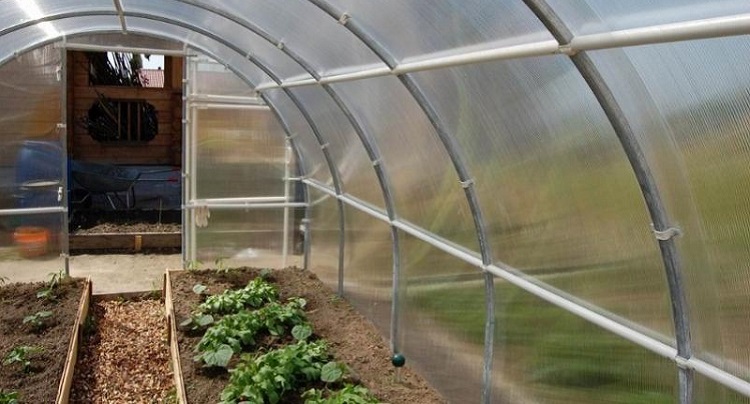
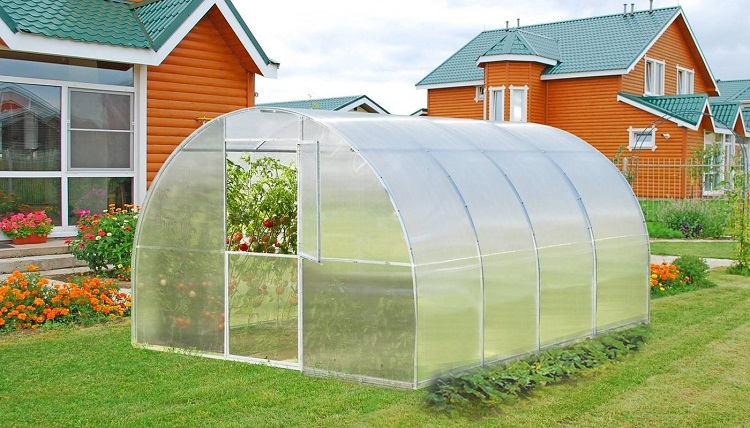
Let's tell about them in more detail. The name of the arched greenhouse speaks for itself. Here there is a semicircular shape of the roof, and the greenhouse has the appearance of a tunnel. For this design, the use of polycarbonate is simply the ideal option. It bends easily and forms a simple arc.
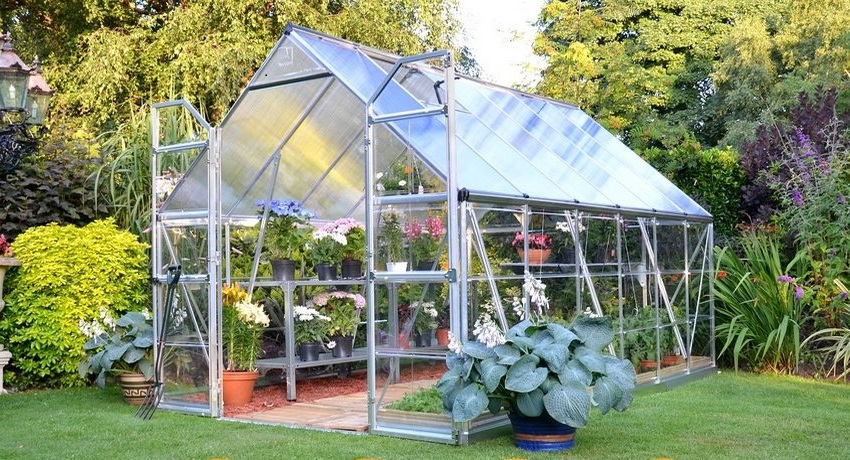
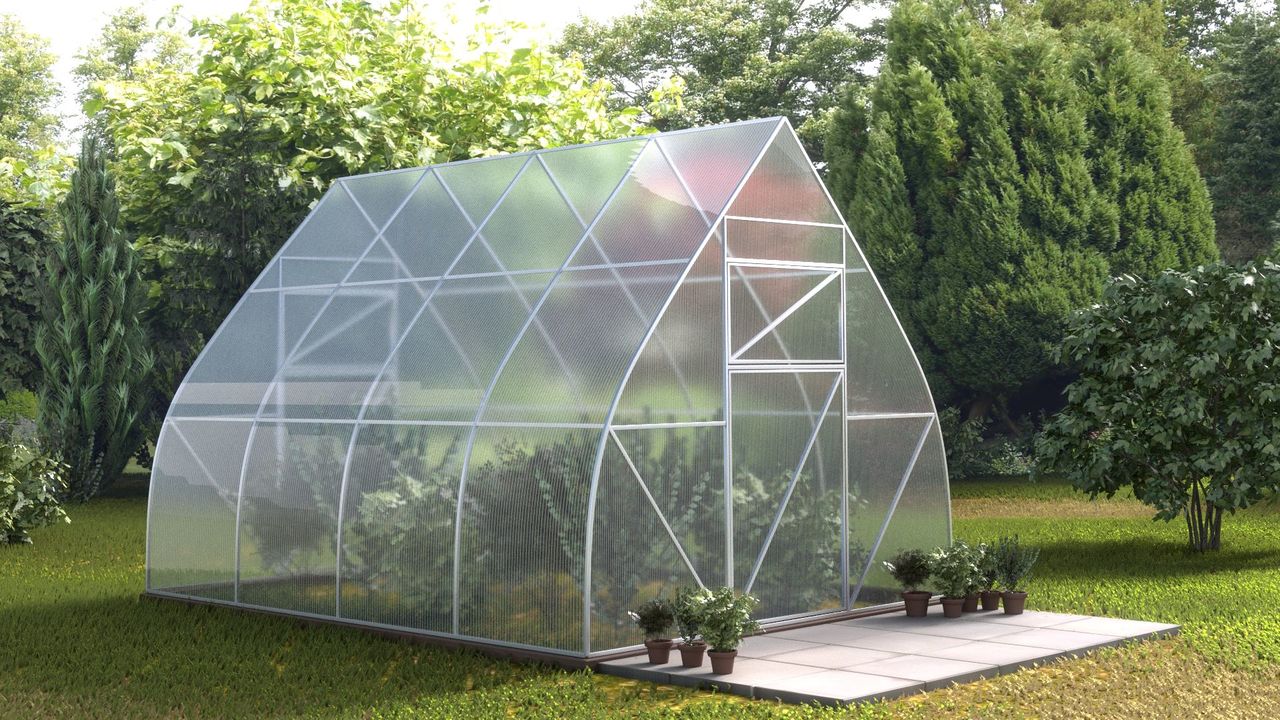
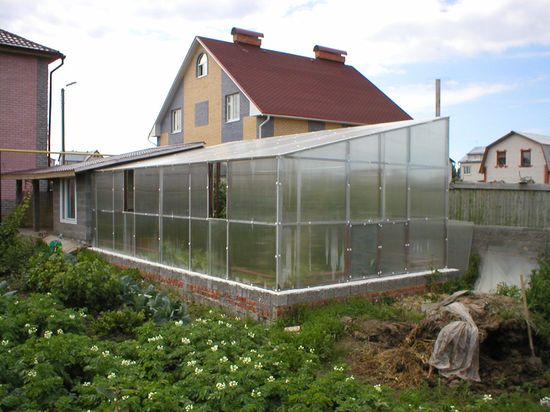
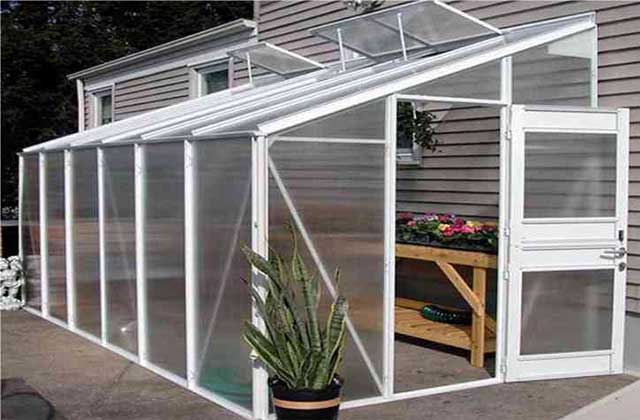
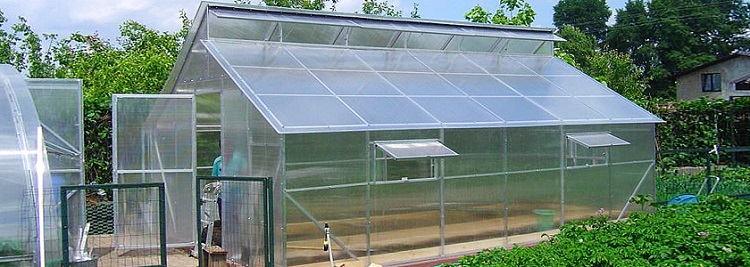
If we talk about the tent greenhouse, it is made of various blocks. On average, the height of the building will reach about two and a half meters, although there are models and higher. Width and length are usually calculated individually in each case. For this type of gable roof is more typical.
It must be said that a number of greenhouses are not built to grow vegetables right in the ground. In such cases, in buildings it is necessary to provide a place for the construction of special shelving and shelves. And this will affect the amount of space inside the greenhouse and, accordingly, its shape.There are options with insulating panels that can be removed at the right time, for example, when the summer is too hot. If the weather has begun to deteriorate or has become colder, the owner of the greenhouse can easily install back the removable shields, which will provide protection to plants from precipitation and cold.
In general, whatever the design, the following factors should be taken into account:
- the greenhouse should be as functional and durable as possible;
- the person must have constant and free access to the plants.
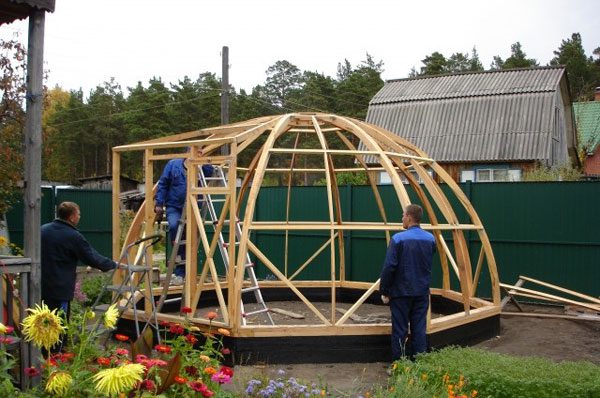
By the way, today you can often find the original greenhouses with a domed polygonal shape. Note that they are quite difficult to create, as sheathe polycarbonate. For this reason, when creating such a greenhouse can not do without the involvement of specialists.
Accessories
If we talk about components that can be useful in the construction of a greenhouse, then The following materials and elements should be highlighted:
- polycarbonate;
- bolts of anchor type;
- waterproofing material;
- self-tapping screws with thermal washers;
- building angles;
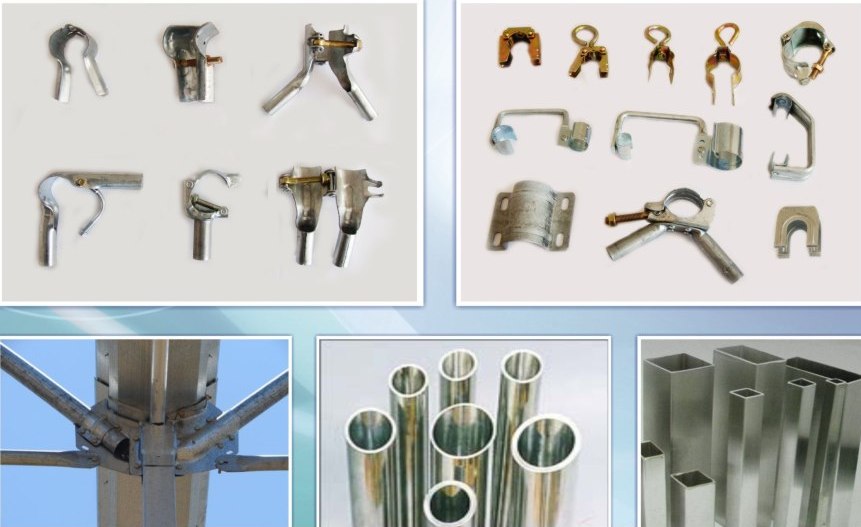
- the material from which the frame will be made: slats, wooden beams, metal profiles, plastic pipes.
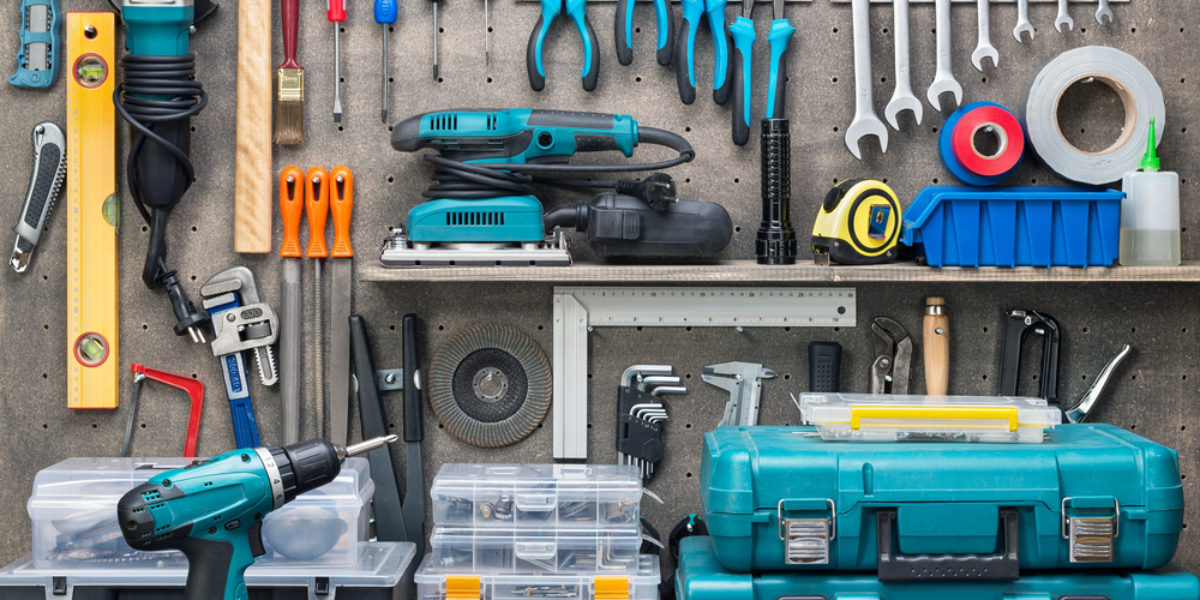
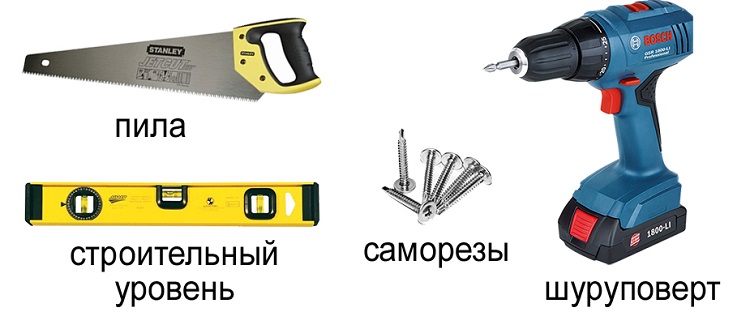
In addition, we will need some tools:
- jigsaw;
- building level;
- sharp knife;
- screwdriver;
- drill.
After preparing the necessary materials and equipment, you can proceed to construction.

DIY installation
Consider the steps the process of building and installing a greenhouse do it yourself at home.
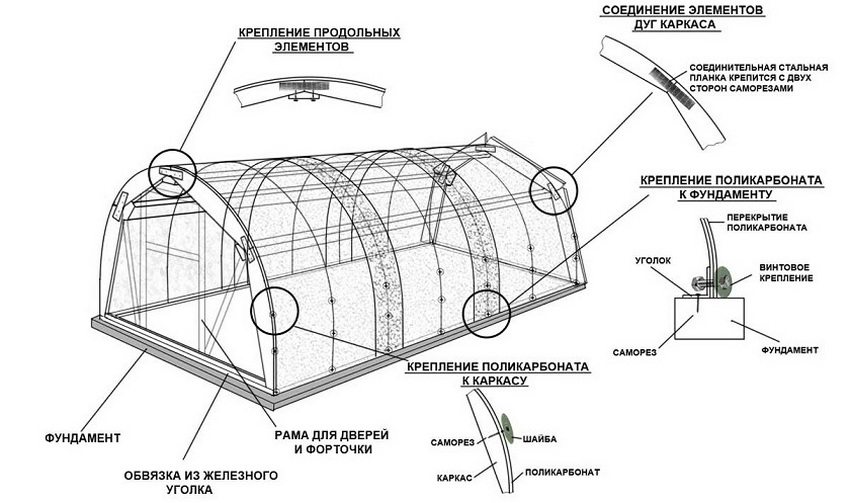
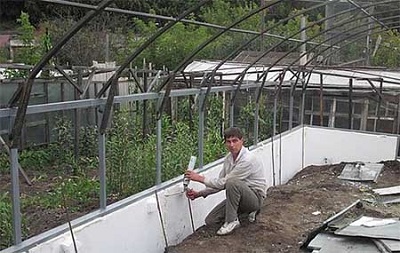
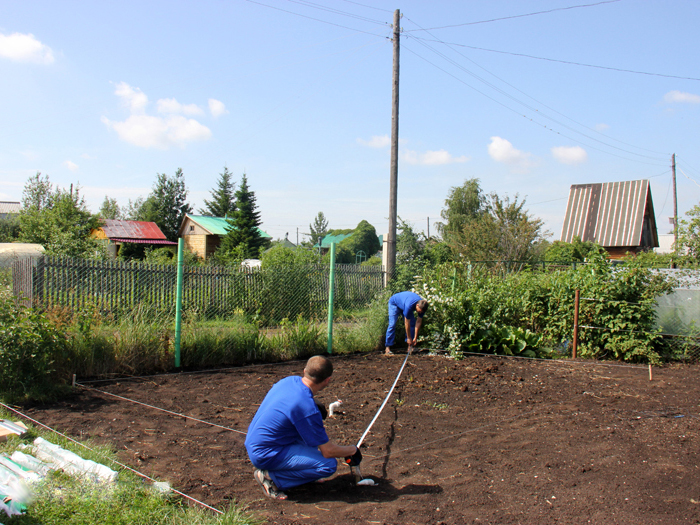
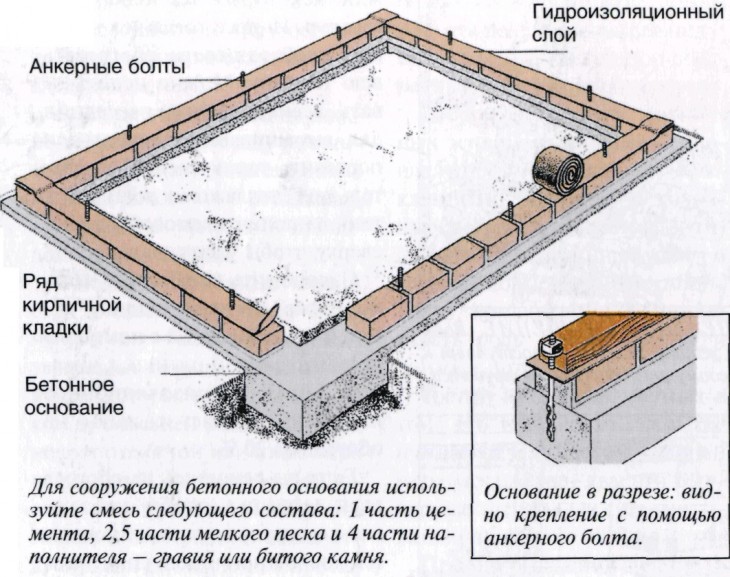
- The area where the greenhouse will be located should be leveled, after which the grass layer should be removed. To make a foundation of concrete, you should create a formwork of such dimensions so that it corresponds with the parameters of the greenhouse. Laying the layers involves the use of anchor type bolts, as well as a number of brick masonry. If you do not want to use a brick, you can apply the basis of their wooden planks.
- To assemble the metal frame, you should have a pipe bending machine, a square-shaped pipe, and a welding machine on hand. First, the pipes are cut into the necessary parts, and then they are connected taking into account the step between the greenhouse arches.Now the ends of the pipes should be connected to the profile, and then weld the door frame.
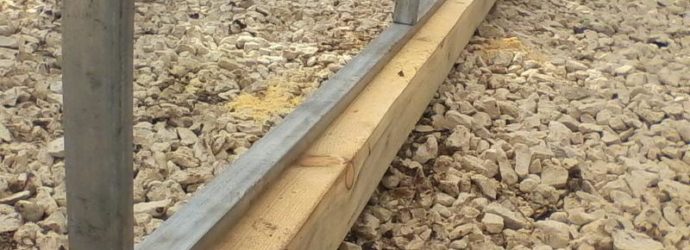
- It is attached to the concrete with bolts of the anchor type. If you decide to install a wooden base, then apply screws. They are also used if it was decided to use timber for the frame. If there is no aforementioned foundation, then arched ends should be fixed with the help of clamps to the base of wood.
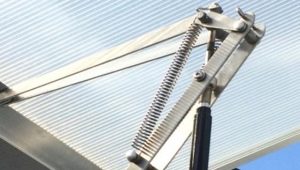
- After that there is a sheathing of the ends, leaving space for doors and air vents. These elements are attached to the end of the entire building. Now the installation of valves, hinges and fittings.
- Next, the greenhouse is sheathed with polycarbonate sheets and the subsequent fixing of the strip of galvanized metal.
In general, as you can see, there is nothing difficult in creating a greenhouse with your own hands. Now let's take a closer look at some stages of construction.
Foundation
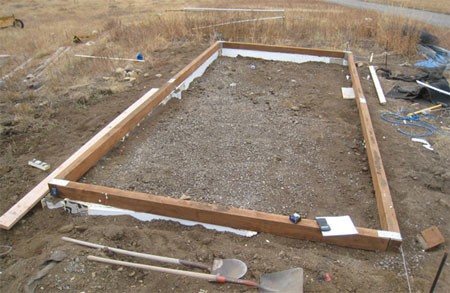
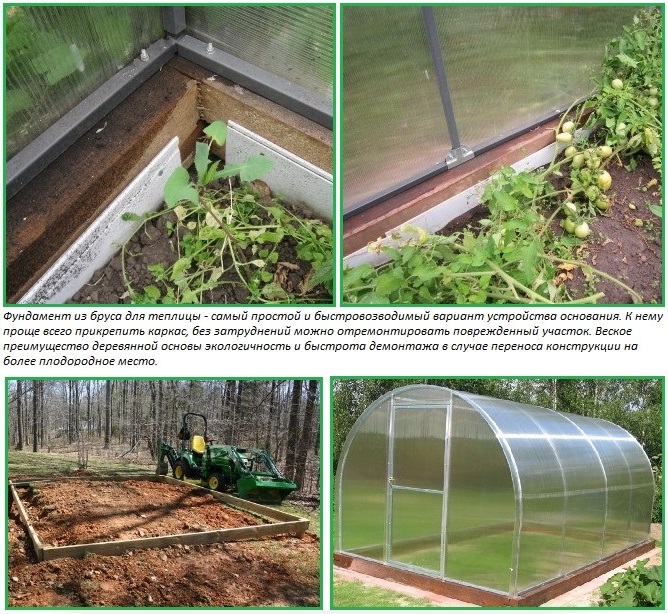
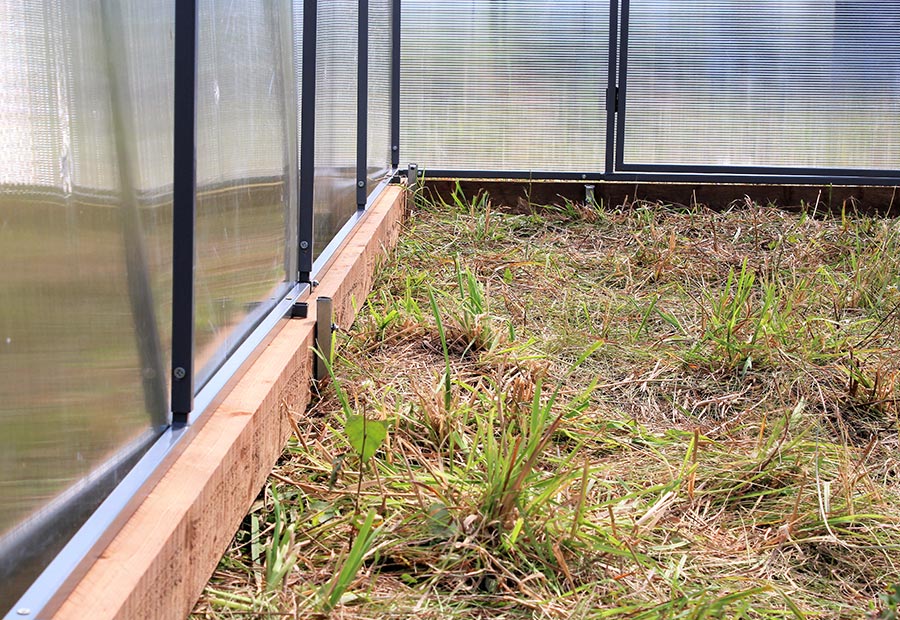
There are various options for foundations, the simplest of which will be timber.
In this case, it will be built as follows:
- we level a site and we soil soil;
- we carry out the installation of supports at the extreme points of the greenhouse;
- fix a timber on them;
- we process wooden elements with antiseptic.
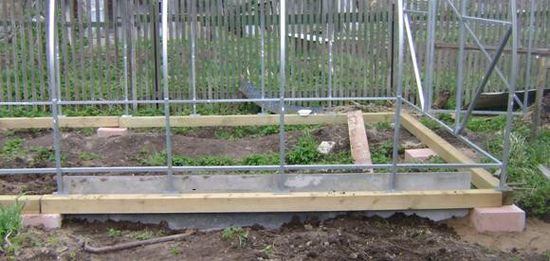
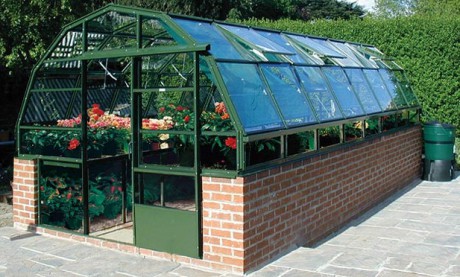
The downside of such a decision would be its fragility. A better option would be a brick foundation that can last for more than fifty years. Usually the brick is laid on a concrete-cement pad.
Laying is better to carry out in several rows. Their number will depend on the size of the room. If we talk about the standard greenhouse, then enough for two or three rows.
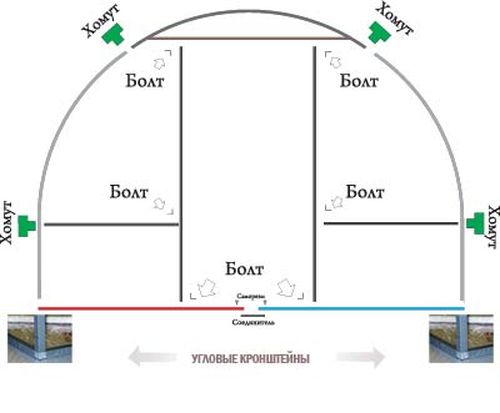
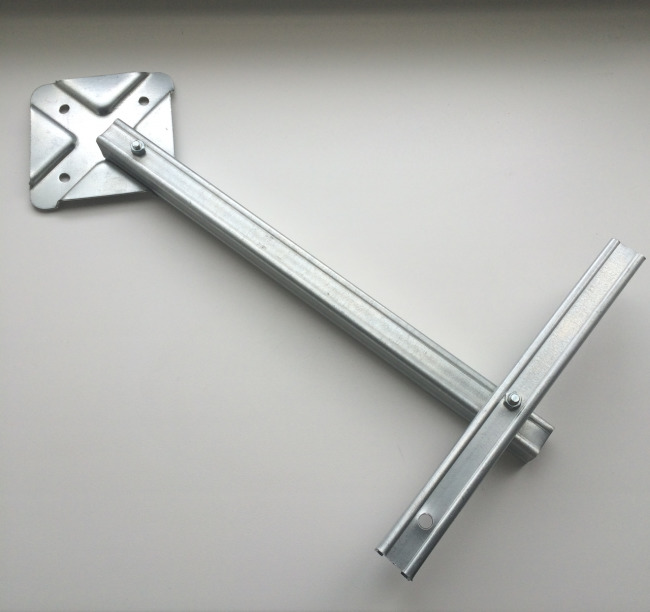
By the way, it is imperative to install fasteners in the foundation. In general, the best foundation foundation will be a small monolithic structure about thirty centimeters deep. Before pouring the concrete solution, anchor bolts should be laid around the perimeter. And after its setting to the embedded parts, weld the tube, which should be an excellent supporting part for fixing the frames of the frame.
Frame: options
The next point that should be discussed in more detail is the frame.
If you are going to make it yourself from the metal profile, then you will need to have:
- metallic profile;
- pipe bending machine;
- square tube;
- welding unit;
- Angle Grinder.
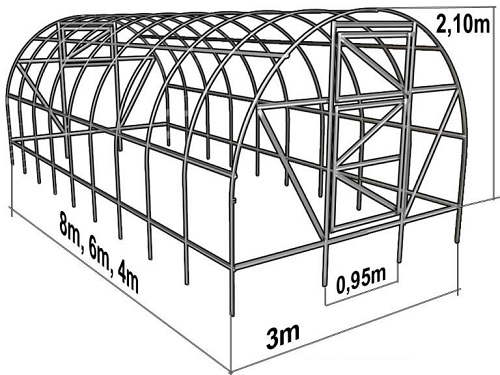
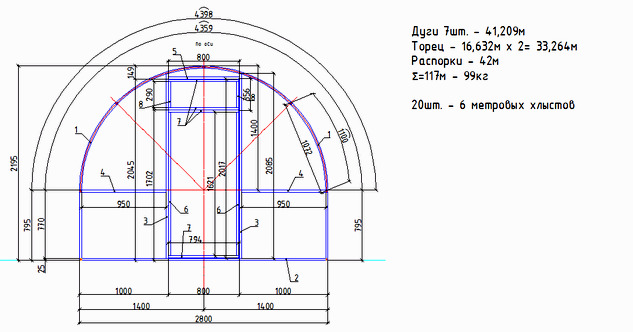
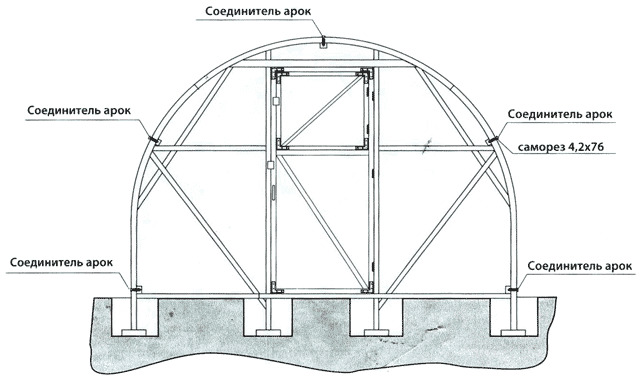
Its manufacture begins with the fact that a pipe, better galvanized, is taken, is rolled through a device for bending pipes, resulting in an arc of a certain size. We cut it into sections of given dimensions and weld arcs every 65-100 centimeters. There should be only seven of them - two will go to the ends, and five will be installed at intervals.
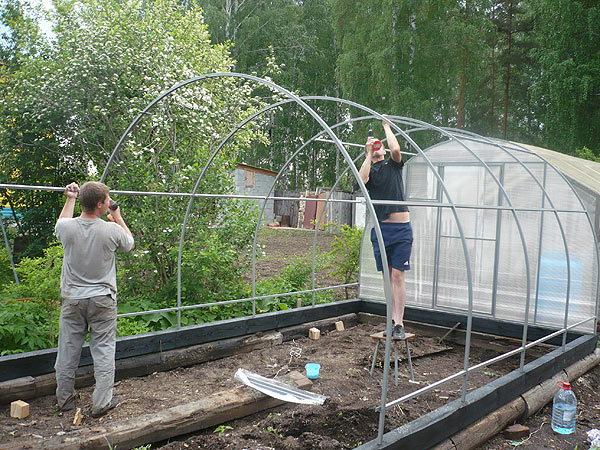

Now you need to make the end elements. To do this, we join the tips of the arcs with a pipe length of three meters and carry out the welding of the vents and the door opening. Such a frame is easy to purchase and in ready condition.
Now we are interested in the moment of fastening the frame to the base of wood. This can be done in the following way: a lower greenhouse frame is installed on the long foundation parts on the previously set wood base. Fastening is carried out by screws through special holes, which were provided by the manufacturer, or holes made by hand, if it is a self-made design.
If the base was not provided, then the arches of the frame should be fastened to the basement with clamps.But the fastener to the concrete foundation occurs with the help of metal angles or special anchor screws.
In general, greenhouse frames can be created from other materials:
- polyvinyl chloride pipes;
- bars of wood;
- plastic profile.
It is impossible to unequivocally name some kind of the best, and some worse, but each has its own advantages and disadvantages. If we talk about galvanized steel, the material has great strength, excellent resistance to corrosive effects. Also, such a frame is extremely simple to install and has a low weight, so that you do not need to make a serious foundation. Among the shortcomings it should be noted that the profile of the galvanized type can bend, not having sustained the load in the cold period due to the snow.
Speaking of pipes made of polypropylene, it can be noted that this material belongs to the category of budget. Such a framework will serve for quite a long time due to the fact that the material is generally not susceptible to corrosion. But because of the small mass, it must be fixed to the ground, and with maximum reliability. Or, due to the impact of the wind, the structure may simply roll over.Speaking of wooden frame, it should be said that this is the most affordable option. But there are also disadvantages here. First, the tree absorbs moisture easily. Secondly, the tree can rot and be destroyed. In addition, such a framework needs a solid foundation and good antiseptic treatment.
If we talk about the option of aluminum, then this is also a good solution. It has a small mass, but its cost will be high. It should be clearly understood that a sufficiently thick aluminum profile will be needed. But the quality of such a frame is justified.
If you take the frame of the profile pipe, it is distinguished by special strength, but you will need to have on hand welding. To prevent the formation of corrosion in this framework for greenhouses of different models (for example, according to Mitlayder), the pipe can be treated with a special compound. In general, the installation process will be quite time consuming.
To make the right choice of frame design, you should pay attention to the following points:
- consider the optimal location and the number of windows: to ensure normal circulation, two vents are enough;
- if the greenhouse is large, then the vents should be located every couple of meters;
- also it would not be superfluous to think about creating a lighting system;
- special attention should be paid to the calculation of the number of arcs and sections in the frame.
Now begins the next stage of construction of the greenhouse - assembly and installation. Assembly instructions are quite simple, and it is quite simple to implement them yourself if you have a scheme on how to dock the elements.
For the installation of the greenhouse we will need:
- hammer;
- drill;
- anchor bolts;
- screwdriver;
- self-tapping screws.
Now we are starting to trim the greenhouse structure using polycarbonate sheets. First, we fasten the sheets at the ends, after which we cut the doors and two vents. Now the installation of finished end elements is carried out. At the next stage, fittings of various types are made.
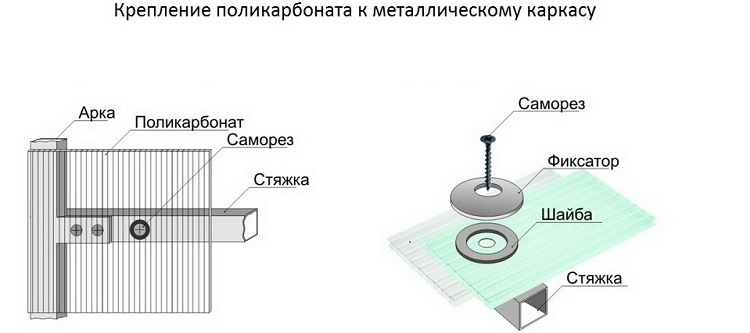
If we talk more about the installation of polycarbonate sheets, then you first need to release the panels from the protective coating, then carefully throw the first element on the frame and align it. Now we draw the part (one to three centimeters of polycarbonate) on the end, aligning the edge on it and fix it with roofing screws on the sheet on the end arc.
After that, it is necessary to take galvanized metal tape, place it on top of the sheet and attach it with special roofing screws, starting from the second arc. After that we put the second polycarbonate sheet and mount the remaining tape. We make a banner. The tapes are made from the first sheet from the 2nd arc, the overlapping of the sheets is the last to be tightened. Then the process ends. Greenhouse is ready!

Erection Tips
We offer you to get acquainted with some useful tips and recommendations that will allow to build a greenhouse much more efficiently and faster.
- If the base is not set at a level, then when the polycarbonate is laid, bulges and other irregularities will form, and then cracks will also form.
- It will not be superfluous to fix polycarbonate with the help of galvanized metal tapes, which will significantly simplify their installation and disassembly.
- It is recommended to provide in the greenhouse a large number of vents. This is necessary to create an optimal microclimate inside the building.
- The distance between the arcs in the greenhouse should be no more than 65 centimeters due to the fact that in winter the snow that accumulates on the roof can simply break through the space between the two elements.
- The greenhouse team needs some care: every spring you need to wipe the walls of the building with a damp cloth. In addition, it is better if the greenhouse is heated, which will prevent the formation of mold and the accumulation of excess moisture.
- If the greenhouse you are interested in has a length of more than six meters, then it will be possible to provide additional vents on the sides. Even better, they will be equipped with an automatic opening system.
In general, as you can see, the creation of polycarbonate greenhouses is a process that can be easily carried out independently, if everything is clearly thought out and followed the basic rules of construction. But if difficulties arise, we should not ignore the advice of specialists with experience in this matter.
How to make a greenhouse from polycarbonate with your own hands, see the following video.