How to fix the mixer?
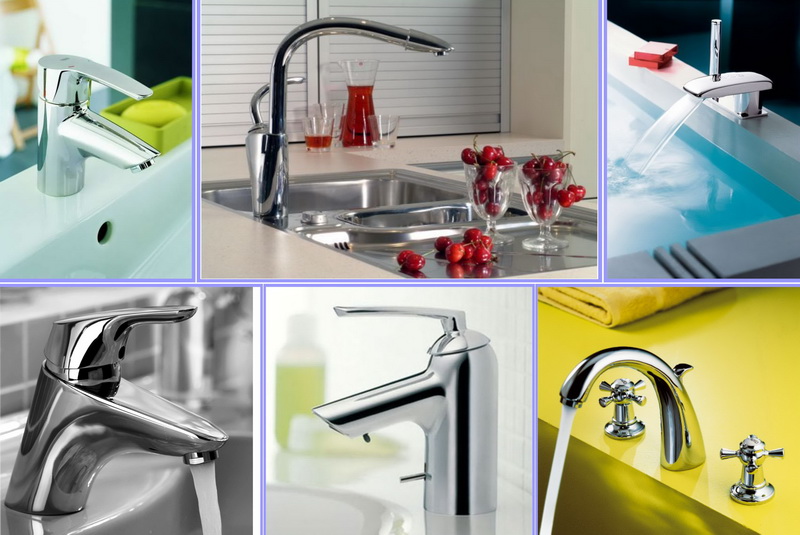
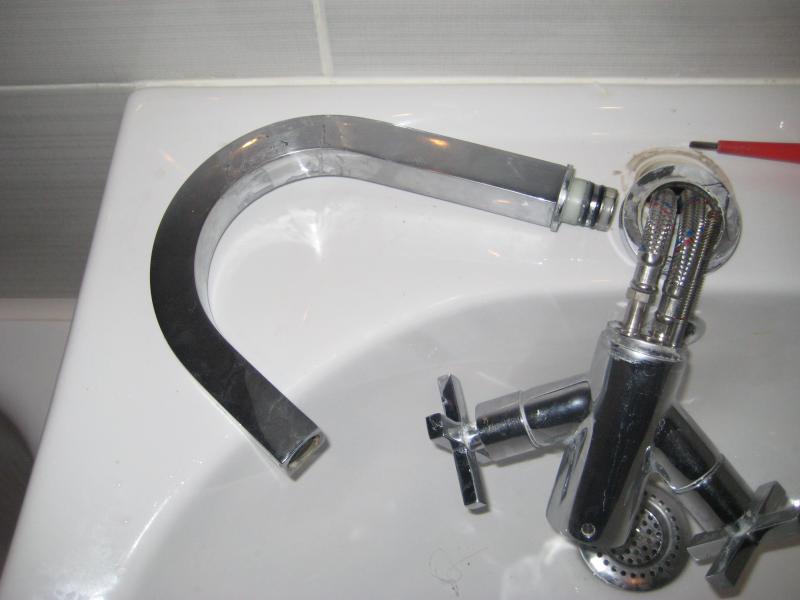
No kitchen or bathroom is without a mixer. This is a device for supplying hot and cold water, by means of which the pressure and temperature of water are regulated. The faucet in the bathroom, among other things, also redirects it from the faucet itself to the shower head.
The service life of such devices is quite large and is usually about 3-5 years. However, like any mechanism, the mixer periodically needs repair. To do it yourself is not as difficult as it may seem at first glance. The main thing is to have an idea about its structure and principles of operation.
Design features
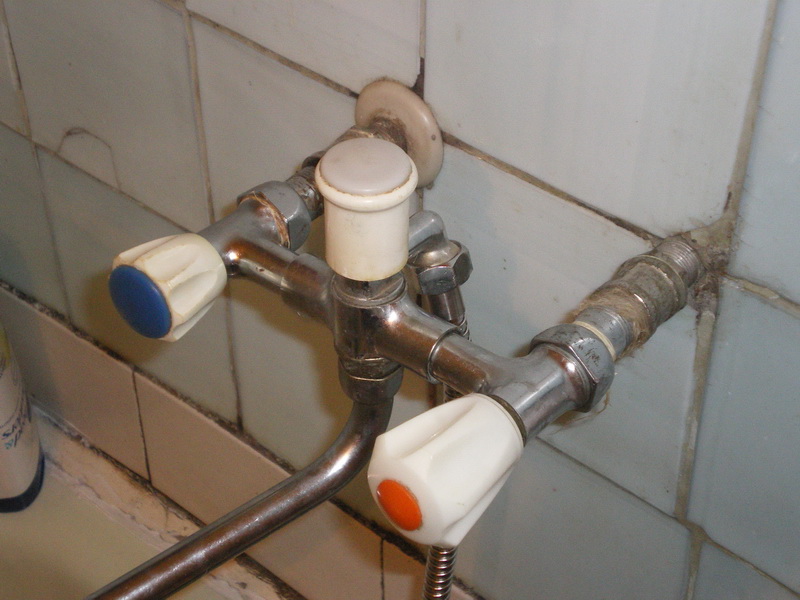
Virtually all types of mixers can be divided into valve, lever and electronic devices. In the bathroom from such a mixer in addition comes out a shower hose with a watering can. The simplest mechanism is the valve device.
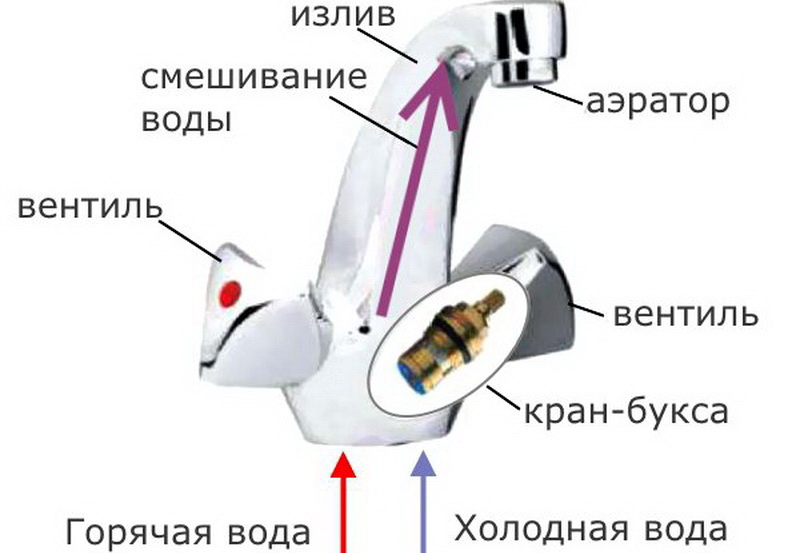
It consists of the following elements:
- mixer housing;
- one or two control valves;
- rubber gaskets to protect the water valve from leaking;
- gander mixer - spout, which moves the flow of water;
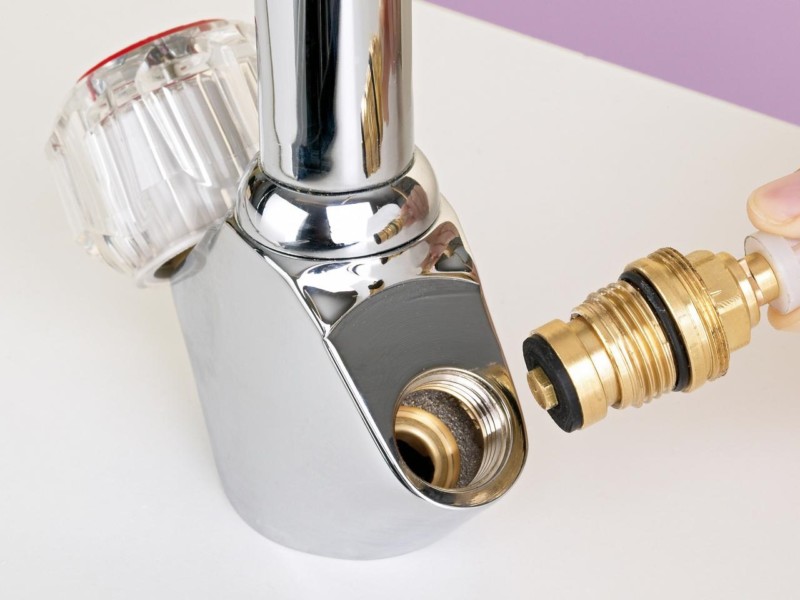
- ceramic box crane with ceramic discs for manual adjustment of temperature and pressure; in the center of the discs there are holes that, when rotated, must coincide with the holes in the core, so that water can go outside.
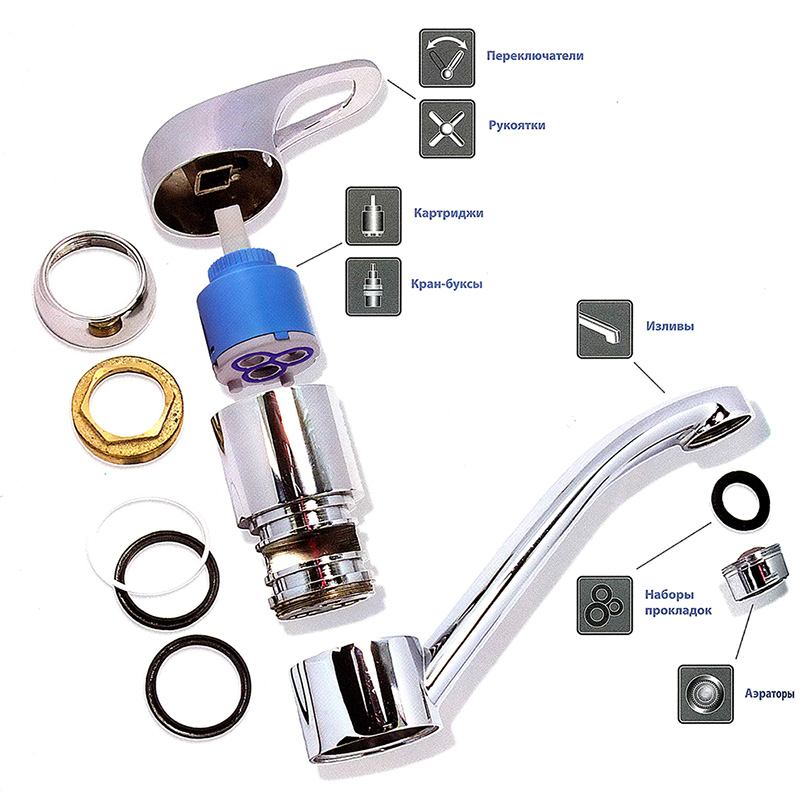
The lever device consists of a larger number of elements and is a more complex mechanism, namely:
- housing;
- water arc;
- a ball or ceramic cartridge that mixes hot and cold water;
- cartridge locking nut;
- a lever for manual control, mounted on the stem, coming out of the cartridge;
- cap.

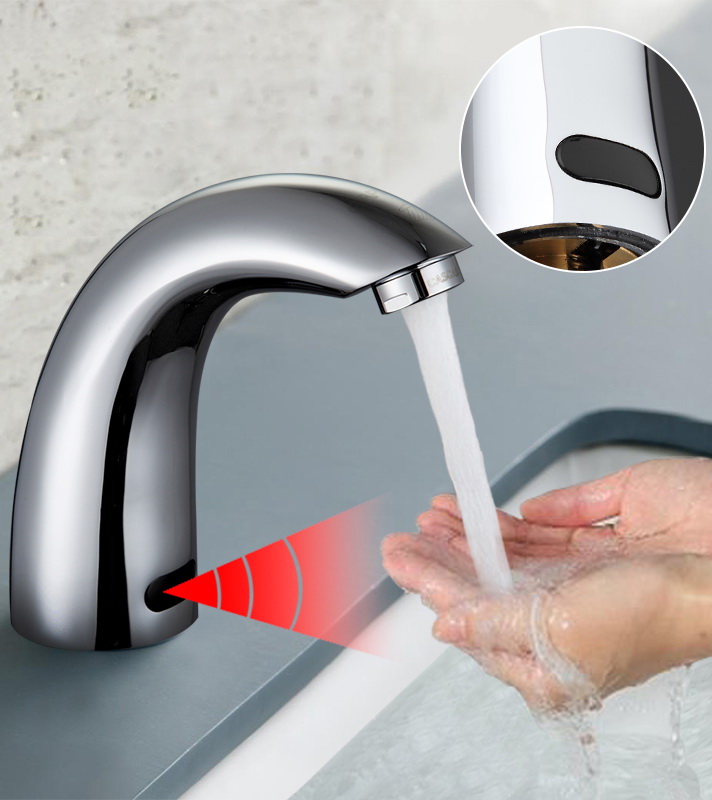
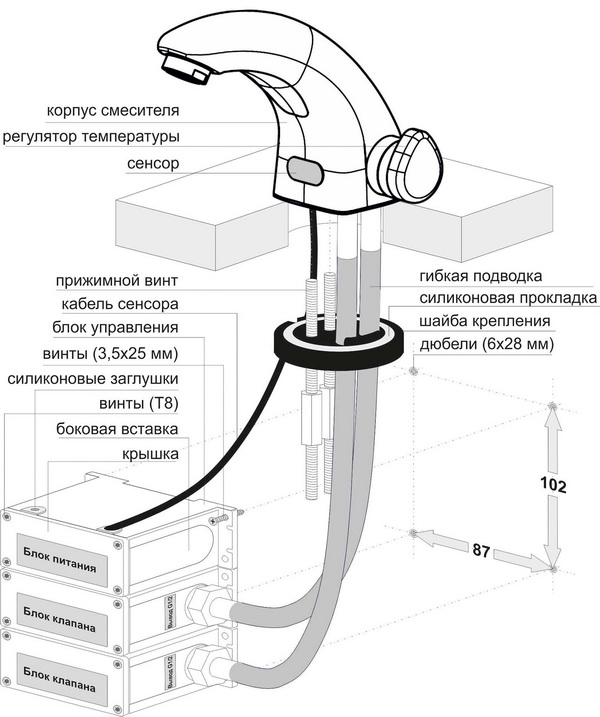
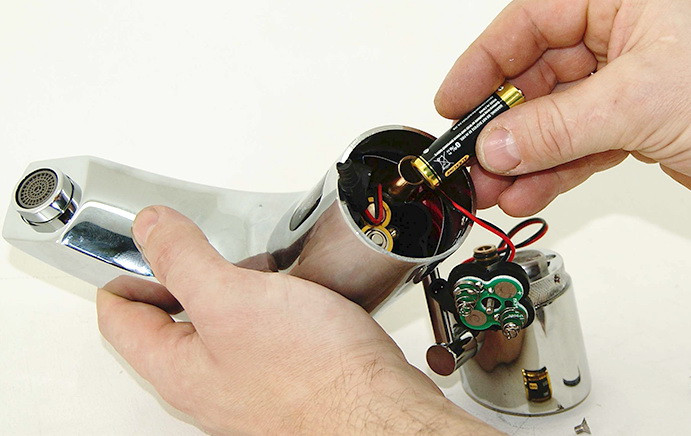
The third type is an electronic mixer. Such devices do not have the usual cranes and levers, and the control is carried out using the buttons on the remote or automatically. One of the varieties of such a mechanism is a touch mixer. His work is controlled by a photocell capable of capturing the movement of objects in a certain area. As soon as the hands, dishes or anything else appears within the visibility of the element, the water supply is automatically turned on at a certain temperature.
If the photocell fails, it is almost impossible to restore it without having the skills to work with such devices. For such a repair will require a specialist call.
Causes of faults
If a breakdown is detected, you should not rush to repair and replace the equipment for the kitchen or bathroom; first you need to find out its cause. Otherwise, a new mixer, installed instead of a broken one, will face the same fate.
Faults in lever and valve versions can occur for several reasons.
- Low quality mixer. It is not necessary to choose the most expensive product in the store, but the price is too low, when compared with similar devices, should be alarming. Most often, this is either a Chinese fake under a well-known brand, or an unfair manufacturer who makes mixers from low-grade materials. If the crane cartridge burst, and the crane began to scroll - a low-quality product was purchased.
- Dirty water with sediment and rust It can also cause damage to both single lever and valve valves. The gander can become clogged with debris, the faucet will start to leak at the base and even burst when the switch moves to strong pressure.

- Outdated consumablessupplied in new appliances.Many manufacturers indicate that for proper operation of their device it is necessary to install, for example, silicone gaskets. In the case of installing a rubber gasket of the old sample, you can get at the output an incorrectly working device.
- Waterwhose stiffness is quite high, it forms mineral deposits inside the spout pipe and in the cartridge. Accumulating, such deposits reduce the speed and pressure of the water flow.
- Equipment may simply wear out. with time. Sensors break, metal rust, even the most reliable device will become useless over the years.
Ways to fix and repair
Since the elements of the valve and lever mixer are different, the failures are different. In addition, a special place is occupied by shower breakdowns in those mixers that contain it. No matter how simple the device of the valve device, it breaks more often than others.
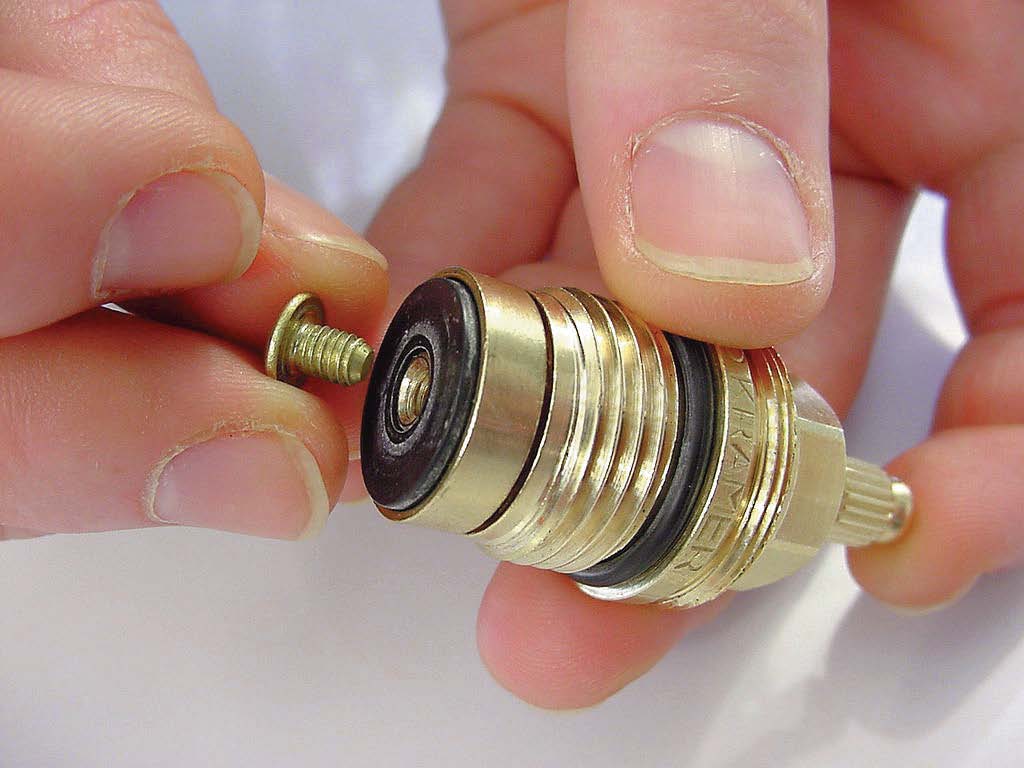
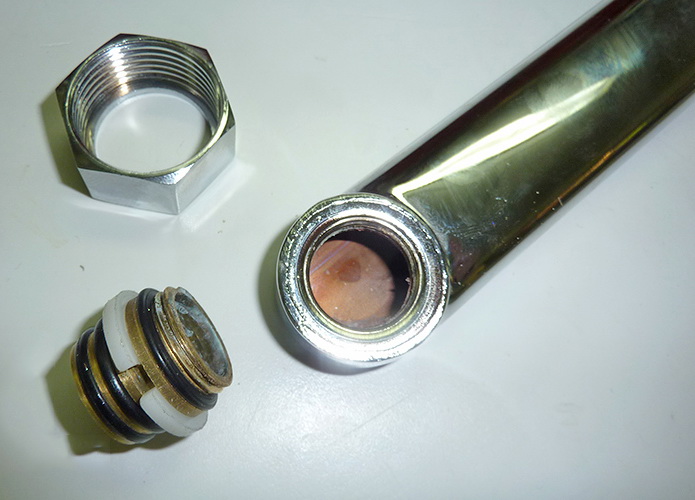
Wear pads
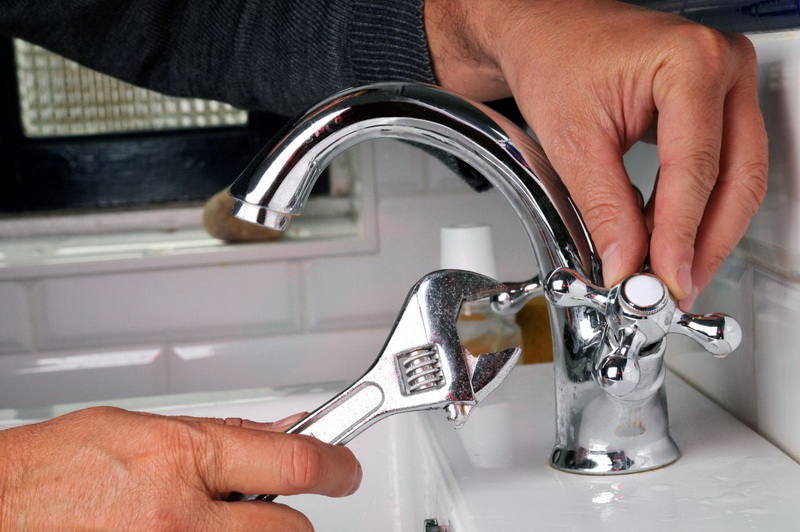
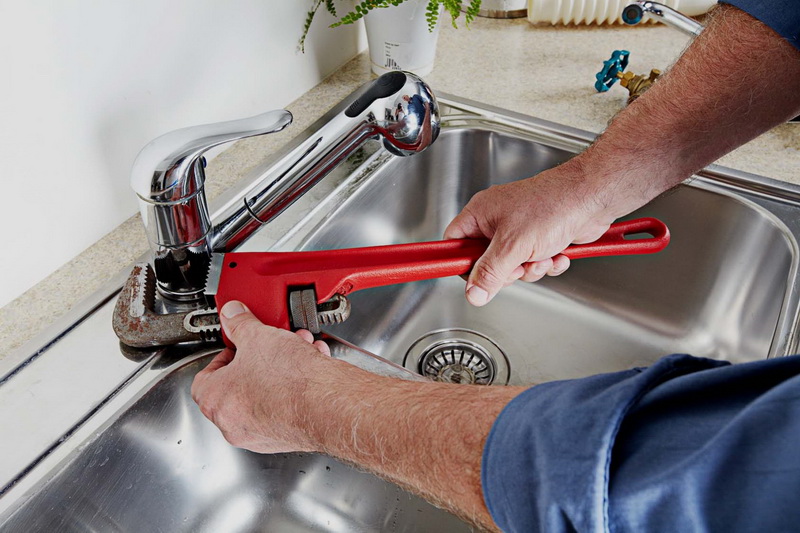
The most common cause of leakage of a crane is the wear or displacement of the rubber gasket. In order to replace it, you will need a wrench, a flashlight, a screwdriver (if necessary, a hexagon) and pliers.New gasket can be purchased in any hardware store, and make yourself from a sheet of rubber with a thickness of about 4 mm. The water supply must be shut off and the valve disassembled by removing the damaged element.
To carve out a new gasket, you need to use the old one as a piece or take measurements from it. The width of the new part should be 1 mm larger than the previous one. The edge of such a gasket is cut at a small angle so that, when it gets to the right place, it fits snugly against the metal walls of the crane box and does not let in a single drop of water.
After replacing the broken part of the crane, the axle box is inserted into its place and tightened with an adjustable wrench.
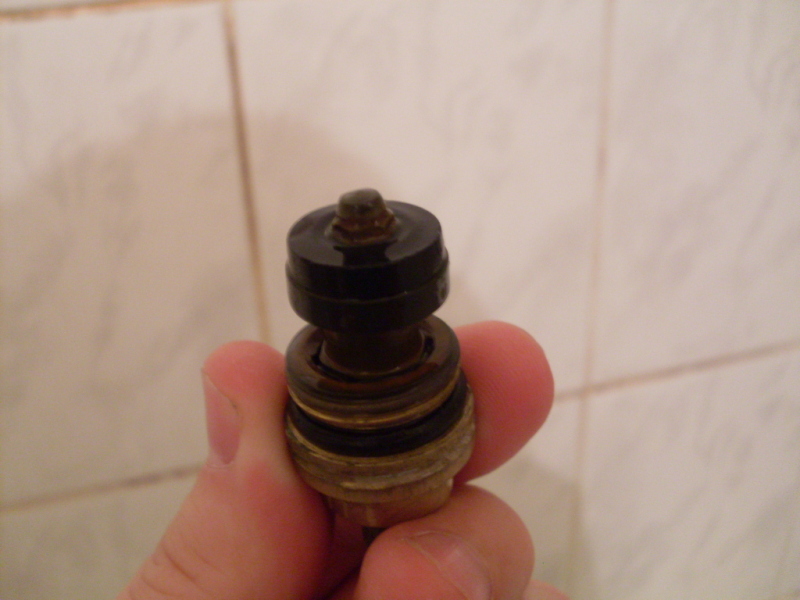
Failure of the valve
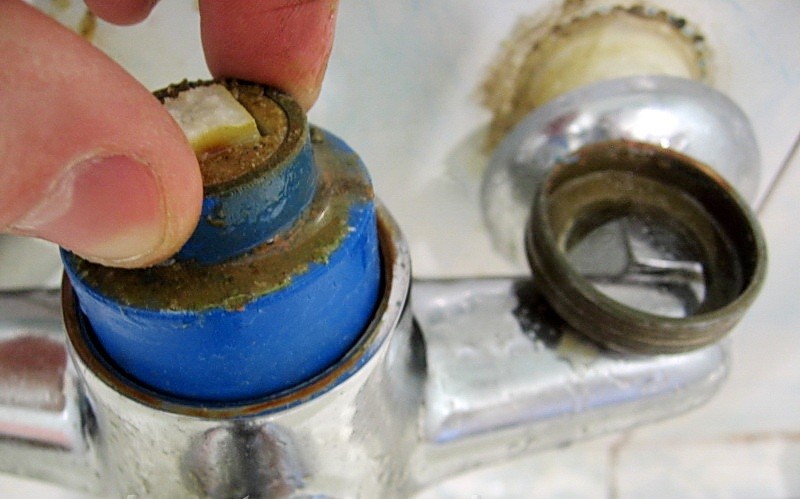
Most often fail half-turn valves. Instead of buying a new part, you should try to remove the old malfunction. To do this, it is necessary to understand the cause of the breakdown.
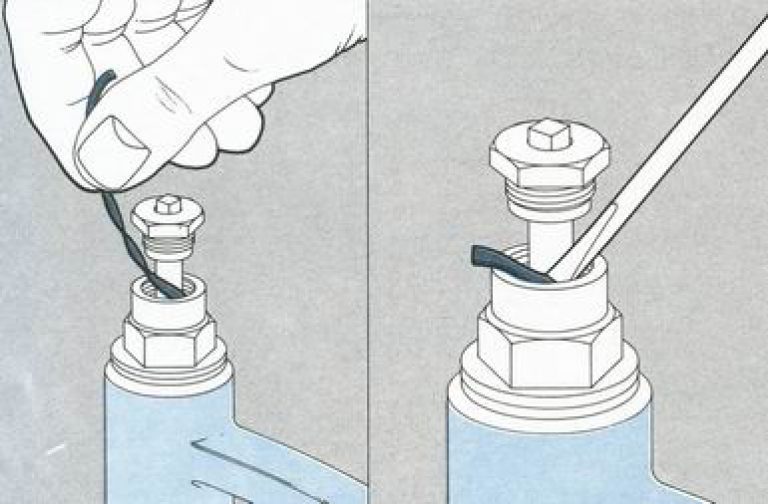
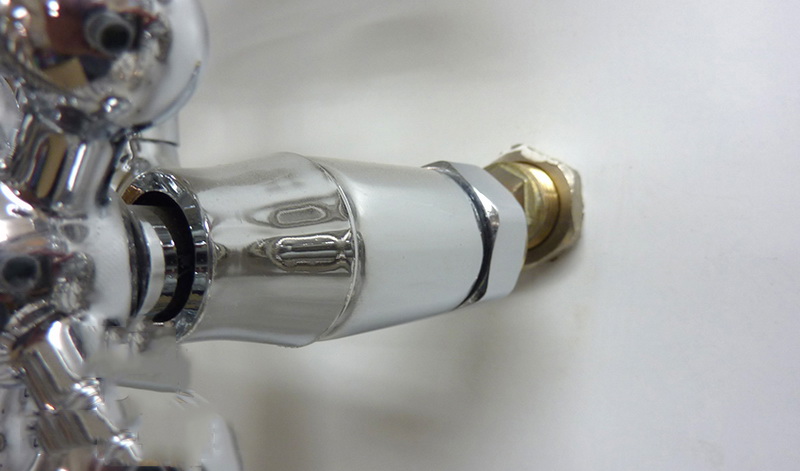
If water is leaking from the stuffing box worn out, you can tighten a small nut at the base of the valve. The nut is twisted with an ordinary wrench in a clockwise direction. If this does not stop the flow, then it will be necessary to completely unscrew the gland ring, wrap the packing on the valve stem with your hands and screw the ring back on.
In addition to problems with the seal, there may be problems with the valve seat - this is the space in which the crane box is screwed. With prolonged use, the saddle can become deformed and start flowing water.
Straighten the element can be using milling. It will remove all dents and scratches. If everything is done correctly, then after installing the repaired part, the leak will disappear.
Switch break
If the cork, with which the mixing of hot and cold water is regulated, is deformed, it is beyond repair. We'll have to replace the broken part with a new one. The water supply is blocked, the broken part is removed from the mixer and replaced with a working one, after which the whole mechanism is assembled in the reverse order.
There is no need to remove the mixer from the fixture for repair of valves and the switch, as well as replacement of the gasket.
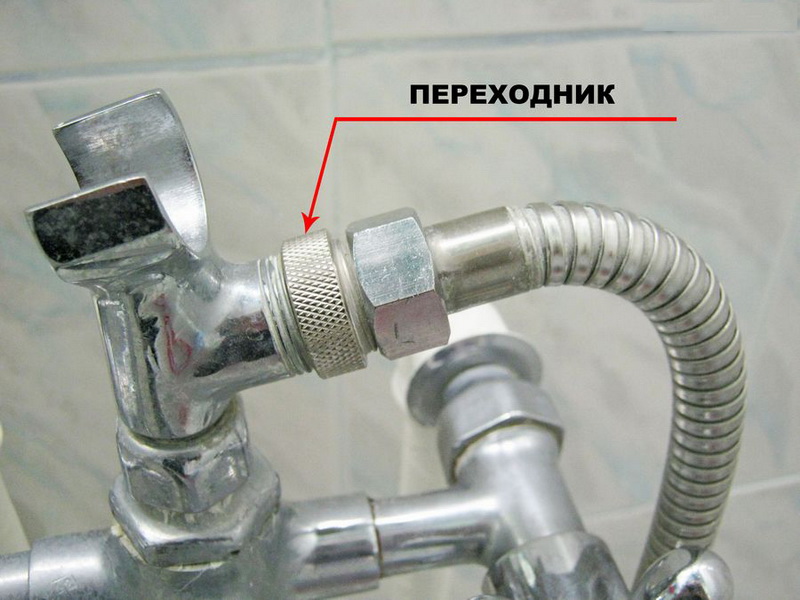
Leak at the junction of the socket with the coupling
Such a problem is no longer solved in a few minutes; it is necessary to completely remove and replace the mixer. The water supply is shut off first. The taps open to the maximum, so that the remaining liquid flows into the sink.Connecting nuts are carefully loosened, as they are often made of fragile materials. The mixer is removed from its place, and the pipe that flows, turns inside out.
When unscrewing the nozzle to keep it necessary for the flange. A nut, removed from the old mixer, and sealing threads is screwed onto the removed pipe. After that, the pipe is screwed into place.

The nozzles of the new mixer must coincide completely with the old ones. If there are at least minimal differences, then both old pipes should be replaced, even if the second one does not flow.
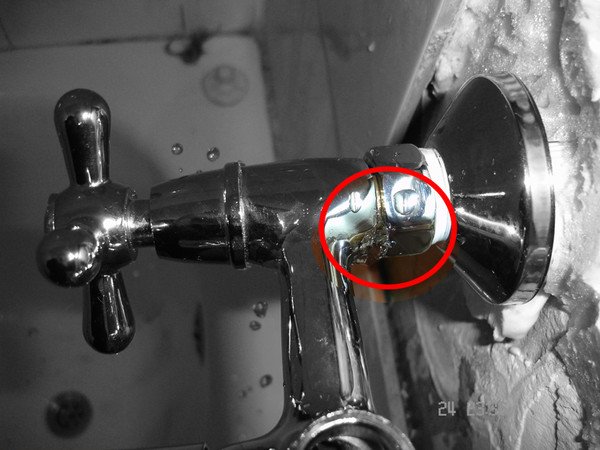
Leak between cap nut and sidewall
If a leak is detected, it is necessary to shut off the water and tighten the nut with an adjustable wrench. After that, the flow must be resumed and check the junction. If the water continues to flow, then you need to shut off the flow again, unscrew the nut and move the valve closer to the wall, moving along the nozzle. Wherein shower hose from the bracket must be removed, to properly adjust the position of the device.
It is necessary to move the mixer concerning a branch pipe until it turns out to remove old laying which should adjoin to a nut for tightness. Often, this rubber ring sticks to the end of the nozzle and is pushed inside.

To remove such a detail without removing the mixer from the mountings is almost impossible.
The old gasket is changed to a new one, which is purchased in a store or made by hand. After that, all parts are returned to the site, twisted and checked for leaks.
Sometimes a leak may appear not behind the nut, but in front of it, that is, between the body and the side wall. To eliminate the malfunction it is necessary to unscrew the mixer from the pipe and the shower, remove its nose and unscrew the sidewall. The detached sidewall is smeared from the inside with special putty or ordinary paint to isolate it from water. After the coating has dried, the mixer is reversed.
Water does not enter the spout or shower hose
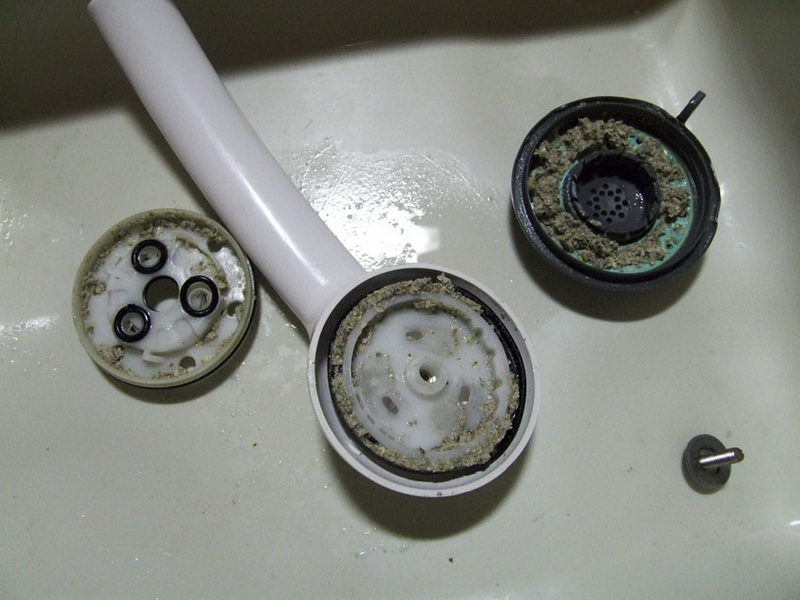
Most often, this problem is associated with ordinary blockages that can occur both in the pipes and in the sidewalls. Loss of water pressure can also mean blockage of the aerator grate.
To get rid of the blockage, it is necessary to remove the valve and insert a flexible steel wire into the pipe. She can crush and remove compressed sand and debris that interfered with the normal flow of water.
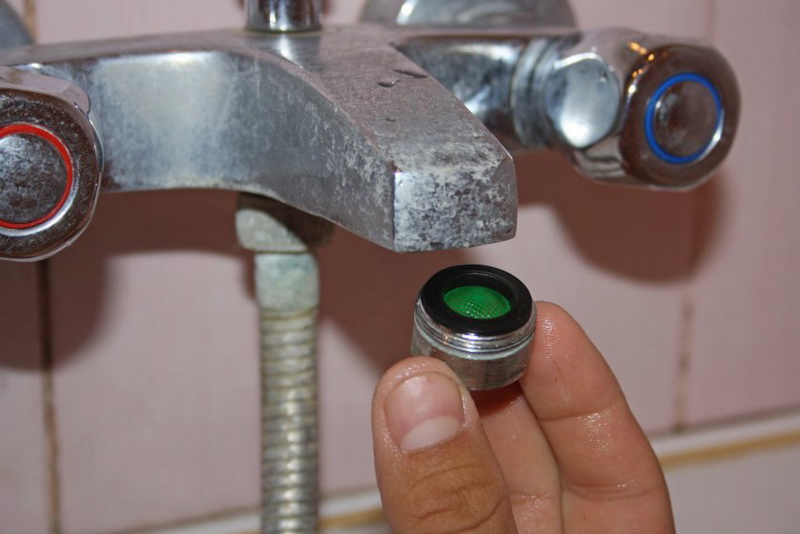
The small holes in the aerator grating are perfectly cleaned with a regular sewing needle.To get rid of all remnants of plaque, it is worth washing the parts with a weak solution of vinegar.
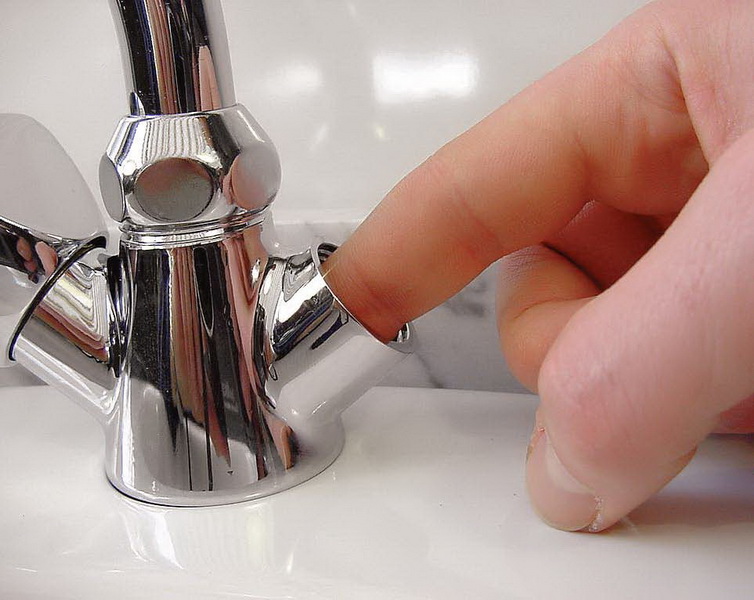
The spout drops
This is due to the breakage of the fixing ring. It is necessary to replace it by purchasing a new, suitable in size.
Temporarily, you can make an expandable wire ring and squeeze it on the spout, installed in the desired position. This design is not very reliable and will only be able to maintain the normal operation of the crane for a while. Preparing such a ring with hard wire and a soldering iron. It should be a circular arc, which almost closes in a circle.
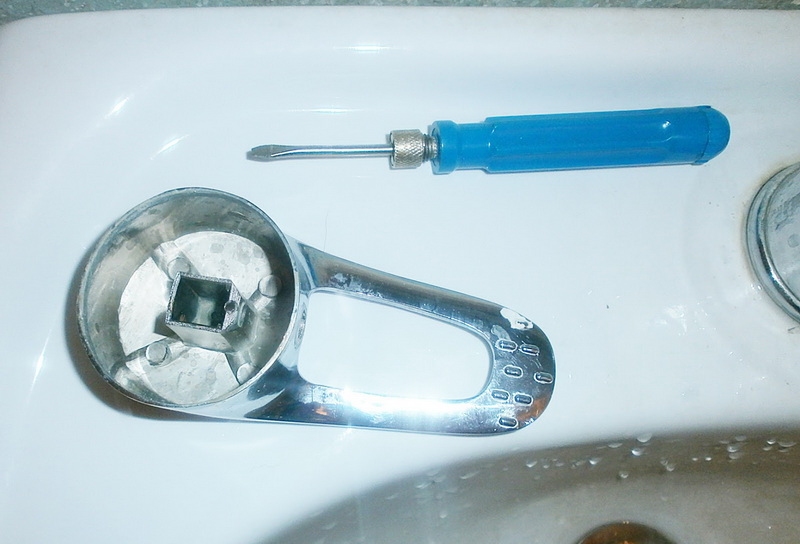
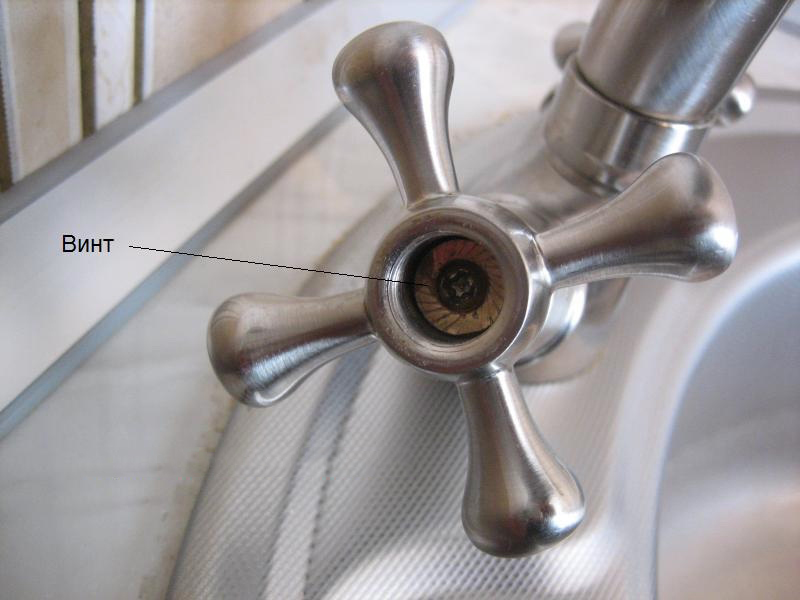
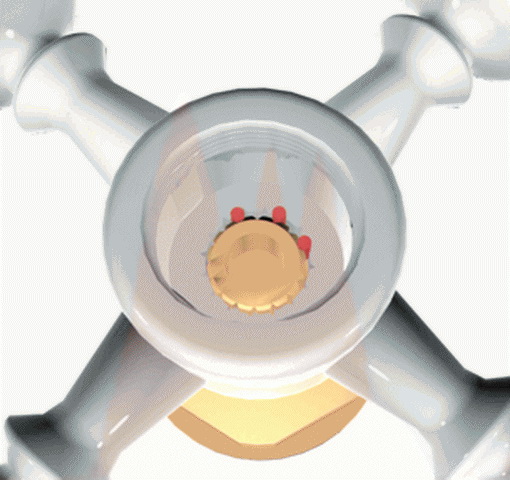
360 degree scrolling
The problem may arise with two handles at the same time or with one of them. It is associated with a breakdown or loss of the limiter stopping the valve stroke. If the item just shifted, then repairing such a breakdown is easy. It is necessary to unscrew the valve and fix the limiter with light blows of the hammer.
In case of loss of parts, will have to purchase a new one. At the time of purchase, instead of a special element, you can put an ordinary piece of wire, but such an unreliable limiter will last only a few days.
In addition to problems with spout, sidewall and other details inside and outside the faucet housing, quite often you may encounter malfunctions of the shower hose and watering can, which is due to both the poor quality of the product itself and the poor quality of tap water.
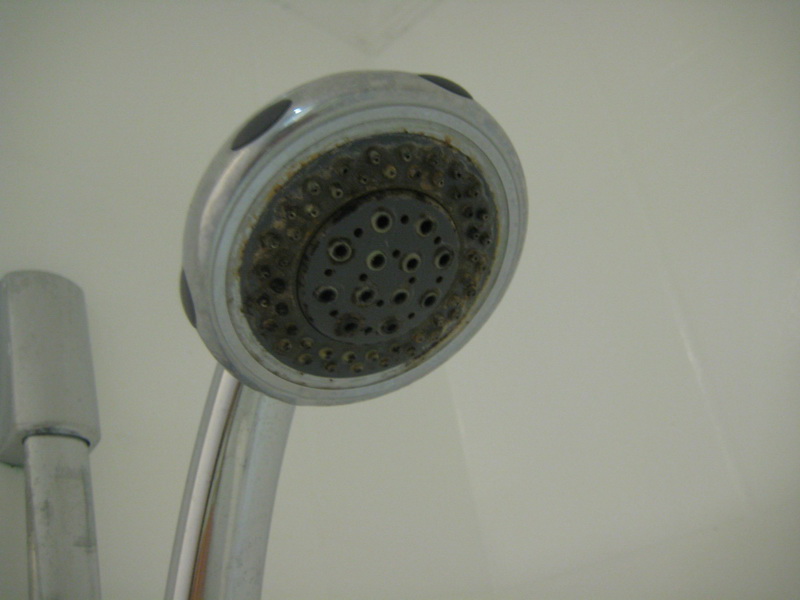
Low water pressure
Most often, the water does not pass through the small holes of the shower head when it is clogged. To fix this problem, you only need to disassemble the watering can and clean the mesh holes with an ordinary needle, tailor's awl or any other thin and hard object.
You should not use a thin toothpick for this, as its fragile tip can break off and get stuck in the cell.
After the reverse collection algorithm, it is sufficient to wipe the outer parts of the shower with vinegar.
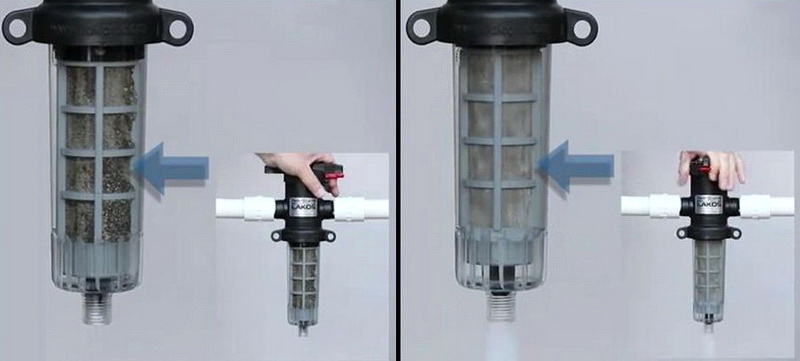
If blockages occur regularly, it is worth thinking about installing an integrated filter with replaceable cassettes. It will not only allow you to drink water immediately from the tap, but also make you forget about the blockages.
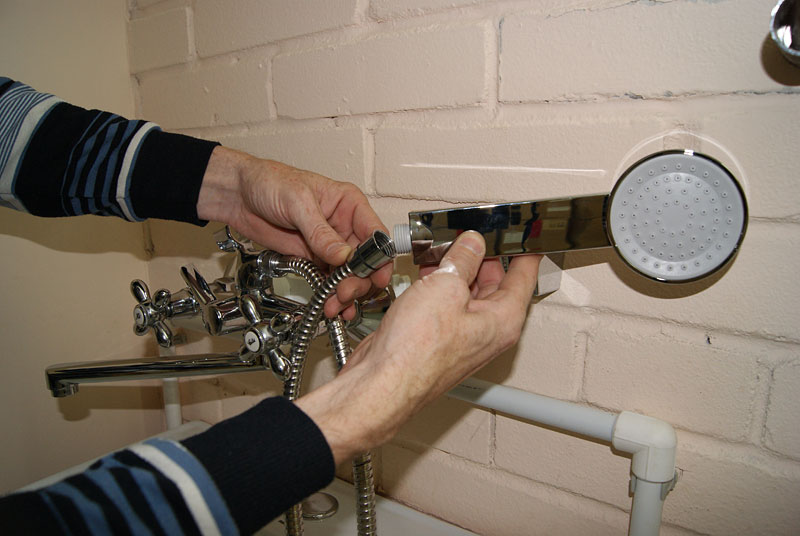
Drain and shower hose
If the leakage was due to damage to the inside of the hose itself or its winding, you will have to buy a new one, since it is almost impossible to repair such damage.Even if you cut off a piece of hose with a leak and re-solder the remaining ends, the risk of a new break in the seam is too great. The cost of the product is quite democratic, and the service life of new products on the market is higher than that of the old modifications.
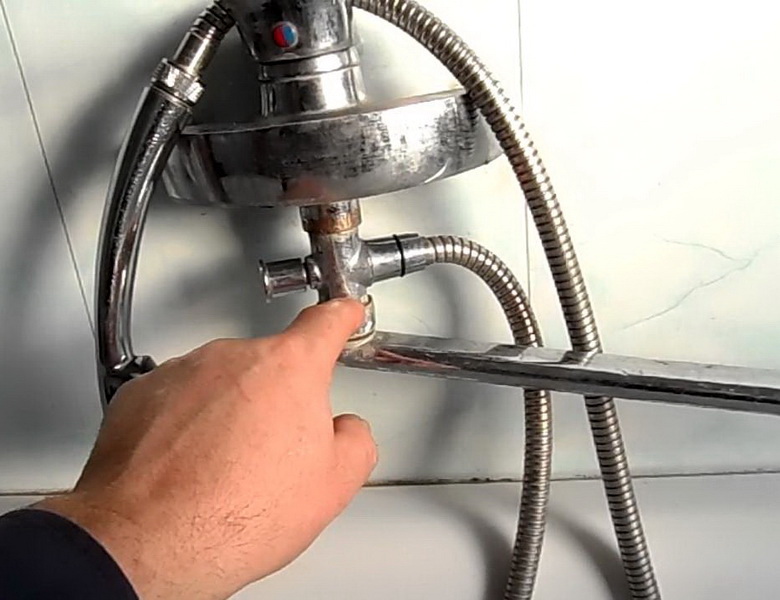
If the leak was formed in two places at once - both in the sink and in the shower, then the problem is in the loosened traffic jam, which badly adjoins to the body. To fix this, you need to unscrew the locking screw and tighten the union nut well. The leakage will decrease, but in order to switch the water supply from the tap to the shower, some effort will have to be made.
If the tightening of the nut did not solve the problem, then the leak is eliminated by grinding the cork to the body with the help of special pastes that can be bought in many hardware stores.
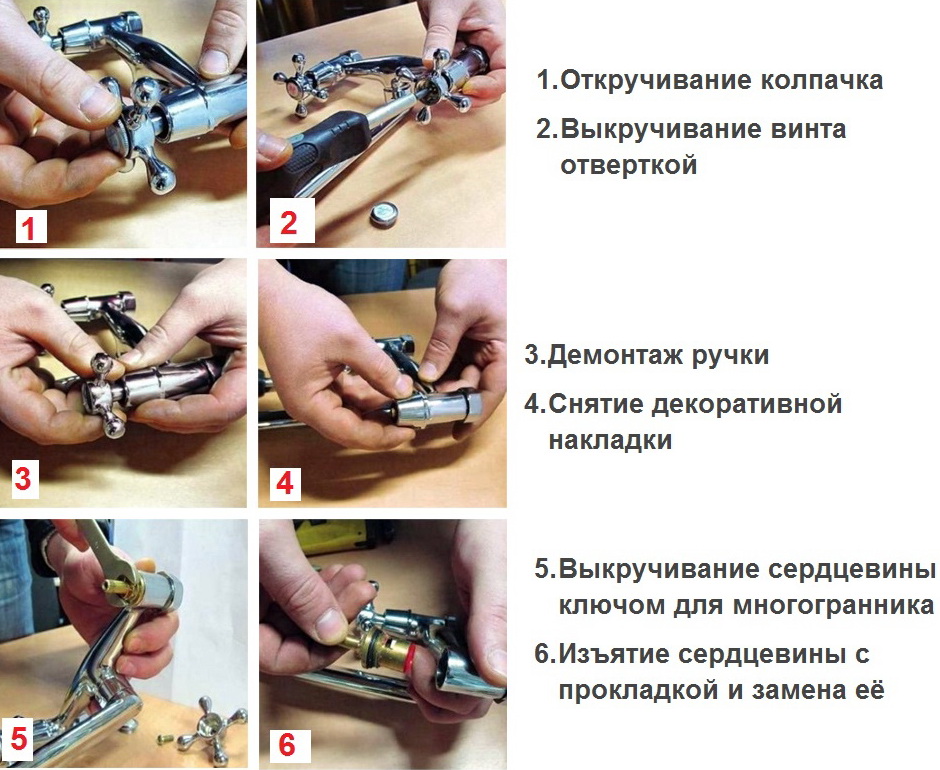
Lever joystick mixers are more convenient to use and gradually begin to replace valve devices. They are more convenient to use and they break less, but it is somewhat more difficult to repair such mixers.
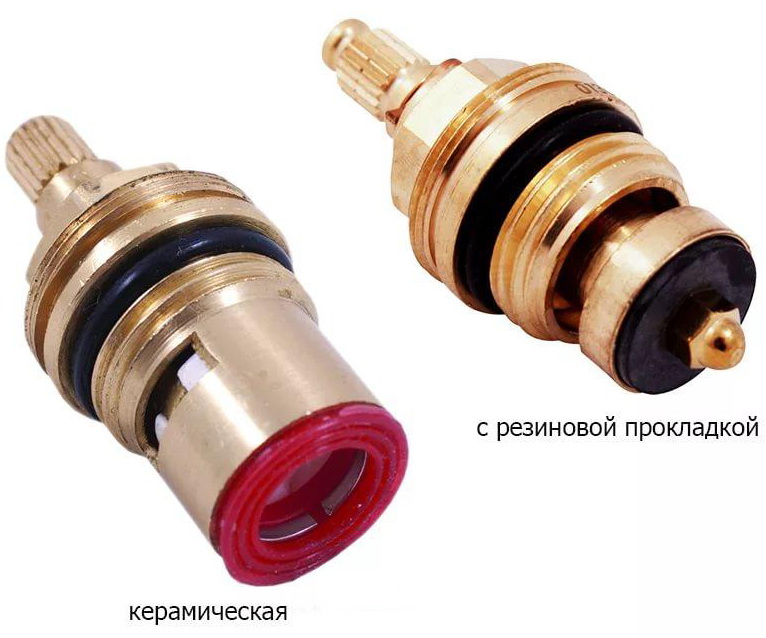
Instead of the usual rubber or silicone gaskets, special cartridges are installed in the lever cranes. They can be of two types: disc or ball.You cannot change one view to another, so you need to clearly understand what type is used in the repaired device.
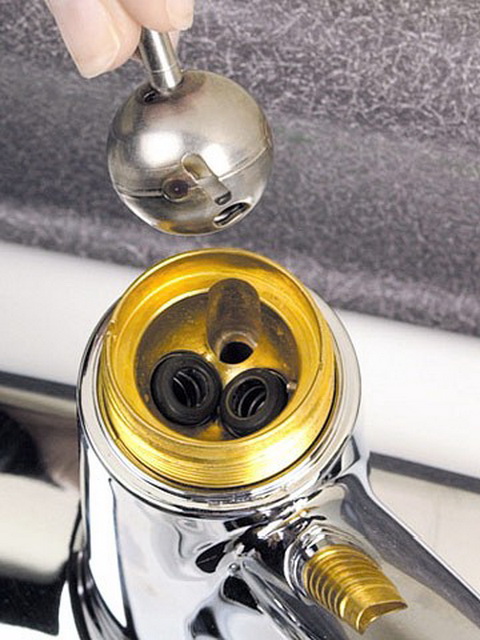
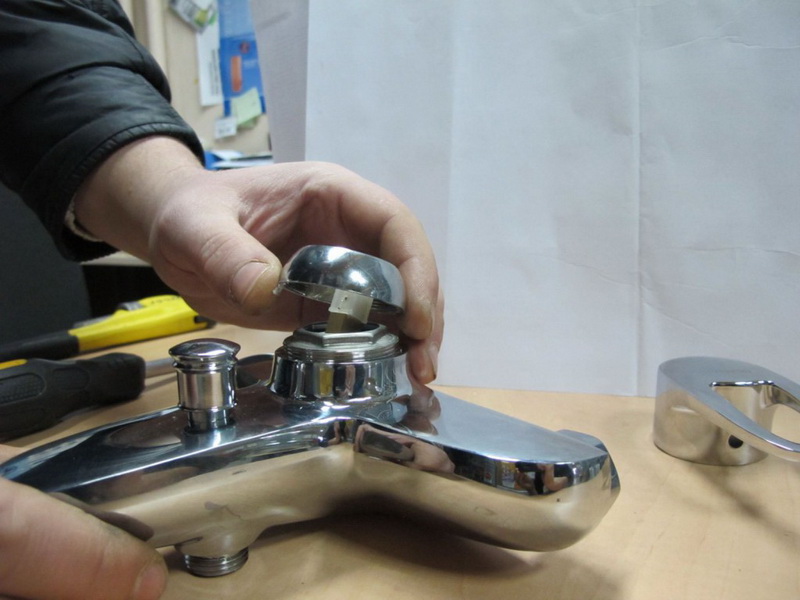
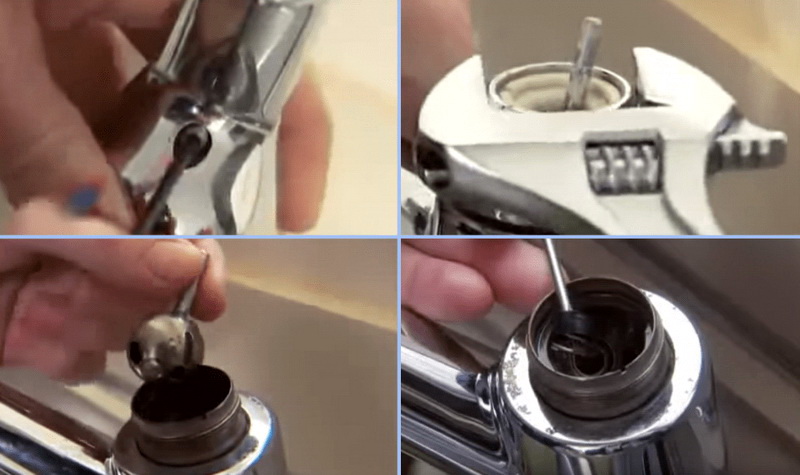
Repair ball mixer
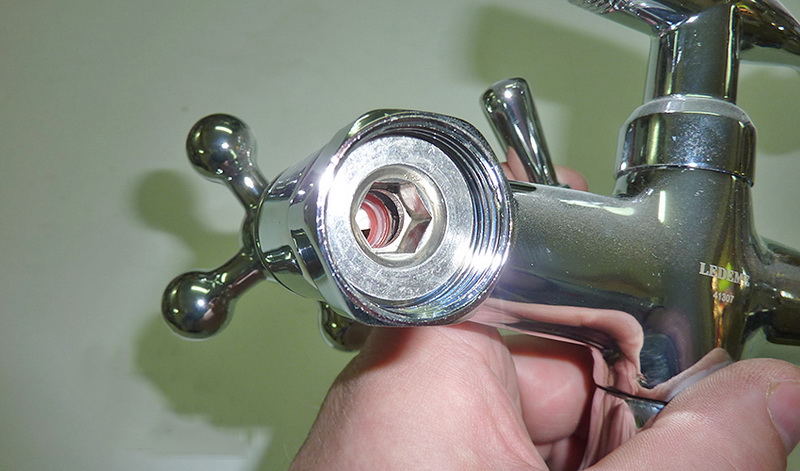
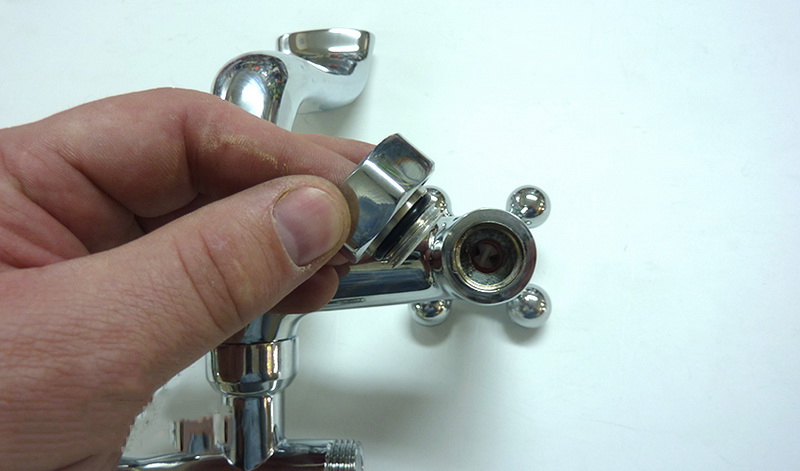
First you need to shut off the water supply and unscrew the mount lever. Then you must remove the lever as neatly as possible. Do not pull and pull it, which can damage the rod on which it sits. Slowly shaking it from side to side, you need to pull the element up so as not to feel resistance inside the structure.
After the lever is removed, you need to unscrew the thread connection. You will see the plastic component and the seal located behind it. The valve flows most often due to wear or deformation of this seal. Damaged part must be replaced. After that, the mixer is assembled in the reverse order.
Sometimes the breakage may concern the ball element itself, then it is necessary to replace it as well.
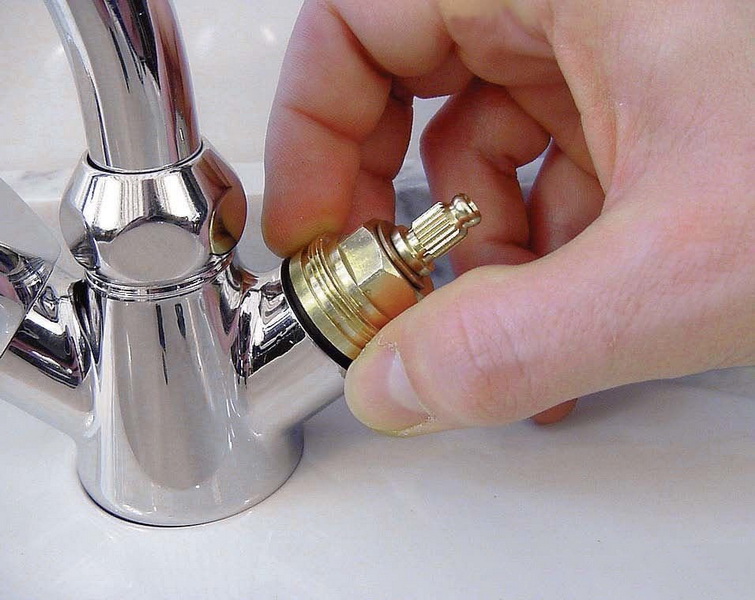
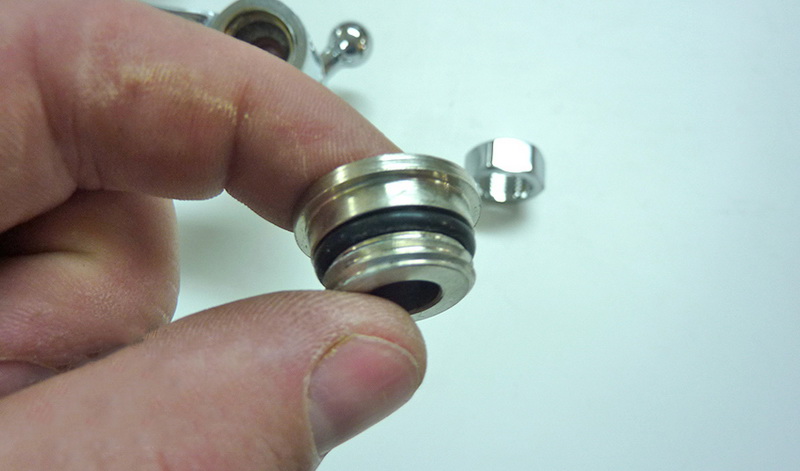
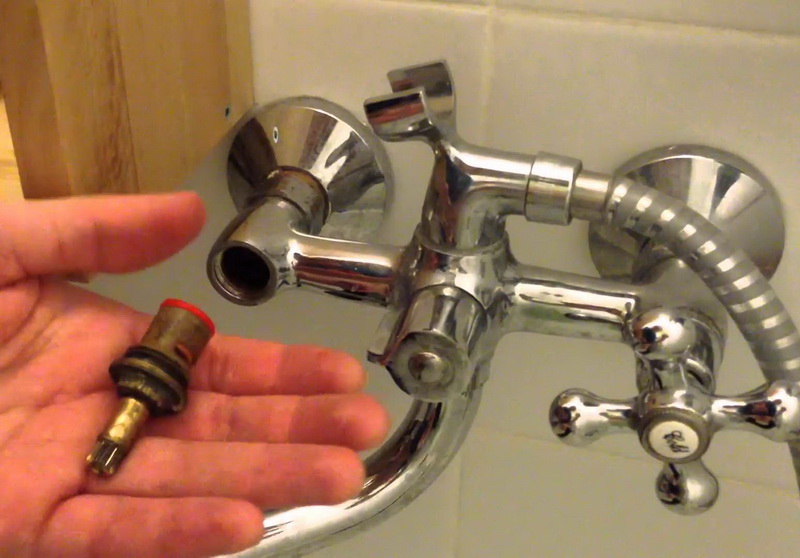
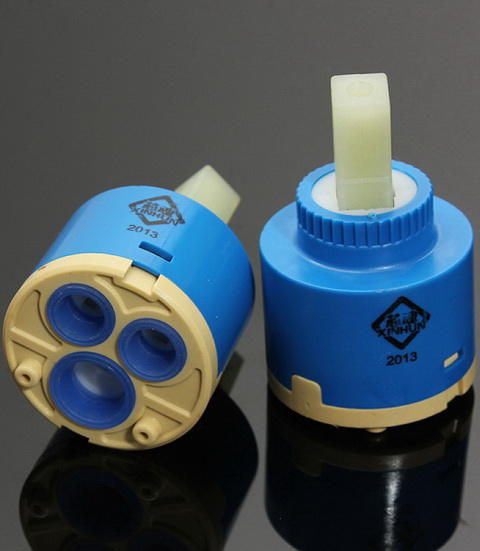
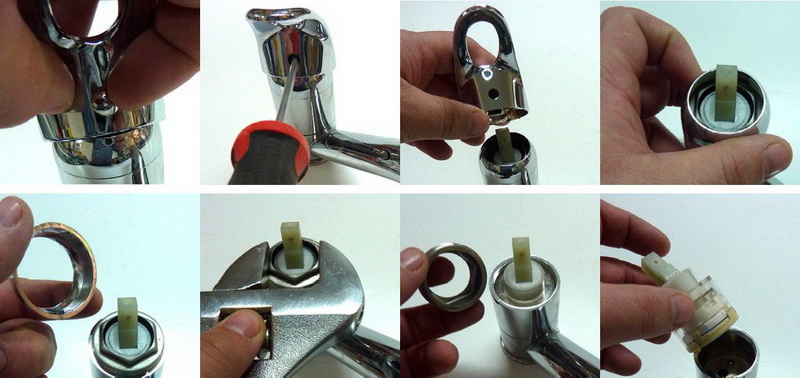
Cartridge breakage
If the old cartridge has become unusable, it is necessary to replace it with a new one. The main thing with the purchase is to choose such a part, the protrusions in which fit the holes of the mixer. It is advisable to know the size and brand of the old parts so that the store does not have difficulties.And you can just take a broken part with you and show it to a consultant who will help you choose the right size.
All parts of the lever mixer are more expensive than the details of the valve. However, they break much less often, and their service life is two or more times larger than the first.
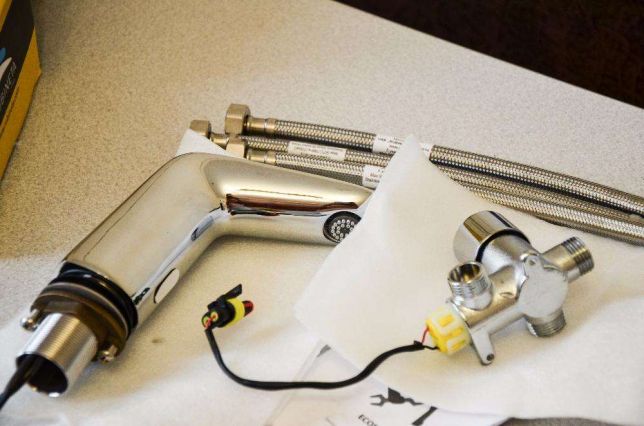
Breakdown of the sensor tap
Contactless faucets for both kitchen and bathroom are considered the most reliable option. Since they have practically no parts that the user acts mechanically, there is practically nothing to break there. However, sensors of the photocell, which monitors the movement, may become unusable. In this case, you need to call the master, who can fix the damage.
But aerator blockages or loose nuts can be easily fixed by hand. They are removed in the same way as on contact mixers, so the aerator can be cleaned with a regular needle and the nut tightened with a wrench.
Useful tips
Of course, it's good when you can fix the mixer with your own hands - this will save money and time to call the master. But it is best to let the mixer work for as long as possible without any breakdowns. For this you need to take preventive measures.
- It is necessary to carefully monitor the composition and quality of tap water. If the water is hard, has a lot of impurities and litter, the best solution to protect the mixer will be to install an integrated filter. For such a primary filtering, you need a coarse cleaning device, which is installed at the beginning of a fork in the water supply system leading to an apartment or house. One of the new products in the construction market is self-cleaning filters that are able to bring all the sand and debris down the drain.
You can put a filter to soften hard water, which is especially important in the presence of ceramic mixers.
- You should not strongly pull the lever of the mixer and with a force to unscrew and tighten the valves - this will lead to an early breakdown of parts. It is strictly forbidden to put pressure on the spout and put gravity on it. If you do this, the fragile part can bend as well as simply break at the junction with the case.
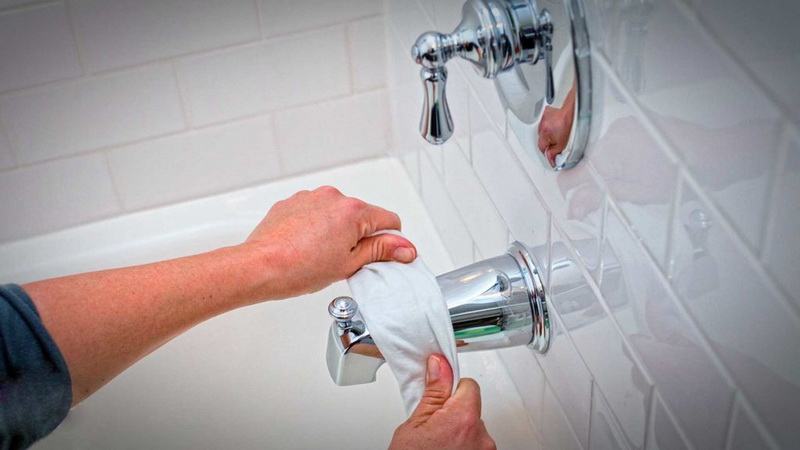
- For external cleaning, you should select cleaning products without abrasive particles that can scratch and damage the surface. You can not use those funds, which include phosphoric acid.Do not wipe the chrome faucets with hard brushes and graters, it is best to use a soft cloth. It’s easy to change a broken part with your own hands, but it’s better if it doesn’t come at all to breakage.
How to fix the mixer with your own hands, see the next video.