Subtleties of the process of replacing the mixer
If for some reason - breakage, wear, change of design, it is required to replace the faucet in the bathroom or kitchen, then for the owner this business should not be an unexpected and extraordinary event. Self-replacement of the faucet - simple work that requires only care and the availability of a suitable tool. Such work takes a maximum of 1.5 hours from a home craftsman, not counting the time of choosing and purchasing the necessary sanitary fixture in the distribution network.
Special features
Any sanitary equipment of the apartment is included in the system of plumbing and sanitary communications that are common to the house or district. Therefore, you must remember about the responsibility for errors in the self-repair or replacement of this equipment. They can lead to damage to property of neighbors and the management company as a result of flooding, fire or other incidents resulting from the negligence of their actions responsible for the accident. All this can be avoided if you carefully consider the entire process of replacing the mixer before starting work.
Before starting repair or replacement of plumbing fittings (valves, valves, taps, mixers) and devices for connecting them to pipelines, it is necessary to completely shut off the water supply to the repaired area. To do this, shut off valves are closed at the inlet of pipelines to a house or apartment (experts call such valves primary valves or primary valves).
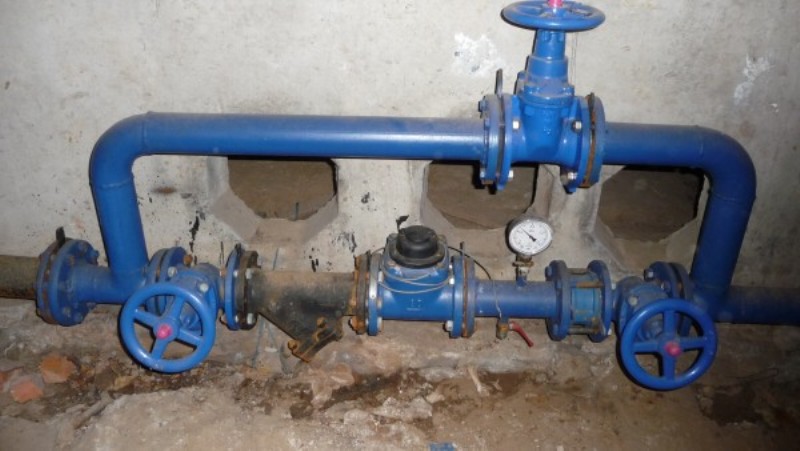

Replacing or repairing a mixer requires shutting off the two water supply pipes - hot and cold. In addition to shutting down the pipelines, it is necessary to ensure the density of the primary reinforcement by opening all valves in the disconnected area for revision: the termination of the leakage from the valves confirms the absence of gaps in the primary valves.
Preliminary measures are necessary to ensure complete safety of work. If it turns out that the primary valves in the “closed” position allow large quantities of water to pass through, then permission should be obtained to turn off the valves at the entrance or even at the entrance to the whole house.Permission can be obtained from the Management Company, where you need to write a statement indicating the date and time of the proposed repair.
The management company must send its employees to the operation of disconnection and subsequent connection of pipelines.

Kinds
To replace an unsuitable or unpresentable mixer, you must first purchase a new one. There is a huge amount of faucets for baths and sinks of domestic and foreign manufacturers, of any color, style and material of manufacture.
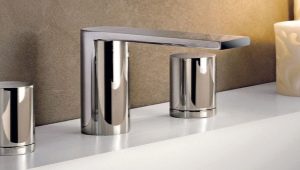
The device of modern bathrooms involves the installation of mixers of two functional types in several versions.
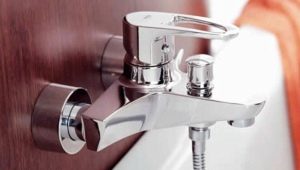
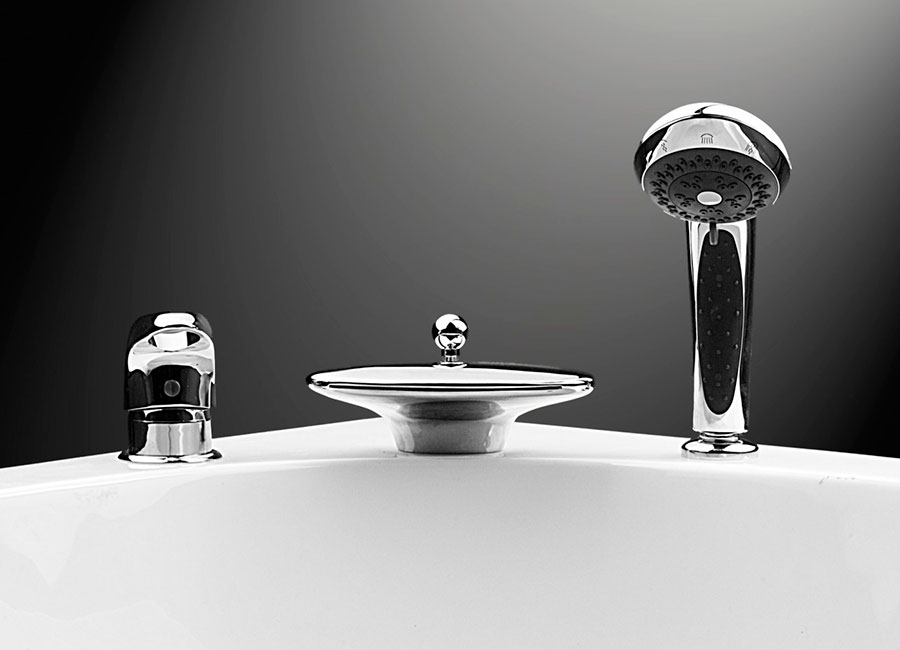
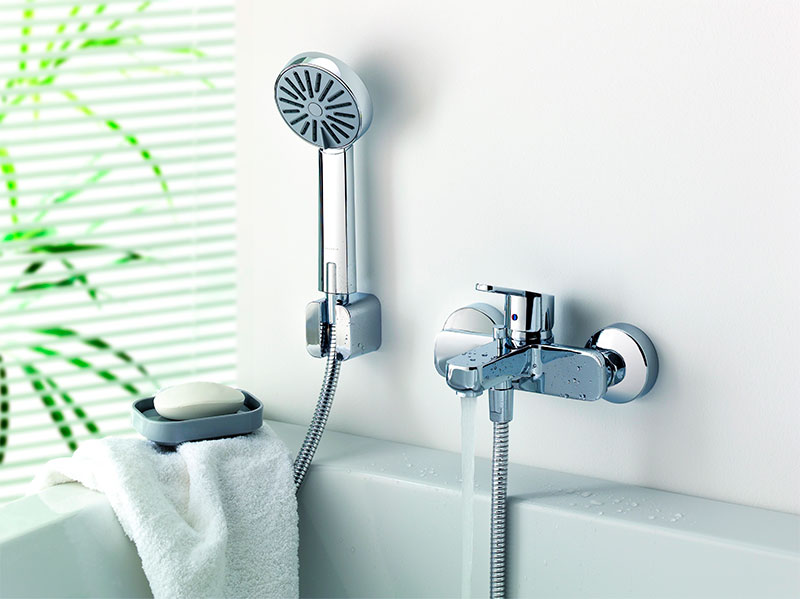
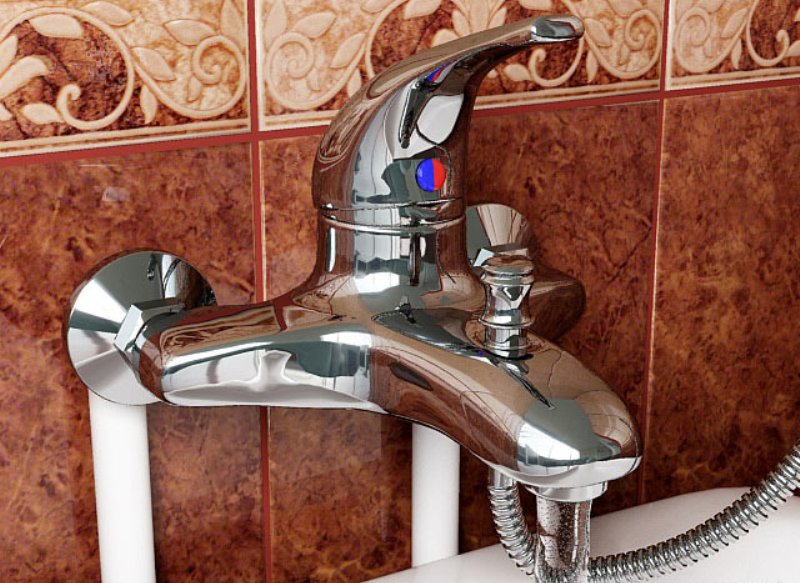
- Two separate mixers: one is installed above the sink bowl, the other - for filling the bath and shower. These devices are completely different in design and function. Above the sink faucet is an ordinary, designed for washing. The faucet above the bath has a flow direction switch to the shower or to the gander for water.
- One mixer that performs three functions at once: a washbasin over the sink, a device for setting water in the bathroom and a shower. The same type of mixing tap is used as in the first version (with a water flow direction switch).
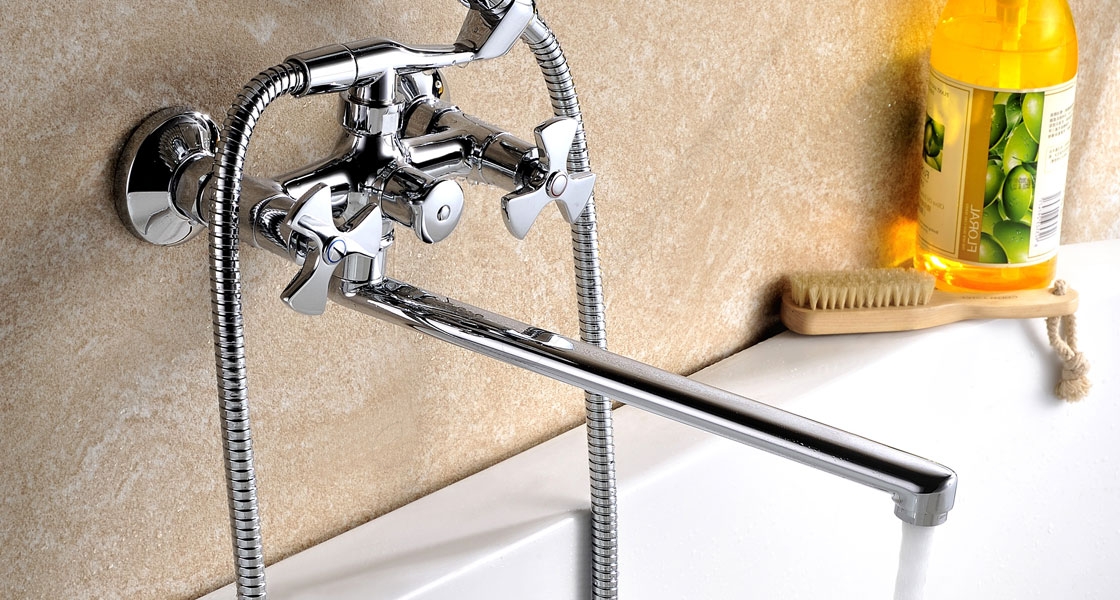
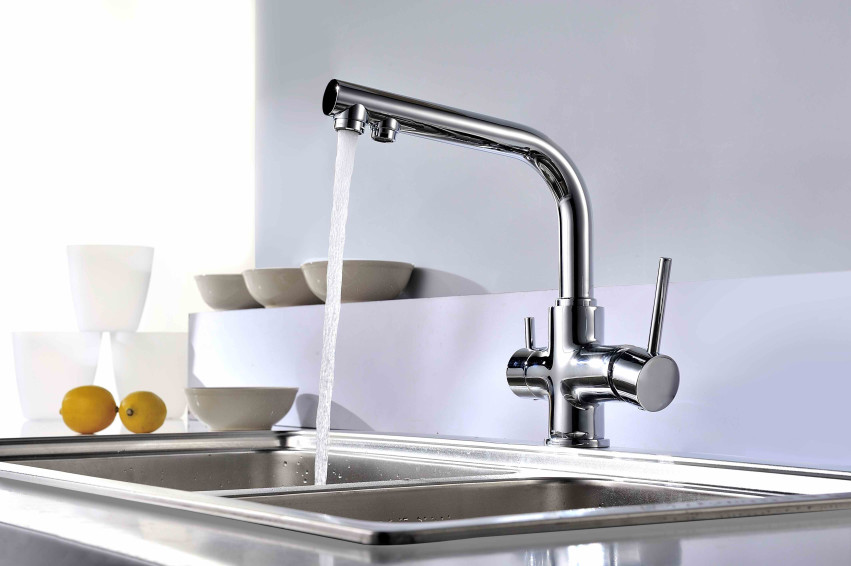
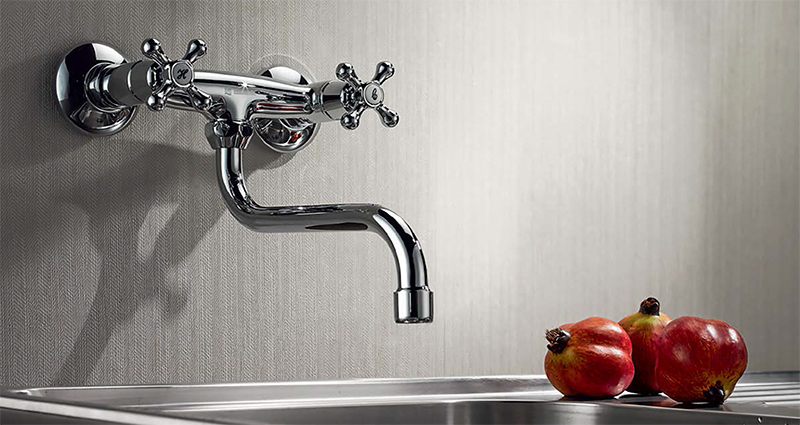
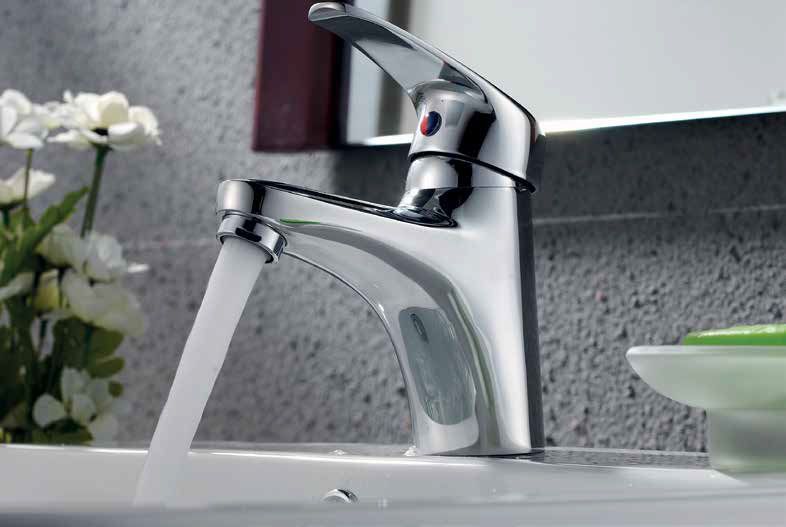
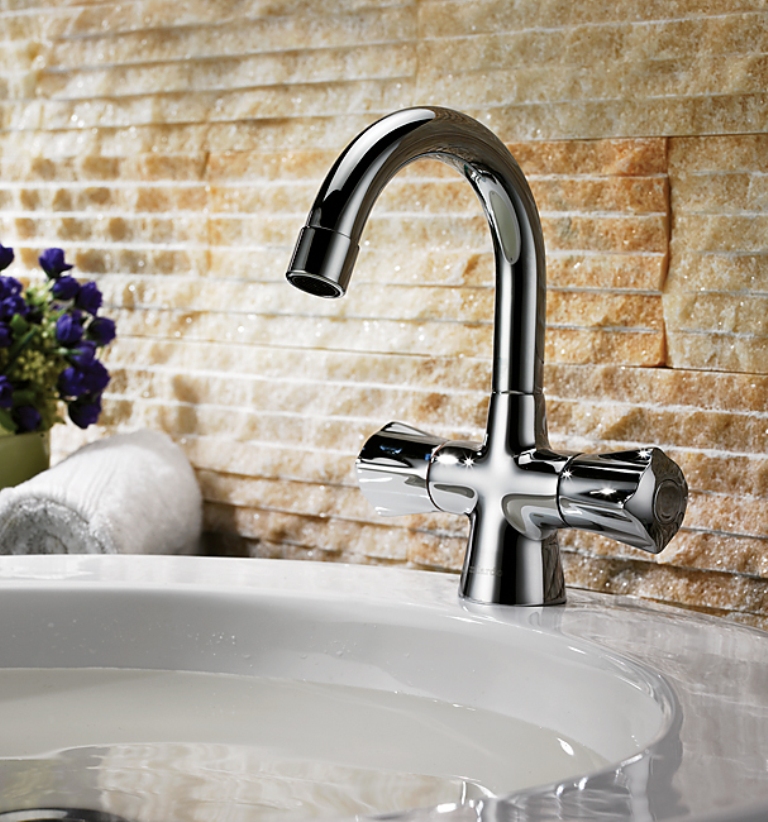
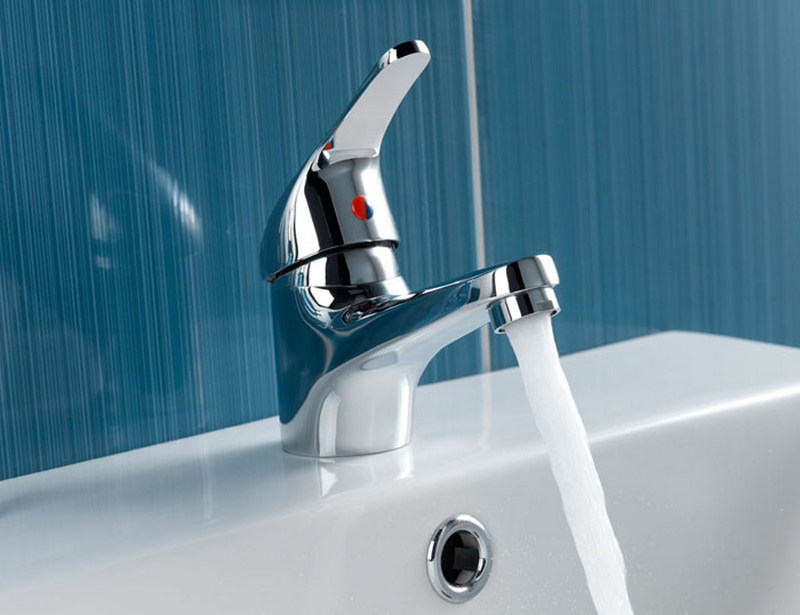
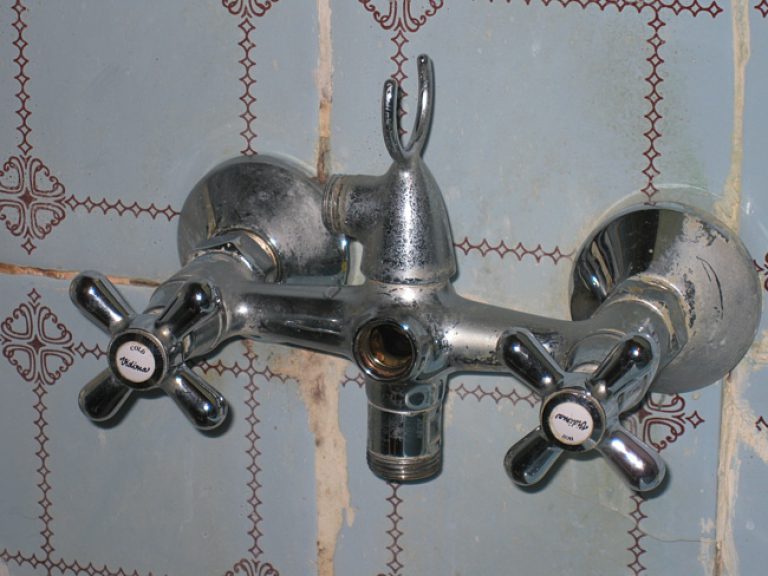
For the sink, it is more common to use conventional taps with two valves (one valve for starting cold and the other for hot water) or taps with one lever. Cranes with a lever is also called single lever. The device named mixers are not the same. They also differ in terms of ease of use: one-handed control is enough to regulate the pressure and water temperature through a single-lever valve. In a two-valve tap, sometimes two hands turn out to be small.
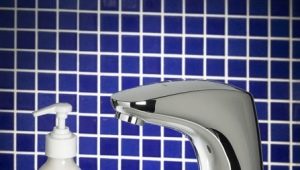
The contactless mixers that are familiar to everyone when visiting public places (theaters, cinemas, restaurants, cafes, stations) are not only a new type of sanitary comfort on the principles of automation and electronics, but also quite hygienic and economical devices.
Having adjusted them to a certain water supply temperature suitable for all family members, they are no longer touched with dirty or soapy hands.
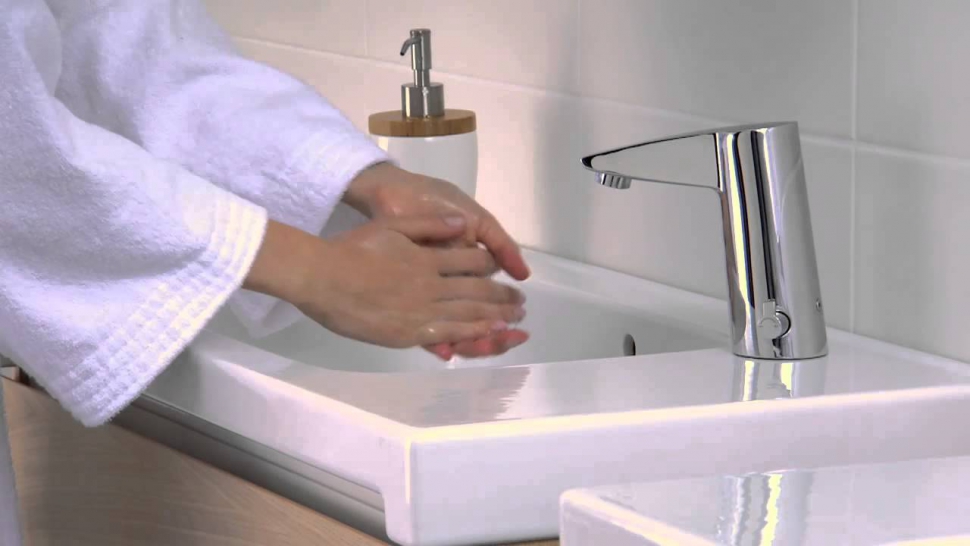
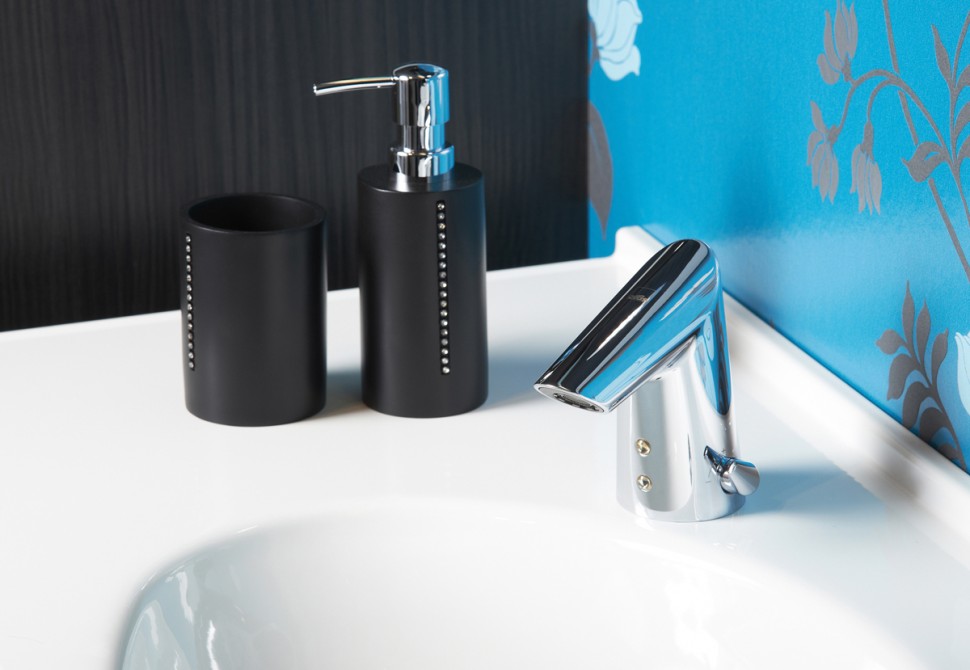

There are no problems with the forgetfulness of turning off the faucet - the sensor in the absence of a “washing object” will block the flow of water. But it is problematic to repair such faucets at home due to the complexity of the sensor system, and in the user relation they are only suitable for installation above a washbasin in the bathroom.In other places they are completely irrelevant: it is possible to dial the bathroom only by constantly holding hands under the tap, and in the kitchen they are inconvenient in terms of frequent changes in water temperature when washing and rinsing dishes.
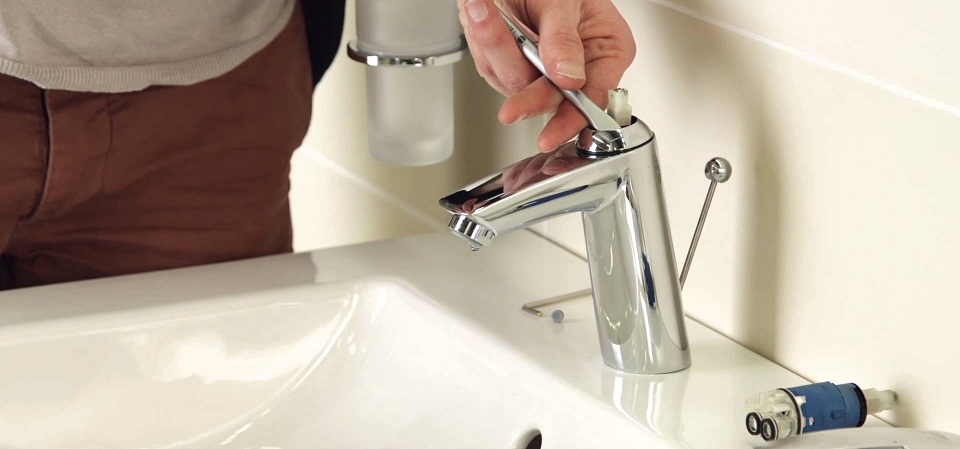
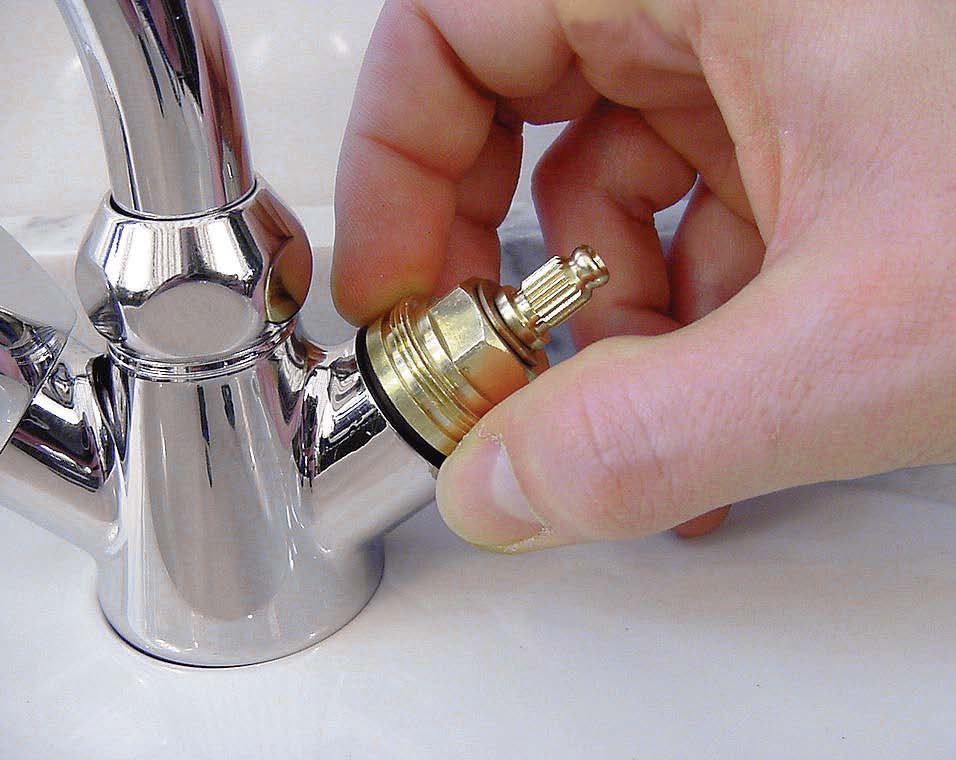
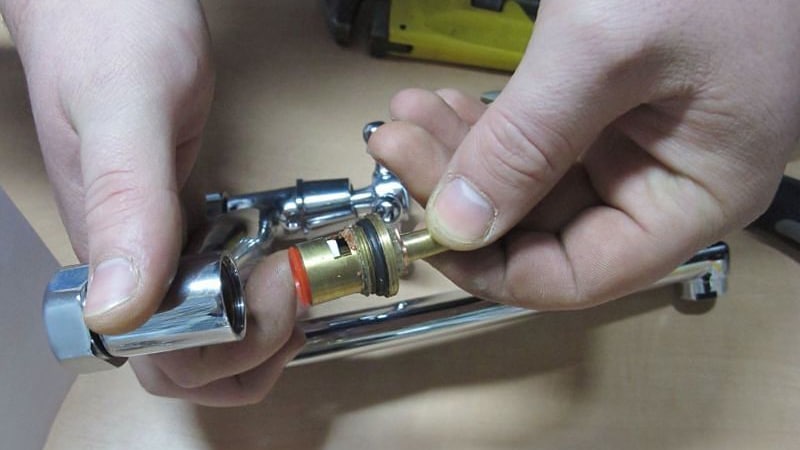
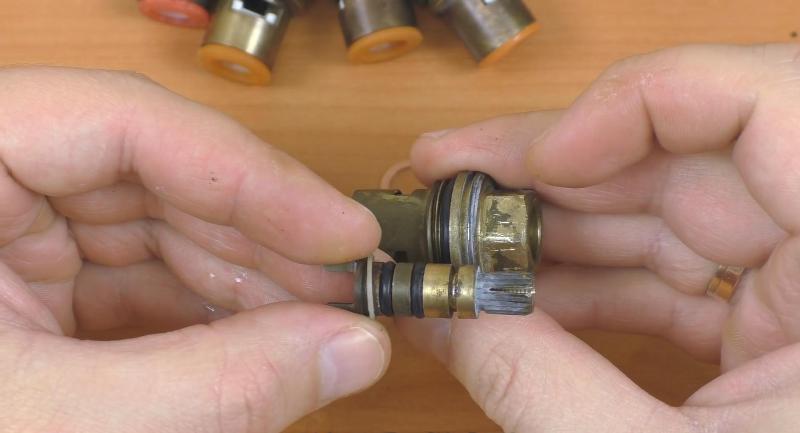
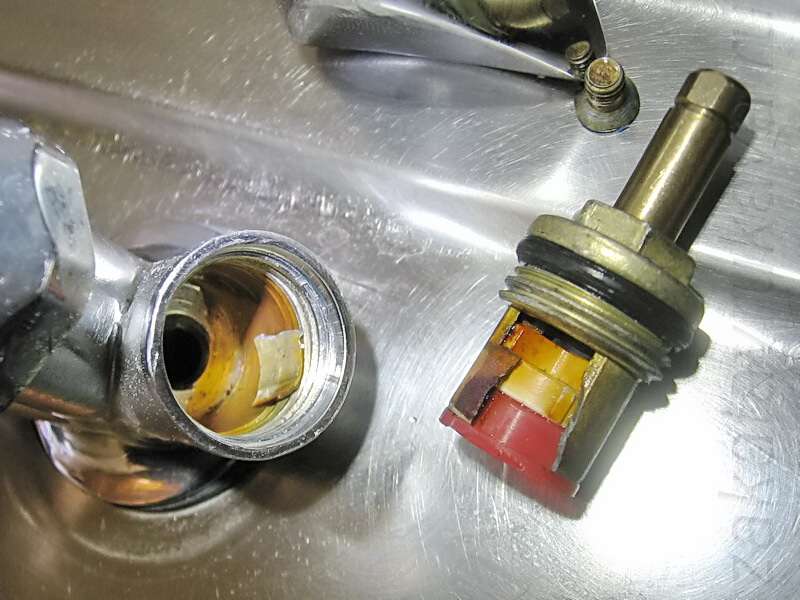
Single lever faucets also have a significant drawback - they either have ball valves or cartridge locking mechanisms that are very demanding for the purity of the water. In the conditions of old water supply networks that are not equipped with modern cleaning equipment, ceramic parts of taps quickly fail. Repair parts are not subject, they can only be replaced with a new locking mechanism. But with such work you can cope in 20 minutes without resorting to the services of plumbers. More important in this case, the set of the desired tool.
Causes of failure
The main reasons for the complete replacement of mixing taps in the kitchen and bathroom are their frequent leaks or blockages, wear of switching mechanisms in the shower-spout system, cracks in the housing, failure of fasteners, and also a change in the design of the rooms where these taps are installed. It is necessary to understand and determine exactly why breakdowns occur. This is especially important for those who are satisfied with the existing mixers, and extra costs are not included in the plans.
Often, some of these reasons can be eliminated without replacing the entire crane.
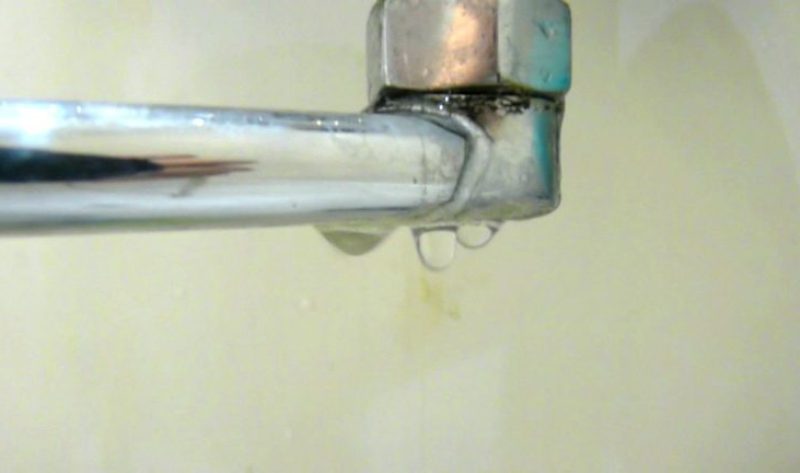
Leakage in two-valve types of cranes are from the mixer gander and from the crane's flywheel.
- From gusak mixer. One of two reasons is possible, or both. The first is the omission of valve gaskets due to the violation of their integrity, wear, hardening or deformation. Violation of integrity may occur as a result of exposure to the gasket sharp edges of the seat of the crane. The second is the wear of the seat and valve, which most often occurs in cranes with a long service life as a result of corrosion and mechanical (rubbing) exposure to water.
- From under the flywheel of the crane. This is to blame: the flywheel stem seal or valve gasket. The cause of a bad flywheel seal is a loose or deformed sealing ring. The reason for missing the gasket - it fell from the pin.
Ball or cartridge mixers give leaks when sand or other debris gets into the shutter mechanism (between the ball and its socket at the ball mixers, and between cartridge-type gate discs). Even with a tight closure of the taps, water will seep through the resulting gap between the working parts of the valves.
In taps with a shower, in addition to the listed faults for similar types of mixers, other leaks are possible.
- When you open the tap water flows through the gander and through the shower.The reason lies in the switch. Depending on the type of mechanism, these can be: lack of water pressure for tight switching of the “shower-outflow” system in push-button types of switches with a metal valve, wear of guide parts in switches with an eccentric and keg, breakage due to sand ingress and clamps in ball switches, wear gaskets in spool devices.
- Leakage through pushbutton pushbutton as a result of damage to the gland.

The reason for reducing the flow of water at the outlet of any type of faucet is often the clogging of a special device installed at the end of the gander, called an aerator. It is polluted due to the high stiffness of the raw water, the salt deposits of which clog the grid of the aerator and the holes in the shower head. Litter and scale in the water pipes can cause clogging of the mixers themselves, which will also affect the power of the jet at the outlet of the faucet. All these malfunctions do not require a complete replacement of taps and are easily fixed at home.
Failures in the form of cracks and fistulas in the valve bodies, breakage of fasteners made in conjunction with the crane bodies, need to be replaced with serviceable appliances.Although contactless taps are distinguished by a long service life, they are subject to the same malfunctions as all the others: they become clogged with dirty water, the internal mechanisms of the shutter wear out, the aerator grids become clogged. But in addition to this, sensors and photocells that are responsible for turning on the water when hands approach the tap nozzle can fail. Such a malfunction will be mastered only by a specialist knowledgeable in electronics.
Required tools
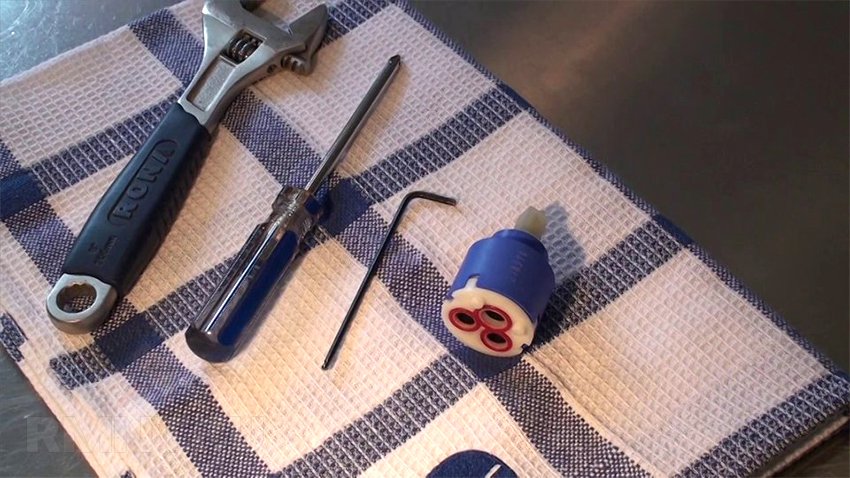
When replacing mixing faucets, a small set of tools is required, which can always be found in a person who knows how to solve economic problems on his own.
Here is a list of tools that may be needed when dismantling and installing cranes of various types (without repair):
- Adjustable spanner or gas wrench of medium size (ideally to have a clamping wrench);
- socket wrenches for 10, 11, 12, 13, 14, 22 and 24 mm (rarely - a key for 27);
- end tubular key 10 mm;
- pliers;
- knife;
- scissors;
- screwdriver flat thin;
- Phillips screwdriver;
- bucket (basin) to drain water.

In addition to the tool, you will need consumables:
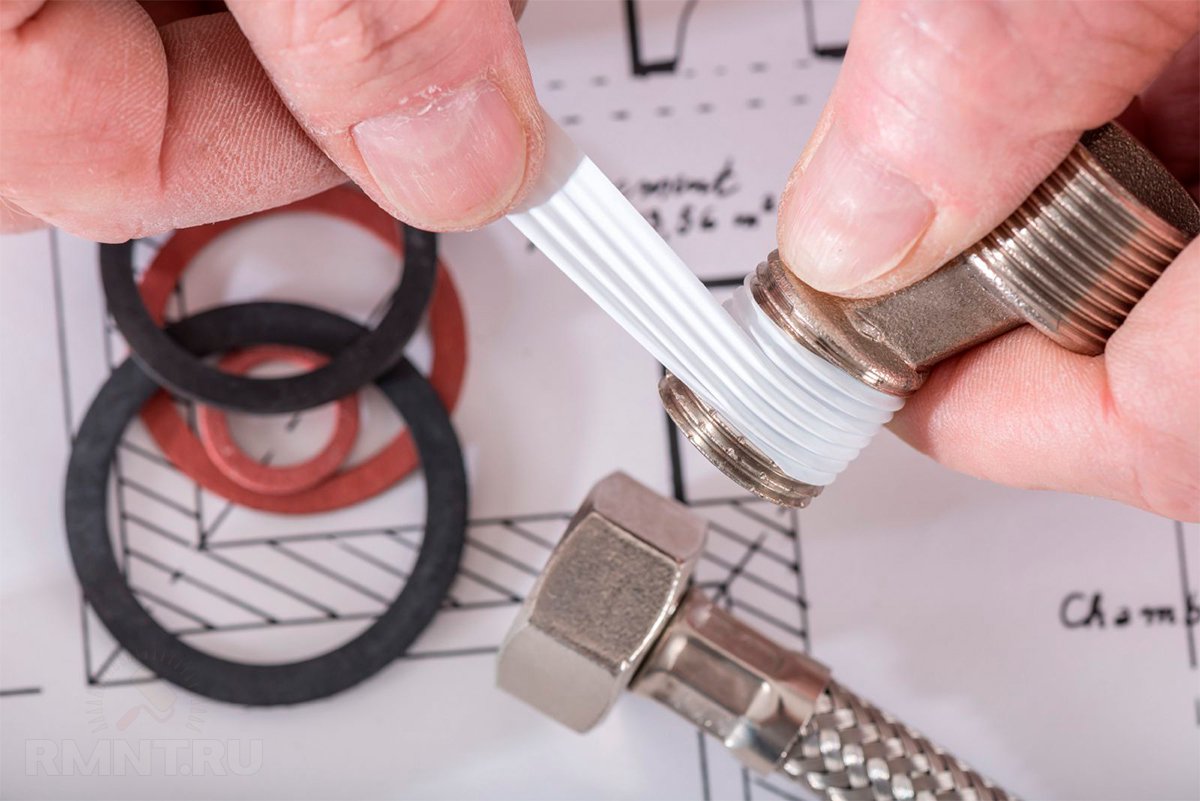
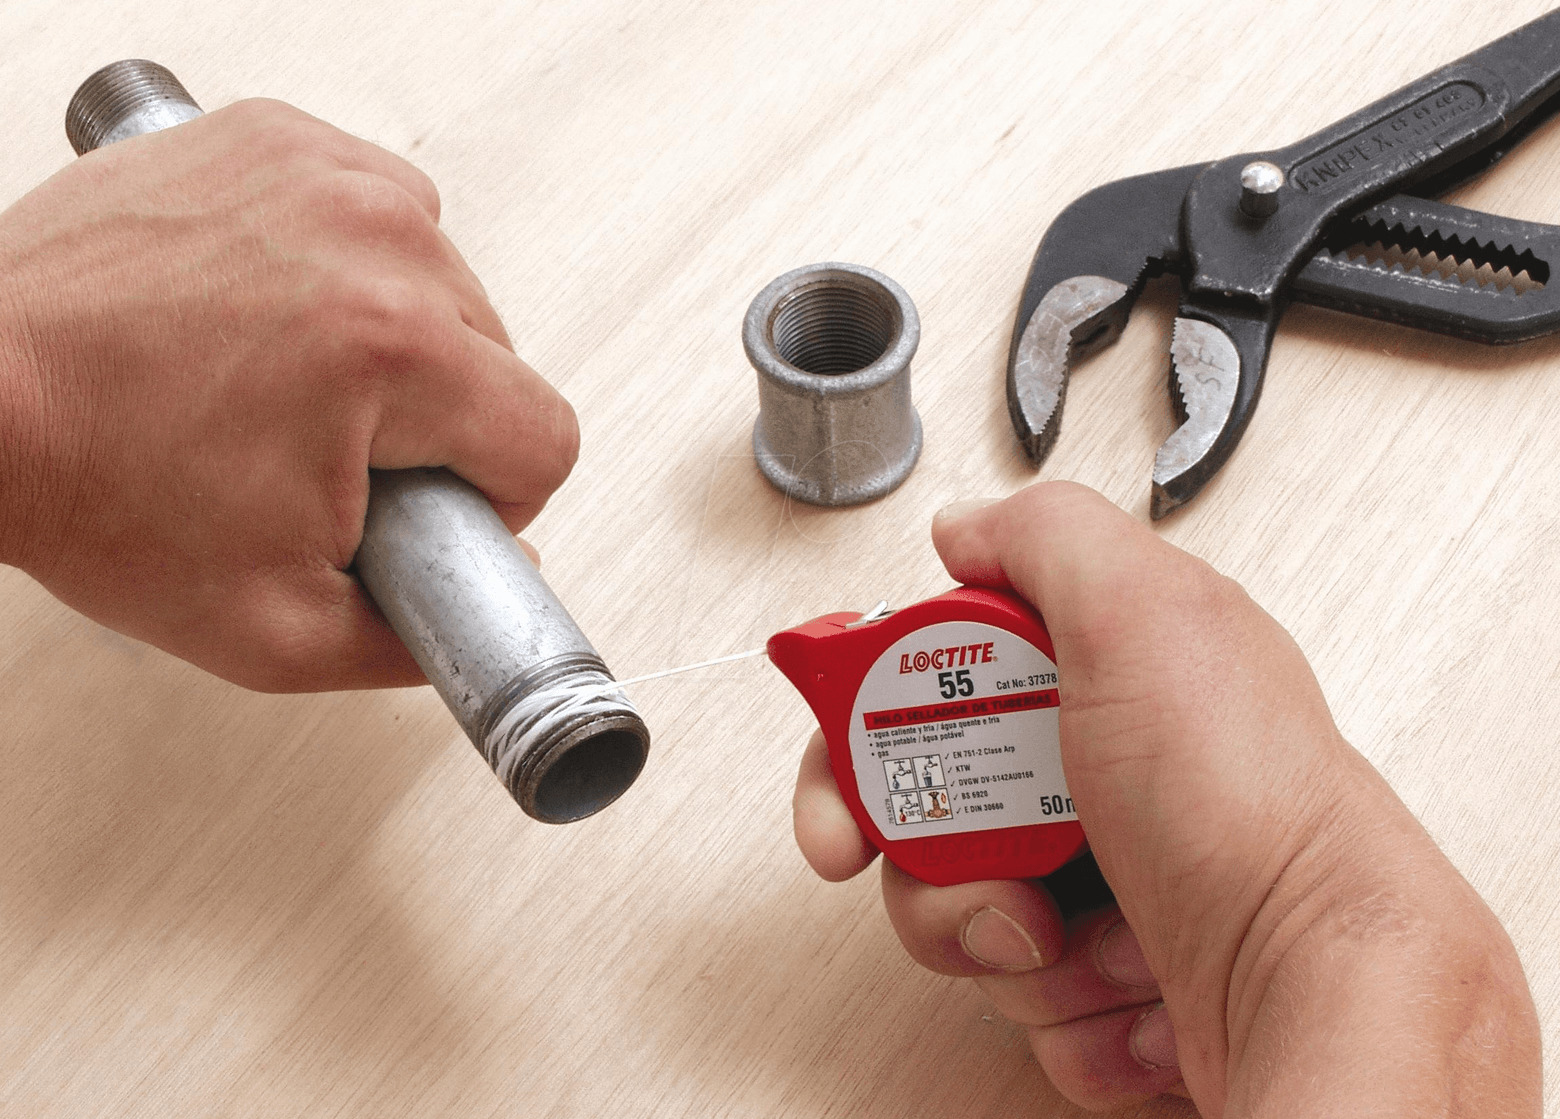
- tape for sealing fittings (thread sealing);
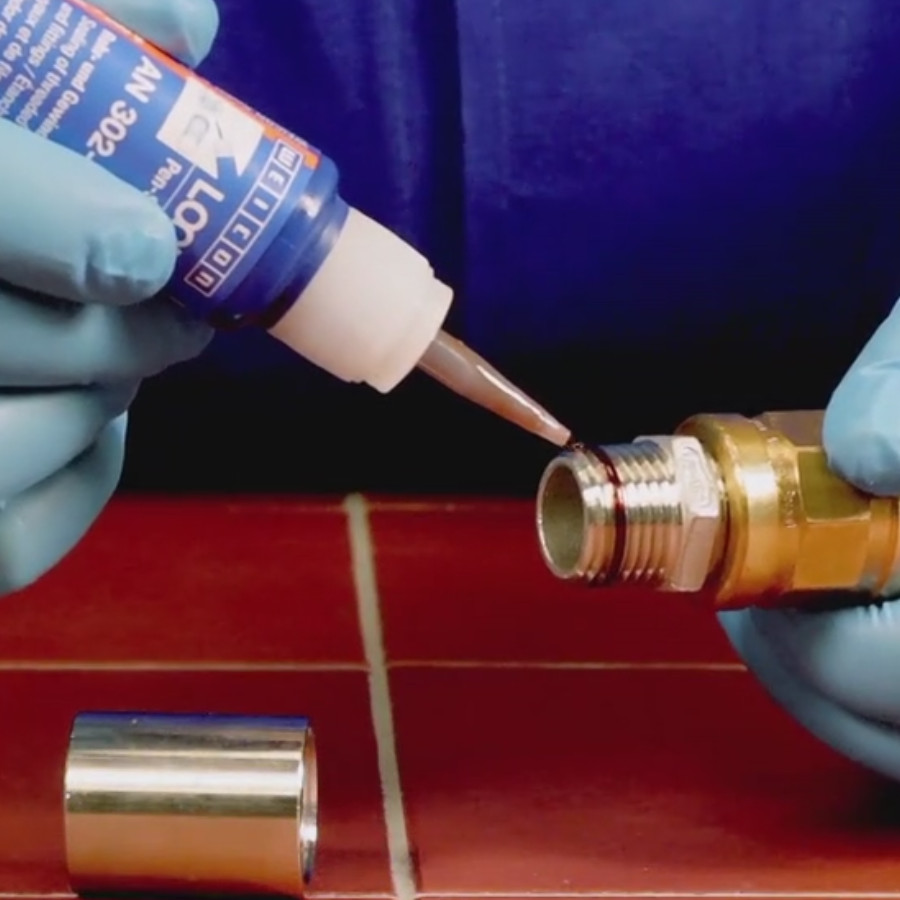
- liquid sealant;
- insulating tape.
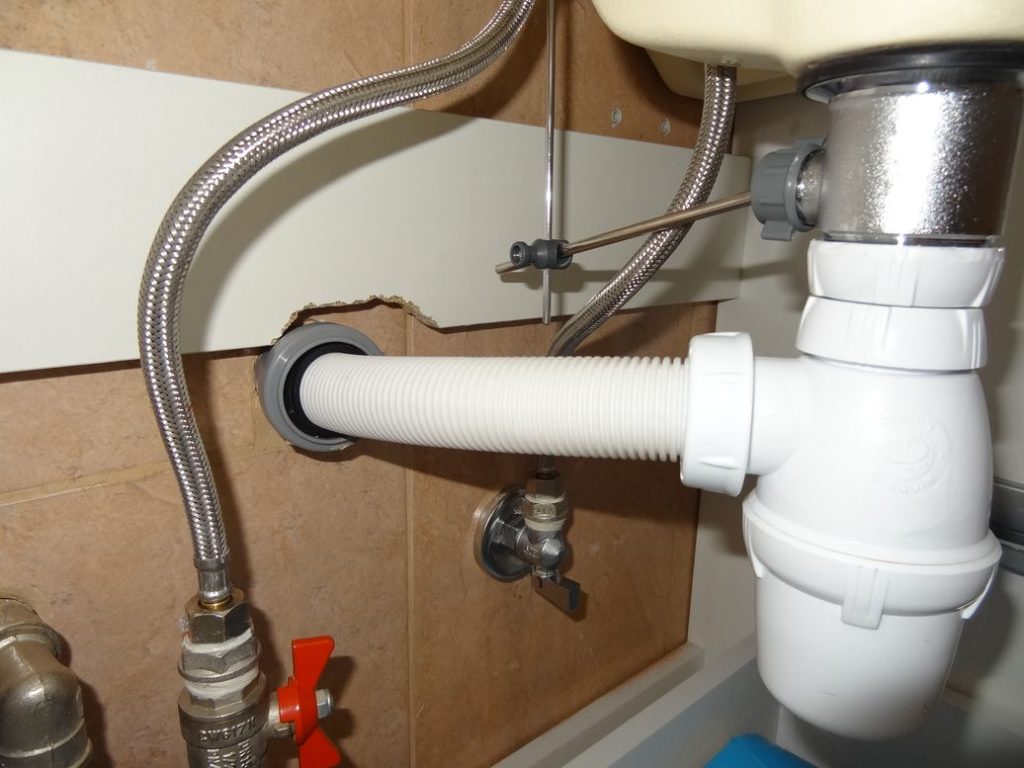
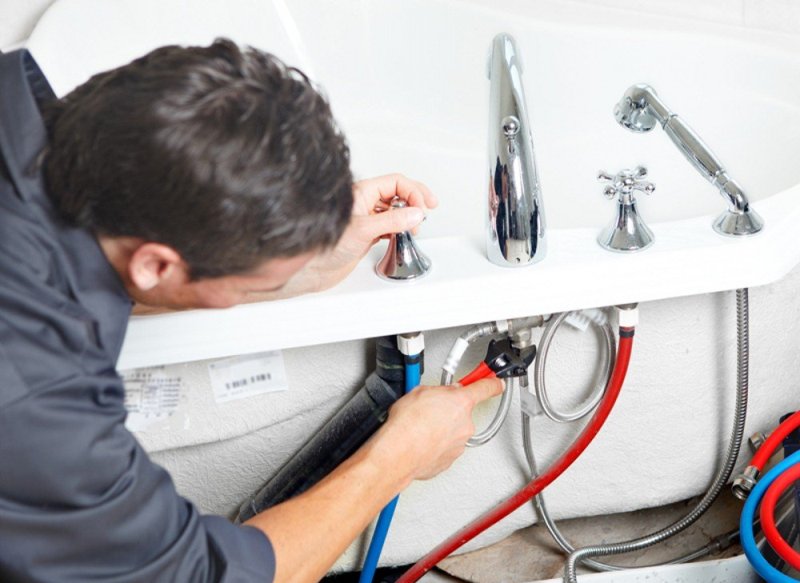
Connecting water hoses must be replaced with new ones. New cranes are supplied to the distribution network with hoses, but their length does not always correspond to the actual length at the installation site. Therefore, it is recommended to measure the length of old hoses and purchase the same ones. The standard length of the hoses from the kit with cranes is 30 cm.
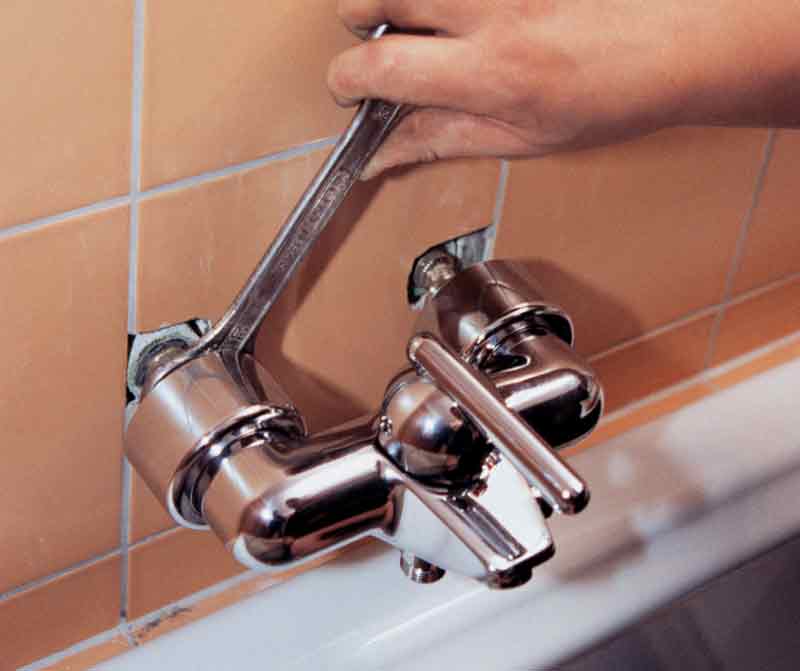
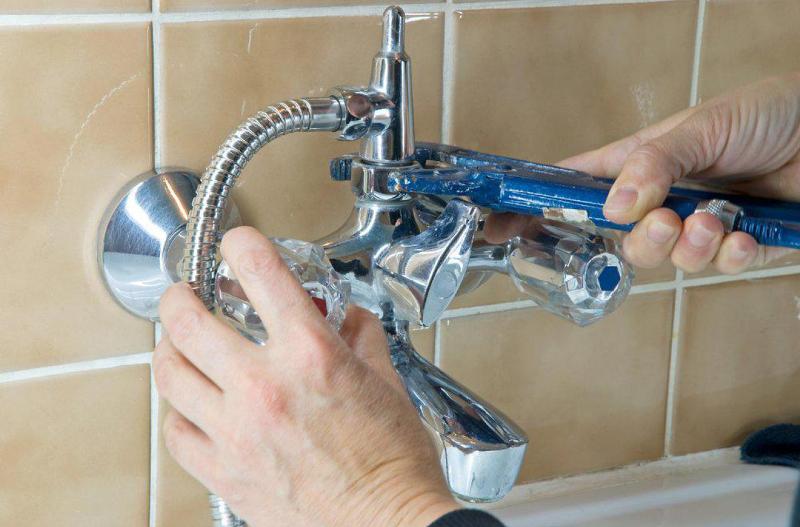
How to remove and disassemble?
Before installing a new faucet, it is necessary to dismantle the old plumbing fixture. The easiest way to remove the bath faucet is because it is removed completely by unscrewing the two cap nuts connecting it to the hot and cold water supply pipes. The only difficulty may arise in the case of pipelines made of polymers. When unscrewing the nuts, a lot of effort is required, so you need to hold the underwater pipes in order to avoid twisting and breaking them. You can hold the pipe with a gas or clamping key for metal fastening lugs sealed into them.
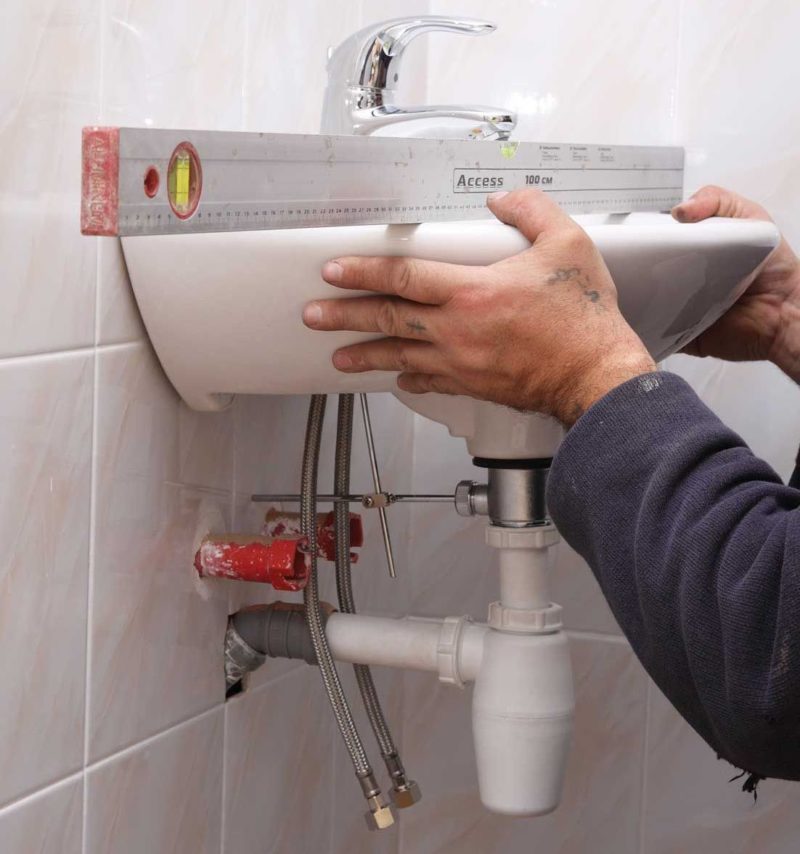
Sink mixers cannot be removed so quickly, work is often associated with difficulty in accessing the dismantling sites, and sometimes requires removal of the bowl.
Most modern sink taps will be properly removed in the following order.
- Water pipelines are disconnected by the primary shut-off valves at the inlet manifold of an apartment or house.
- Cranes are opened both at the work site and in other places to remove pressure from disconnected areas. Under the open dismountable faucet, if necessary, you can substitute a bucket to collect the remaining liquid in the supply of hot and cold water lines.
- Making sure that all the water from the pipes at the level of the taps is gone, you can start working on removing the sink mixer. To do this, you have to climb under the bowl, lay something in order not to smudge. It is better to disconnect sewer pipes and a siphon - it will be more convenient to be engaged in the crane. It is good to use a bucket or basin to collect any residual liquid in detachable sewer devices.
- Unplug flexible wiring from hot and cold water pipes. In the hoses and pipes on the lower level there is still water, it does not hurt to substitute the dishes for its collection. At this stage, you need an adjustable or open-ended wrench 22x24.
- Immediately use a suitable tool (knife, screwdriver) to clean the supply pipe unions from the remnants of the old sealant, if any.
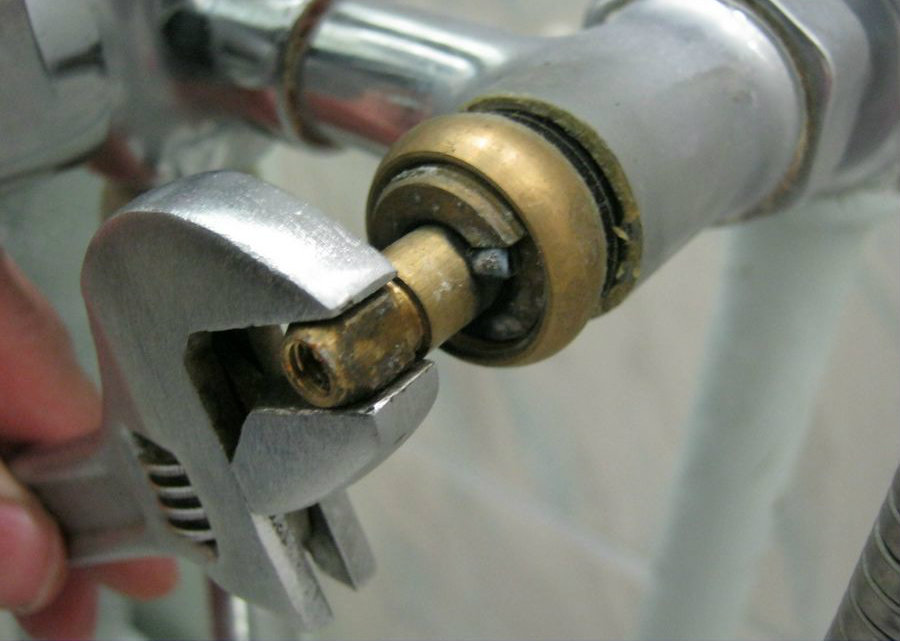
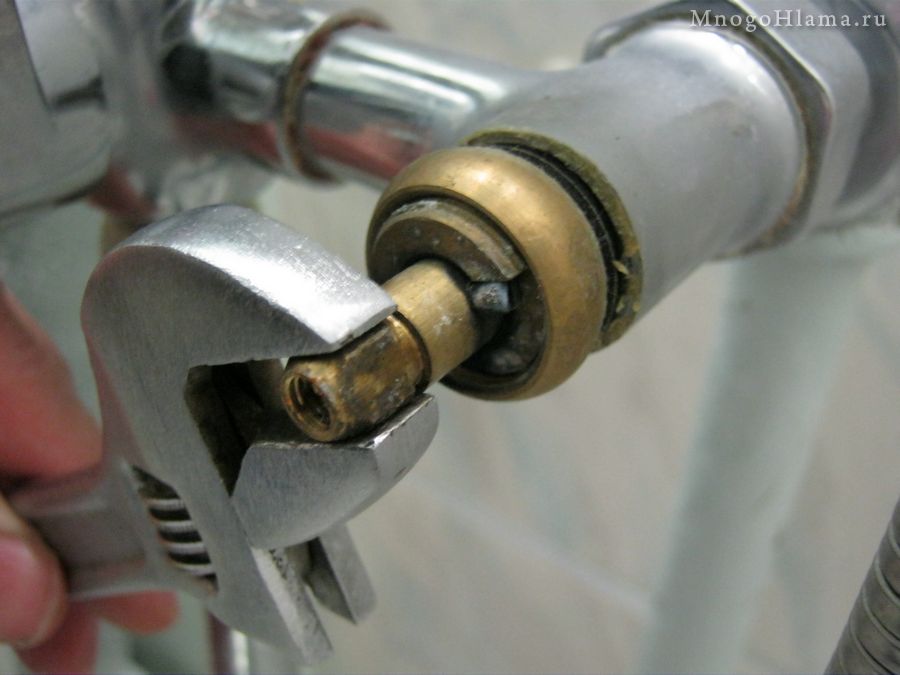
- The next operation is the most difficult, especially if the tap is installed a long time ago. The bottom fastener of the crane has two long steel pins with nuts screwed on them. From moisture, the nuts become tightly attached to the pins, and sometimes it is impossible to unscrew them. To facilitate the task, it is recommended to lubricate all the threads of the pins and their contact with the nuts with kerosene or a special solution sold in hardware stores, and give a little time for disintegration of the places of scum connections. After that, unscrew the nuts with a fully tubular wrench for 10 (and a spanner wrench will do).
- Now it's time to rise from the floor from under the sink. Having stretched the valve as far as possible, unscrew the flexible connections from the inlets in the lower part of the valve body. This can be done with pliers.
- Pull up the whole crane. Before unscrewing the hoses this cannot be done - the lower fastening plate interferes, through the openings of which the nuts of the flexible hoses that connect the hoses to the pipelines do not pass.
- To clean the installation place of the mixer on the sink from dirt not only from above, but also from below, under the sink.
It is recommended not to discard the removed valves, but to disassemble them for parts. No one knows when gaskets, fasteners, valves, and faucets may be required. Let even the old. Sometimes it may be necessary and the usual lamb, and at hand will not be.
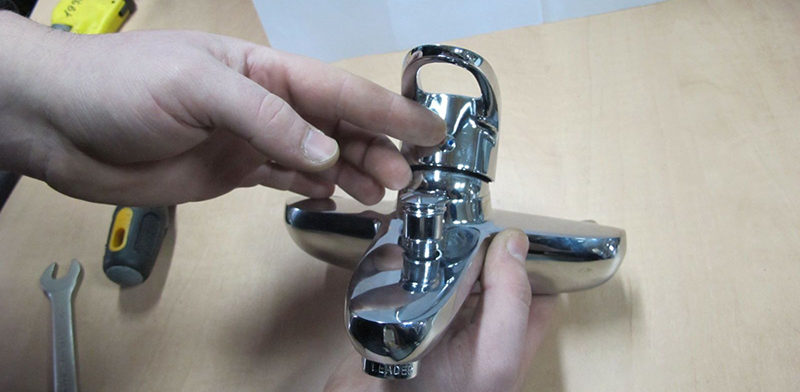
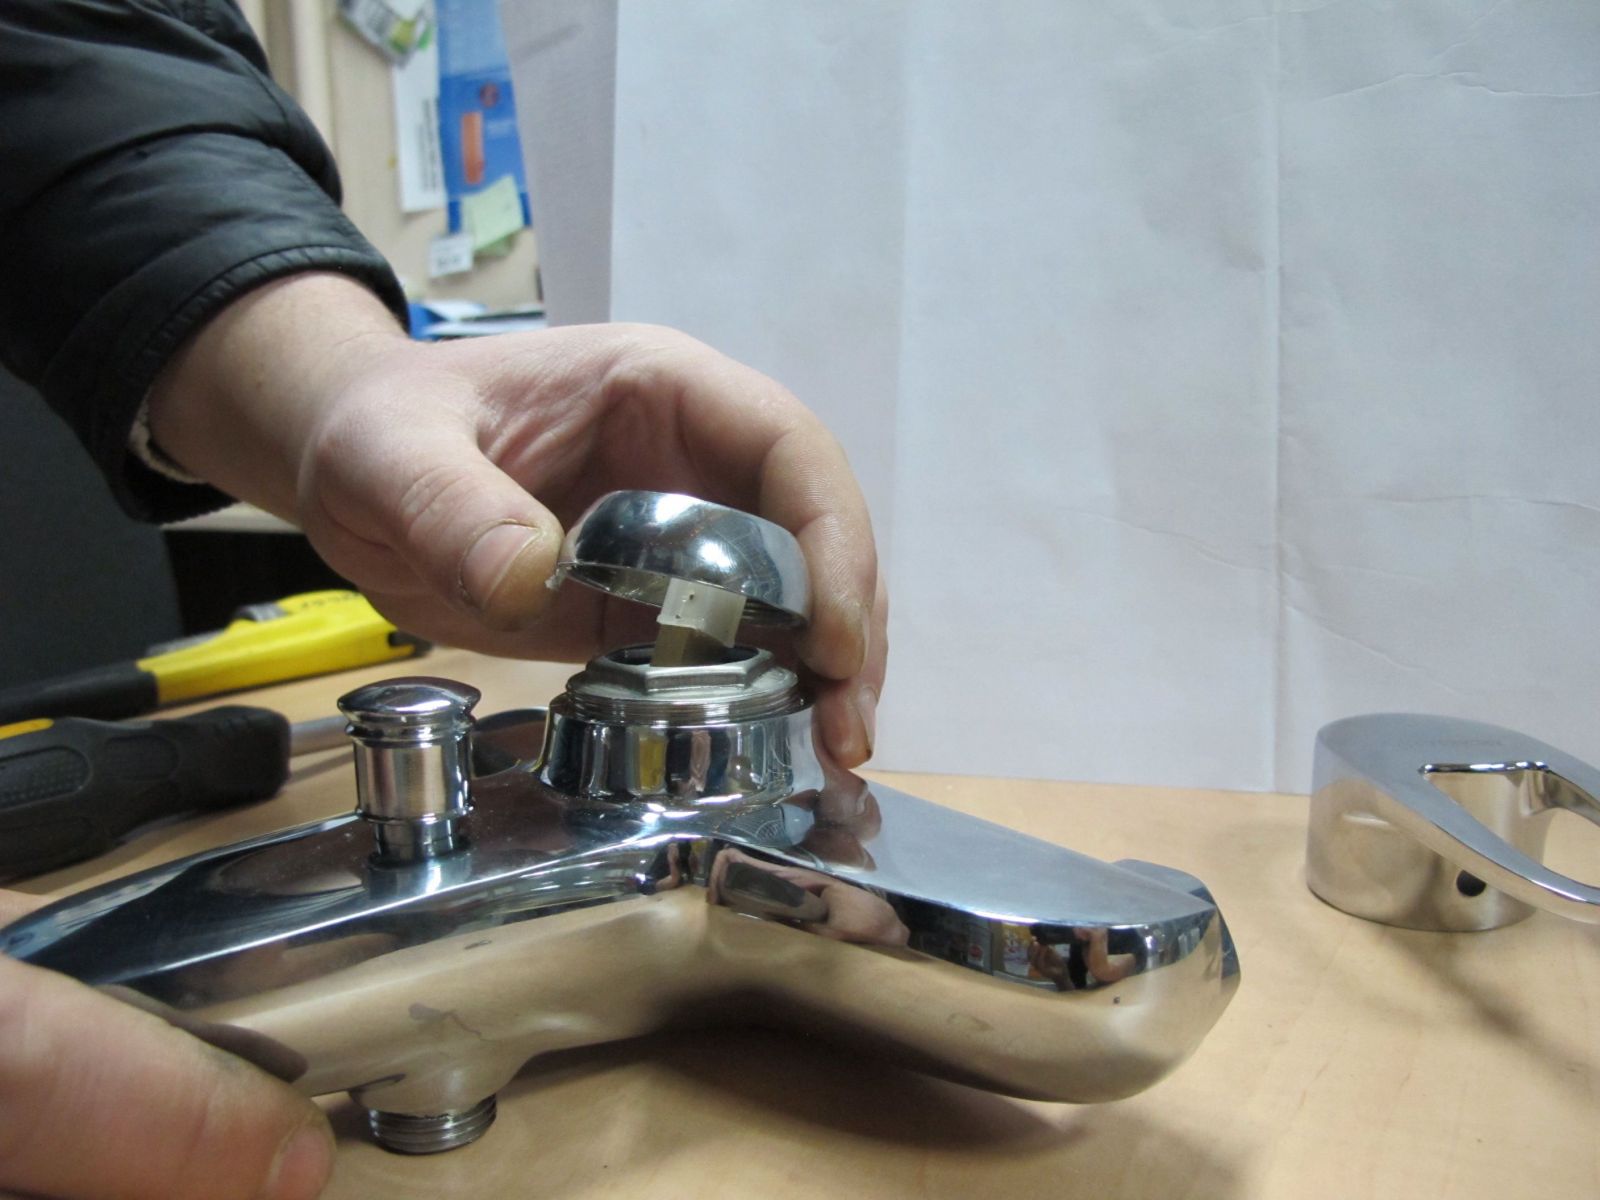
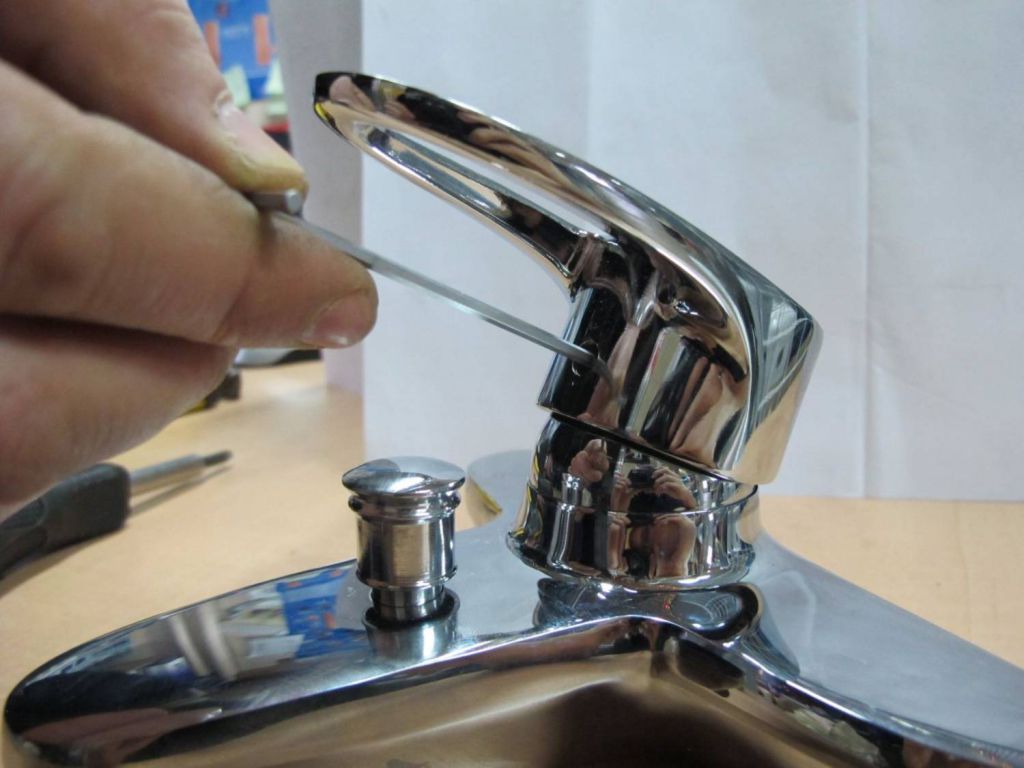
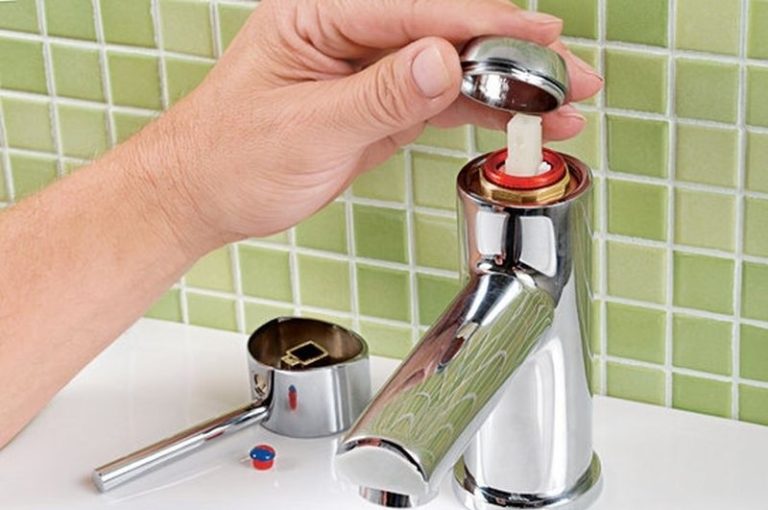
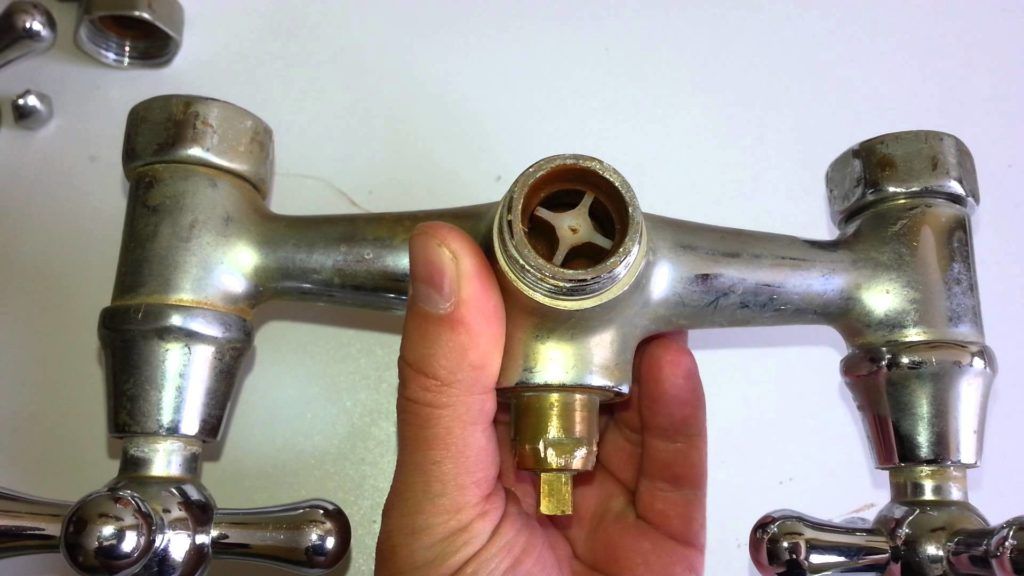
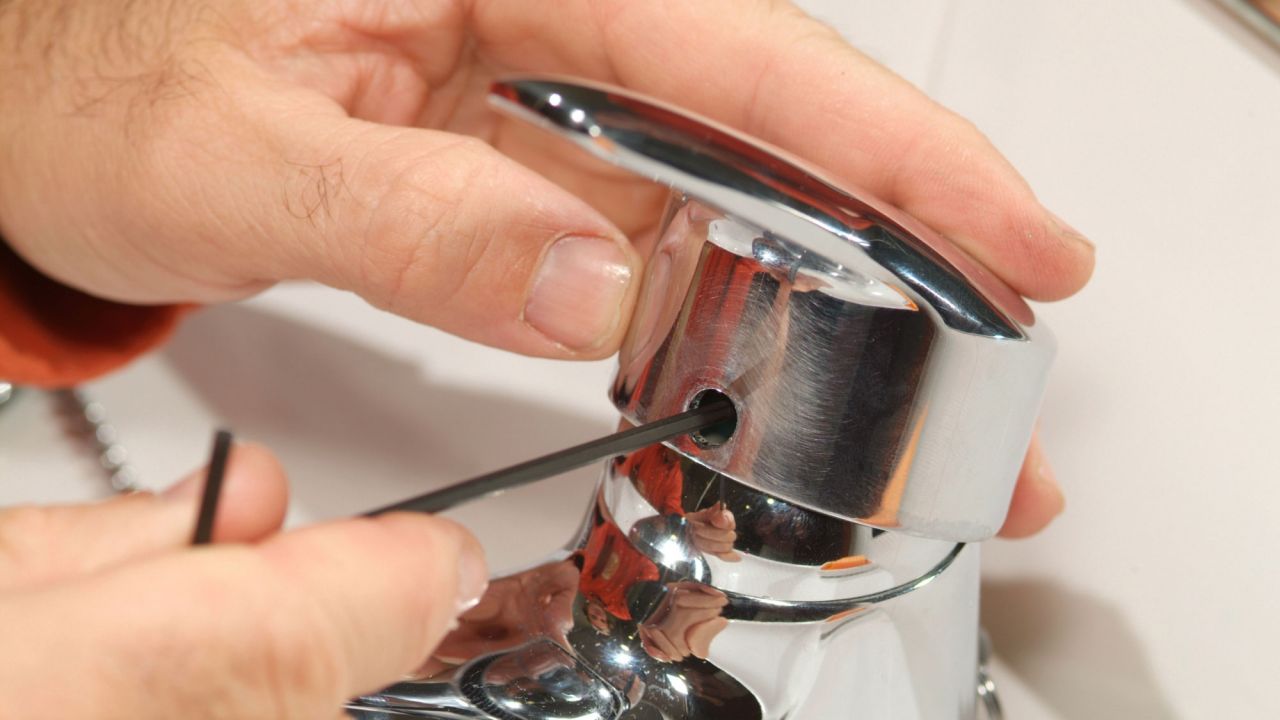
The handle (lever) of the crane or the flywheel is removed after unscrewing the screw with screwdrivers. The screws are under the decorative caps, which you just need to pry with a knife or flat screwdriver. After removing the flywheel or lever, unscrew the top cover of the valve mixer housing or remove the cartridge cartridge and discs in the ball valves. The rest of spare parts are easily removed from the body of valve taps: valve, gasket, crown (crane). All this can be very useful in the future.

How to change the tap?
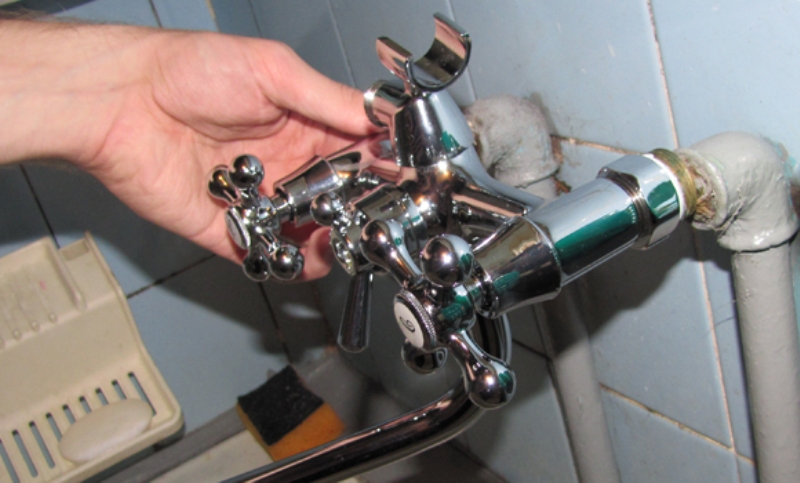
The new crane is installed in place in the reverse order of dismantling. Usually mixers are supplied assembled. Only in the “shower-out” system installed above the bathtub, the shower column hose is placed in a separate package. It is connected after the installation of the crane to the supply pipes - it is more convenient to work. But it is imperative to check the instruments for the valve stroke and tight tightness of all connecting parts.
Installation of faucets for the kitchen and the sink in the bathroom is done by hand, without the involvement of professionals. It is only necessary to strictly follow the following step by step instructions.
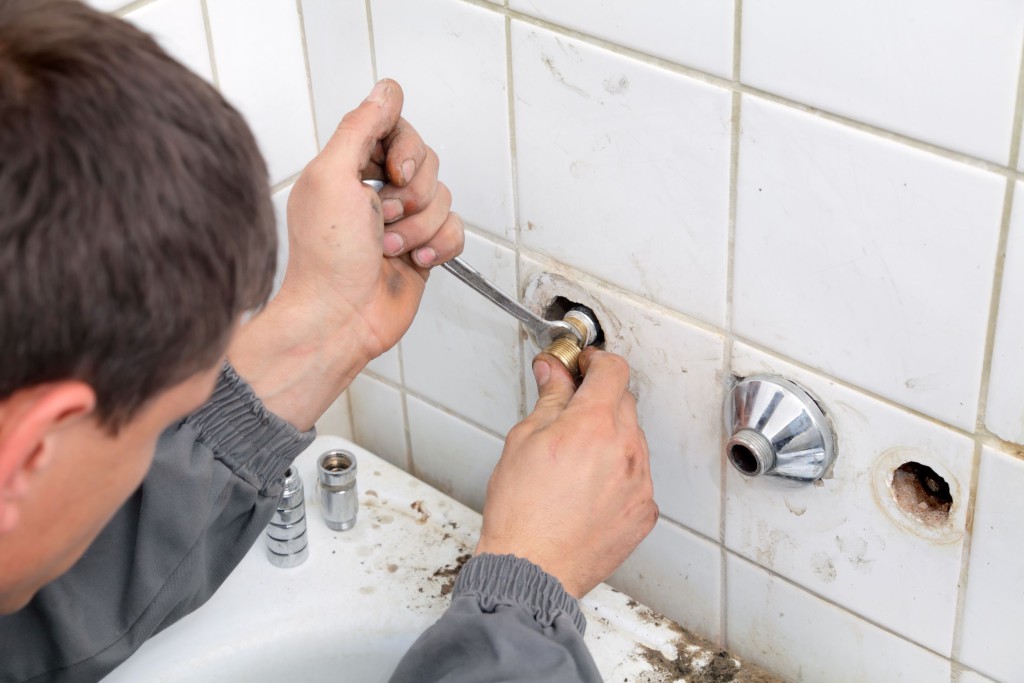
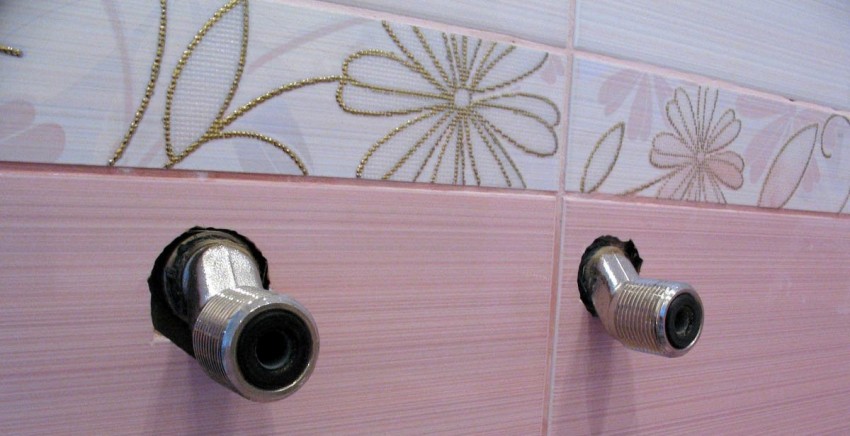
- Tie flexible liner to the body. They must first be successively passed through special holes in the rubber seal and the mounting plate with a narrow connecting end of the eyeliner (without nuts) forwards, and then push it from the bottom into the mounting opening of the shelf shelf. To do this, you have to climb under the sink.
- Securely screw the flexible wiring into the mixer housing.
- Install the gasket and mounting plate on the pins at the bottom of the hole (work under the sink) and tighten them with nuts.
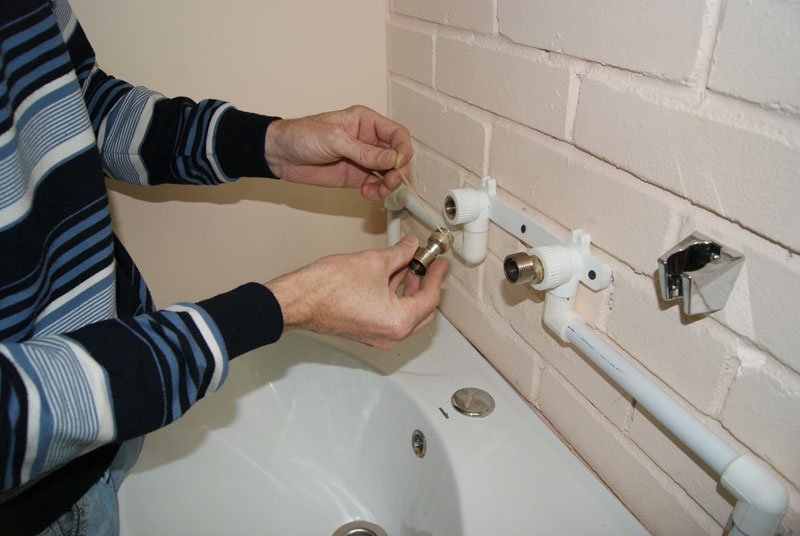
- Connect the free ends of the flexible connections to the hot and cold water pipelines, to rewind the sealing tape to the threads of the adapters for reliability. Ensure that gaskets are inserted in the flexible hose nuts. If not, then they should be included. For synthetic pipelines, it is not necessary to use excessive force to tighten the nuts.
- Properly place the faucet in the mounting hole of the sink, evenly distributing the top seal around the circumference, and tighten the fastening nuts under the sink.
- To pressurize the system with water supply to the mixer, having previously closed the control taps, which were opened before starting work.
- In the case of removing the bowl to gain access to the fixture of the mixer, it must be installed in place after tightening the fastening elements of the crane before connecting the flexible hoses to the pipelines. That is, step 3 of step-by-step instructions is replaced by paragraph 5, after which you need to hang the bowl on its mounting bolts.
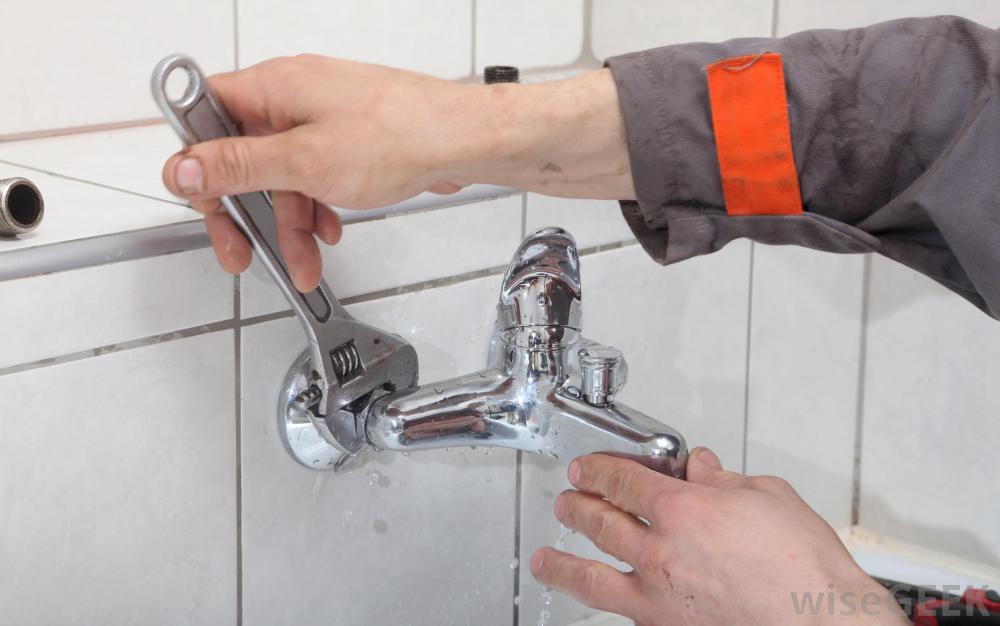
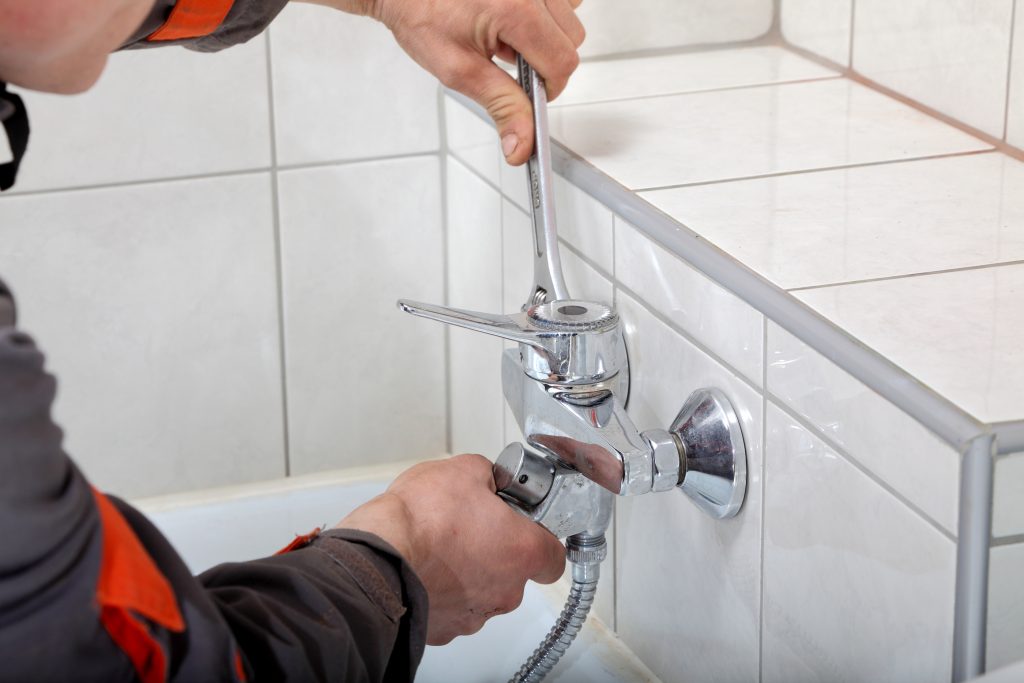
When installing the device above the bath, it is necessary to strengthen the reliability of its connection with the supply pipes with liquid sealant or thread winding with a fum tape. When installing the gander and the shower hose, you need to install the gasket joints, which should be included in the package. Also in the kit there are eccentrics to regulate the tolerance of the supply pipes and crane fittings.
When installing a new device, it is better to replace old eccentrics with new ones from the kit.
Tips
Beginners can give a few tips and practical recommendations that will be useful when replacing mixing valves of any design.
- To extend the time of perfect operation of water taps, filters should be installed at the water inlets (after the primary valves). Ordinary water filters for the price cheap, but effective.Filters will preserve the plumbing fittings from debris and sand, causing heavy damage to the ball and cartridge elements of modern types of mixers.
- During installation work, find ways to install check valves in the water line after filters and meters. These devices will not allow the flow of hot and cold water through the mixers due to the pressure difference in their lines and its excess.
- Periodically carry out the prevention of residential plumbing devices. Under the prevention of malfunctions means the following work: replacement of gaskets of valves and their connecting and sealing elements once a year, as well as simultaneously cleaning them from scale and clogs, replacing flexible hoses at least every two years. And at least once a month to carefully examine the plumbing system for leaks, especially in places of any connections.
- When mounting and dismounting any fittings on the water supply system, in order to preserve nickel-plated surfaces, it is necessary to wind the places of contact (loosening, clamping) of tools with insulating tape. Plumbing work should be done deliberately, without haste, having considered all operations, necessary materials and tools.
How to repair the mixer, see the following video.